Pages

Tuesday, August 16, 2011

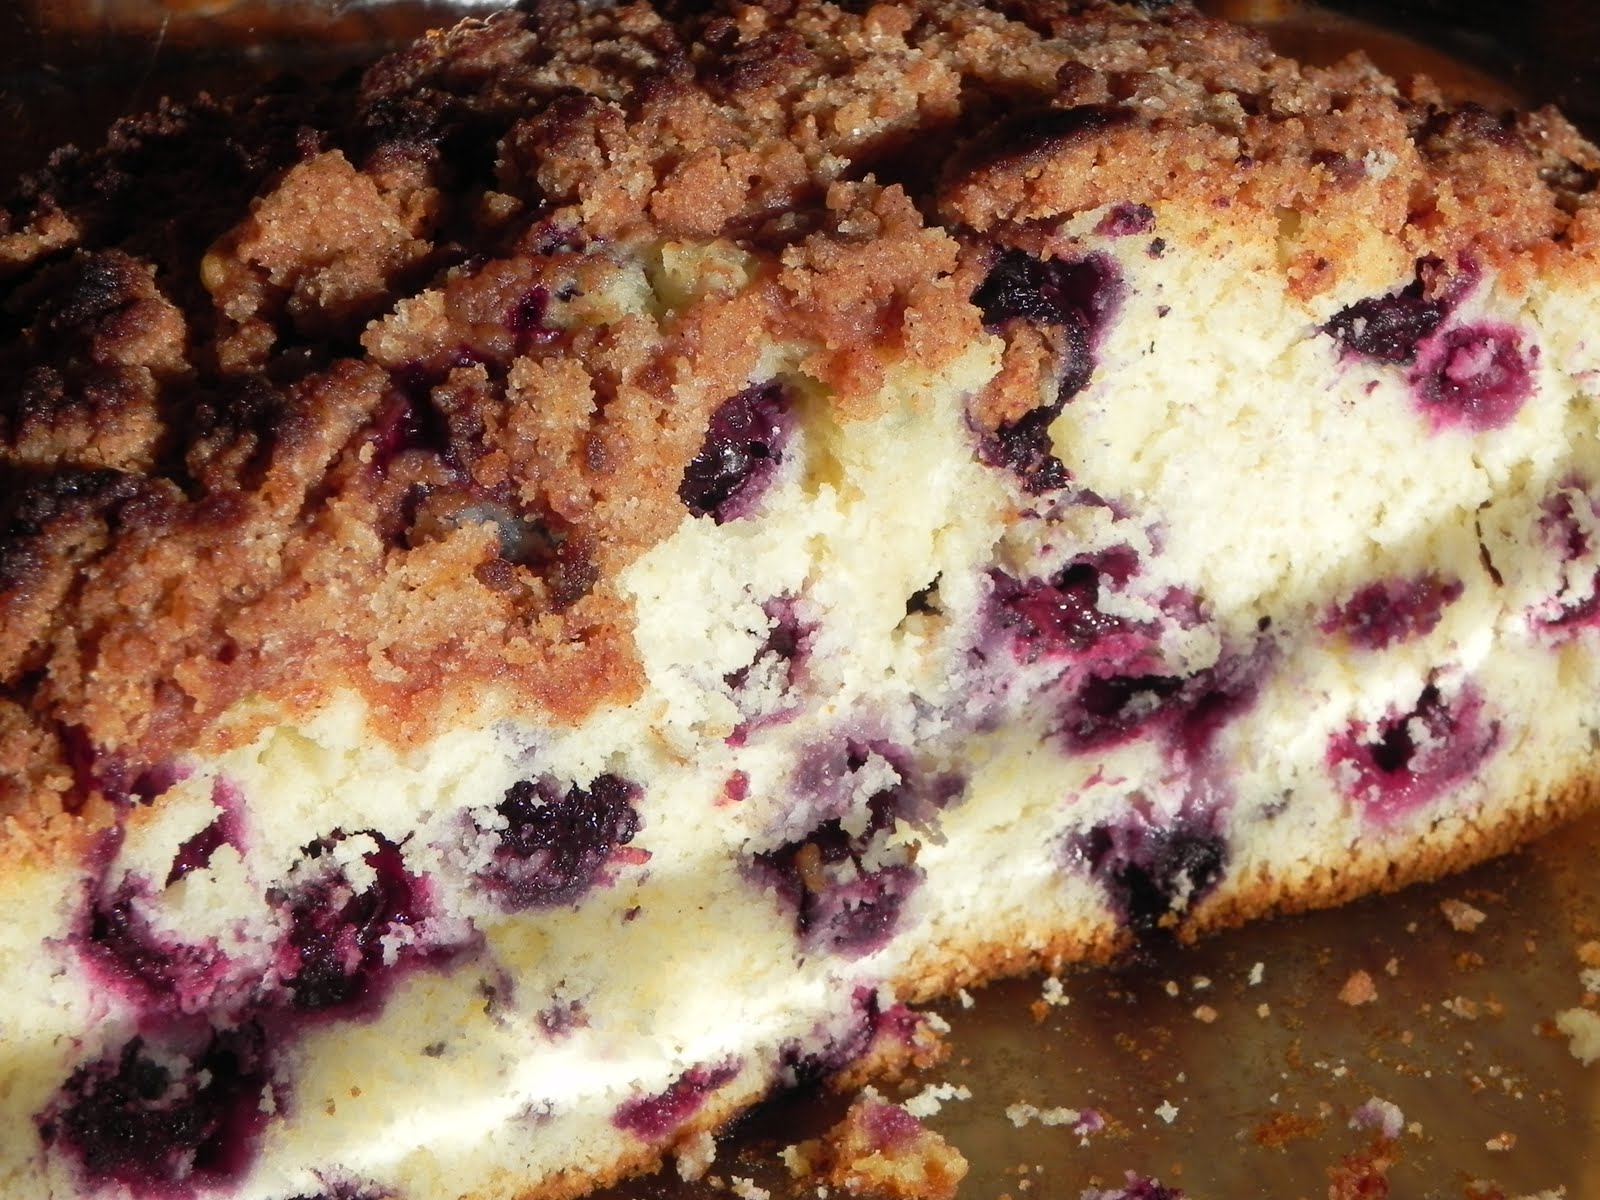
Maine Blueberry Crunch Cake

A few years ago, I was visiting family in Maine and had the opportunity to go to a church-sponsored lobster roll feast. Here are a few things you should know:

1) I love Maine. As much as I'm ready to give up (Midwestern) winters, you could probably offer me a job in Maine (coast Maine, just so we're clear, because that's the only part of the state I'm familiar with) and I'd take it in a heartbeat--even if that meant winter galore.

2) I love my family's house in Maine. My cousins own the place and it's a gorgeous old white home on the Sheepscot River. And I love their old sailboat. And kayaking with them. I wish I saw them more.

3) I love Maine blueberries and spent a lot of time harvesting them on the trip I'm writing about, along with tart cherries from their cherry tree. Maine blueberries, lowbush blueberries, are tiny little blue pearls that grow in blueberry barrens. A side note: My friend John is from a town in Michigan which hosts a blueberry festival (they grow a ton of blueberries there) and whenever I hear this mentioned, I am skeptical that his blueberries are as good as the ones I picked in Maine.

4) I do not love lobster.

But enough of listing (5 - I really like lists). So, this church-sponsored lobster-roll feast was down the street from my cousins and I went to it on my way out of town on my last day. For some small fee ($5 comes to mind, but this was in 2008 so I might be wrong) I could get a lobster roll or (_______ something else, but don't remember what -- something also "Maine-ish"), a drink and chips, and a large chunk of blueberry cake. Blueberry cake seems to be served with most meals in Maine -- certainly this is pretty typical of what the lobster shacks offer with their combo meals.

After I ate, I asked about the cookbook they had for sale. Were the things I'd just eaten found in the cookbook? The people selling the cookbook--and other miscellaneous items, typical of what you'd find at any church basement sale, assured me this was the case. I bought the cookbook.

6) I also love church cookbooks that are highly regional. There are a couple of great recipes and a bunch of horrible ones that make me laugh.

I tried several of the blueberry cake/bread recipes to no avail and gave up on it when none of those recipes worked. The cookbook moved to the Midwest with me and I didn't touch it for three years. But the other night, my mozzarella-buddy and I decided to try and make one of these recipes again. Two weekends ago, she went blueberry picking at a local berry patch and wound up with gallons of (now frozen) blueberries.

Although I'm making a point of avoiding gluten, I did try a small bite of this to see if it was the recipe and I believe it is. This is the original recipe (with a few corrections, since, for instance, the version in the cookbook doesn't tell you when to add the egg) and in a couple of weeks I hope to post a gluten-free version. The recipe comes from the 175th Anniversary of the Southport Methodist Church cookbook, and was contributed by Joyce Duncan. The batter is ridiculously thick. Don't worry about it. It all works out in the end.

Maine Blueberry Crunch Cake
1 1/4 cup sugar
2 1/3 cup all-purpose flour
1/4 cup butter
1 teaspoon cinnamon
1/4 cup shortening
1 egg
1 teaspoon baking powder
1/2 teaspoon salt
1/2 cup milk
2 cups blueberries

For the topping: mix together 1/2 cup sugar, 1/3 cup flour, butter, and cinnamon. Set aside.

Sift together remaining flour, baking powder, and salt. Mix remaining shortening until light. Add the egg and beat until incorporated. With mixer on low (or by hand, if you're me), add flour mixture alternately with milk until just blended. Stir in blueberries. Pour into greased 7 x 11 pan. Sprinkle on topping and bake at 375 degrees for 35 minutes. Allow to cool 10 minutes before serving.
Despite the thick batter, look at that crumb!

Saturday, August 13, 2011

Basil Lemonade


A couple of weekends ago, I was walking around the Main Street Farmer's Market in my town and the co-op was selling basil lemonade. Oh, goodness this sounded refreshing--at 7 a.m., it was already in the mid-80s, and by the time I was walking around the market, it was past 7 a.m. The heat index for the day reached nearly 120. I live in a part of the country where not everyone has air-conditioning because this type of thing doesn't happen. Oh global warming, you make the summers icky.

I walked up to the co-op tent (where I knew all the workers), ready to buy lemonade, only to be informed they'd already sold out. It wasn't even 11 yet and the market runs until 1 p.m. Sadness! Because I knew these workers, I made sure they were holding up okay in the heat and went on my way.

Basil lemonade isn't hard to make. I've made it before -- I just wanted the convenience of being able to buy a $2 glass while I wandered around the market making other purchases (namely salad greens. I'd come into a bountiful supply of produce from a CSA share, given to me by a friend who was going to be out of town).

There are two basic methods for making basil lemonade. If you live in a place where you can get a good supply of fresh lemons, I highly recommend you make lemonade from scratch, so you can have it as sweet or tart as you like (and let's face it, fresh lemonade is amazing). I don't live in such a place, so here's what I did.

Basil Lemonade
1 quart low-sugar lemonade
1/3 cup (or to taste) real lemon juice (mine came from a bottle, for convenience and cost-efficiency)
1/2 cup (or to taste) freshly chopped basil

Mix all of these ingredients together in a container large enough to hold everything and allow the flavors to combine for at least 45 minutes before serving. Serve very cold. Will keep for several days.
Cool and Refreshing. Especially served in a mason jar!

Friday, August 12, 2011

An Experiment in Mozzarella

A friend and I decided to try our hand at making mozzarella this weekend. Cheese-making has been on my must-learn list for a while, so I was thrilled to learn a friend had the same desire. We looked up a recipe in a cheese-making book, which called for a special mozzarella starter. Our reaction, ha. One, we weren't sure where we would find this if we did want to use it (to the best of my knowledge, our food co-op doesn't carry such things though it does carry rennet*--which I already owned--another necessary ingredient). Two, we didn't need enough starter for 13 gallons of milk (which is apparently what most starters provided). And three, we imagine ourselves better at making-do than that.

We knew recipes existed that didn't call for starter. We remembered reading them. Specifically, we both remembered reading about such a recipe in Barbara Kingsolver's Animal, Vegetable, Miracle, which was taken from Ricki Carroll's book Home Cheese Making and which I've copied below. We looked up the recipe for 30-minute mozzarella and that was the recipe we tried. The recipe didn't specify what type of millk to use (i.e. - whole or skim or other), so we used 2%. According to the New England Cheese Making website, it doesn't really matter after all.

This recipe also calls for citric acid. We were skeptical. My friend asked if we could use lemon juice instead. Maybe? Probably not? We weren't sure and before experimenting too much (or, looking it up on the internet), we decided the easiest thing to do would be buying the amount of citric acid we needed from the bulk section of our co-op. It cost less than $1 for a lot more than this recipe calls for--but when I went to buy it, I bought extra on the chance/hope that it would go well and we'd make this again before I moved.

A friend of mine--and I use the term loosely, since I haven't talked to her in three years--makes goat cheese mozzarella with milk she gets from her small flock of Nubians (floppy eared goats, very popular as dairy goats). When she first told me about this, I was both impressed and skeptical. She said it used a lot of water and that the first few attempts had turned out poorly. I wondered what goat's milk mozzarella would taste like.  If you're interested, here is a link for a goat's milk mozzarella recipe--using a starter--from Mother Earth News. For this post, I tried to find out more about the farm my friend runs, Contrarian Farm, near Pittsboro, North Carolina--but could only find a few useful fact-lets about it on the interwebs. If you live near there though, I know they used to show up at the Pittsboro farmers market and I'm guessing they still do--there are enough recent entries on the internet about the farm and its owners. My friend also used to raise meat bunnies.

*Rennet, traditionally, comes from the stomach-lining of young calves, as a by-product of veal production. The rennet we used was a vegetarian rennet. There are a few varieties of vegetarian rennet. Vegetable-based rennet comes from plants with coagulating properties, such as thistles, nettles, and mallow. They can also be grown from microbes, such as Rhizomucor miehei. The type we used ("double strength" where 1/8 teaspoon will coagulate 2 gallons of milk) comes from this type of microbe.
Our Super-Strong Rennet

Mozzarella
1 gallon pasteurized milk (NOT ultra-pasteurized)

1 1/2 level tsp. citric acid dissolved in ¼ cup cool water 

Stir the milk on the stove in a stainless steel kettle, heating very gently.  At 55° add the citric acid solution and mix thoroughly. At 88° it should begin to curdle. 

¼ tsp. liquid rennet diluted in ¼ cup cool water

Gently stir in diluted rennet with up-and-down motion, and continue heating the milk to just over 100°, then turn off heat. Curds should be pulling away from sides of pot, ready to scoop out. The whey should be clear.  (If it’s still milky, wait a few minutes.) Use a slotted spoon to move curds from pot to a 2-quart microwaveable bowl. Press curds gently with hands to remove as much whey as possible.  
Just starting to form curds
Use the pot of hot whey on the stove for the heating-and-kneading steps. Knead the cheese with hands (rubber gloves would be good, according to Ricki Carroll) or a spoon to remove more whey. Put the ball of curd back in with a big slotted spoon, and heat it until it’s almost too hot to touch.  Good stretching temperature is 175 degrees. Repeat 2 times, kneading between each time.
It shouldn't look like this once you've pressed it out (attempt 1)
At this point, salt the cheese to taste, then knead and pull until it’s smooth and elastic. When you can stretch it into ropes like taffy you are done. If the curds break instead, they need to be reheated a bit. Once cheese is smooth and shiny, roll it into small balls to eat warm or store for later in the refrigerator.


***
The first time we made this, we overworked the cheese. The second time, we worked it less, got it hotter, and it made the process much easier. The cheese looked and pulled like taffy and we can't wait to make it again. Tomorrow.
We have smooth, shiny mozzarella balls (attempt 2)