Pages

Showing posts with label party food. Show all posts

Monday, December 31, 2012

Monster Cookes

How many times have I made Monster Cookies over the past 4 years (since I first learned about them)? More than I'd like to admit. There was a period where I was making them for every bring-something potluck or dinner I went to, and also a period of time where I was making them about once a week for a on-going bake sale fundraiser to support a literary journal (along with cake pops), where I was a member of the staff.

The thing I like about Monster Cookies are that they basically work with what you probably already have in your kitchen -- peanut butter, sugar, oats, butter (or in my case, vegan butter or coconut oil or even just canola oil), eggs (ehm, fake eggs), and chocolate, nuts/seeds, and dried fruit. Or, whatever else you want to throw in them.

I haven't made them since switching to a vegan diet, though I have made vegan monster cookies before. And I haven't tried to consciously make them just a little better for you, while still definitely tasting like an indulgence. To be sure, these are cookies, and they are an indulgence, just so we're all clear. But some indulgences are worse than others, right??

What makes these monster cookies better for you? Well... that's a somewhat subjective question, but these cookies are:
  • Gluten-free
  • Vegan
  • Low in refined sugar (they use agave nectar and the pictured cookies also use Enjoy Life (vegan, gf, soy free) semi-sweet chocolate chunks
  • High protein (especially if you add seeds/nuts!)
They're also moderately low fat (only a small amount of oil is needed to help these cookies become chewy and crispy and soft, the perfect combo in my mind) since most of the fat comes from peanut butter. They include whole grains, and they can use dried fruits or nuts of whatever sort makes you happiest.

Monster Cookies (vegan, gluten-free)
1 cup creamy peanut butter
1/2 cup agave nectar
1 tablespoon coconut oil, melted
2 flaxseed eggs (2 tablespoons ground flaxseed combined with 6 tablespoons water)
1/4 cup unsweetened apple sauce
2 1/2 cups gluten-free oats (quick oats works best, but I never have them on hand, so pictured you'll see old-fashioned oats)
1 teaspoon baking soda
1/4 teaspoon salt
1.5 cups of any combination of the following (or whatever your heart desires): VGF chocolate chunks/chips, sunflower seeds, pumpkin seeds, dried cranberries, raisins, chopped peanuts, VGF candy-coated chocolate (i.e. - sunspire drops), coconut flakes, slivered almonds, banana chips, etc.

Preheat oven to 350 degrees. In a medium-sized mixing bowl, combine the peanut butter, agave nectar, coconut oil, flax eggs, and apple sauce, and stir until well mixed. Add the oaths, baking soda, salt, and fruit/nut/chocolate combo. Stir well.

Allow the dough to rest for 20-30 minutes (especially important if you're using old-fashioned oats, because this allows them to become a little softer). Scoop the dough, by 1/4 cupfuls onto a baking sheet that has been lightly greased, or lined with parchment. Cook 12-15 minutes and allow to cool another 3-5 minutes on the cookie sheet, before trying to remove them.

Serve, or allow to cool completely and store in an airtight container for 3-5 days.


NOTE: You can also make smaller cookies (say 2 tablespoons, 1/8 cup). If you opt for this, keep an eye on them while they cook and reduce cooking time to 10-12 minutes. They should be golden brown around the edges when they are ready.

Saturday, December 22, 2012

Cocoa Roasted Almonds

 Flavored nuts seem incredibly popular right now. Where I last worked, we often had a spicy chili-lime almond available, as well as toffee and mocha almonds. These made a nice snack, and, frankly can be pretty addictive (at least if you're me) -- but also a bit spendy, which is a problem on a small budget.

Fortunately, they can also still be (not too bad?) good for you because nuts are packed with protein and minerals. Almonds, in particular, work well because they're already naturally a little sweet and they don't seem to scorch as easily as some other nuts (walnuts, I'm looking at you!).

I had the chance to try straight cocoa roasted almonds after a martial arts seminar -- they're a great energy boost, and the small amount of quick sugar is nice after an intense workout. But, as Chelsey (whose post inspired the particulars of my version) points out, most of the commercial brands contains modified food starch of one type or another. I share her sentiment why?? modified food starch? Why?

I still use a highly processed flour here (sweet white rice flour), but I'm going to hold that that's still better than a modified version of a starch that's already starchy. It's not the by-product of a by-product. I opted for sweet white rice flour because it's already naturally a little sweet and very glutinous, which will help the cocoa powder bind with the agave.

That's right, this uses agave. It's vegan friendly, gluten-free, and has a lower glycemic count than the same snack made with many other sweeteners. If you have the option, buy your almonds in the bulk section of your local grocer -- it's probably cheaper than buying a bag of them and depending on your particular grocery store (and the time of year) the bulk almonds are likely a little fresher.

Cocoa Roasted Almonds
1 1/2 cups raw almonds
1 1/2 tablespoons agave nectar
1/4 cup cocoa powder
1 tablespoon sweet white rice flour (really, any flour would work)

Preheat oven to 275 degrees. In a small bowl coat the almonds with the agave nectar, stirring until the almonds are evenly coated. Set aside while you combine the cocoa powder and white rice flour in a separate small bowl. Add the almonds to the cocoa powder mixture and stir until the almonds are evenly coated. Spread the coated almonds onto a cookie sheet lined with parchment or a silpat. Roast for 25 minutes, stirring every 5-10 minutes so the chocolate doesn't scorch. Allow to cool completely before storing in an airtight container.


Tuesday, June 5, 2012

Review: Way Better Simply Sunny Multigrain Chips

Oh, how I love my local grocer. For no particular reason, every so often, they drastically reduce prices on certain items. Sometimes, I think it's just overstock. Other times, it appears to be a product they're trying to clear. Sometimes it seems that it's on super-sale because they're introducing it. That's how I tried the Way Better Simply Sunny Multigrain Tortilla Chips.

The company claims it sprouts the grains and seeds that compose its products, which allows our bodies to better absorb nutrients. While that's nice, I'm really interested in the fact that these chips have broccoli and radish sprouts in them -- and they still taste really good. The ingredients in these chips are:

Stone Ground Corn, High Oleic Sunflower Oil and/or Safflower Oil, Organic Sprouted Flax Seeds, Organic Sprouted Quinoa, Organic Sprouted Brown Rice Flour, Organic Sprouted Daikon Radish Seeds, Organic Sprouted Chia Seeds, Sprouted Broccoli Seeds, Pure Sea Salt
I can't help but notice the definite lack of "organic" in front of the first two ingredients, however, and I find that problematic, especially given the push to label GMO foods. Guess what can be GMO. Nonorganic corn. Yep.

But, that aside, the rest of the review:

These gluten-free chips have a tasty (though definitely multi-grain) flavor, in that's complex and there's not too much -- or too little -- salt. They're pretty sturdy, and conveniently square (nice for putting hummus or something on, especially if you're gluten-free).  I'd love to say that because they're multigrain I feel more wholesome or something, but let's face it, I'm eating chips. The second ingredient is oil. True, there's more complexity, and the website claims that a serving of these chips contains 420 mg of omega-3s. Great, I guess, but it's still a chip.

I can pronounce everything on the label, always a plus, and I've seen all the ingredients in their whole form--and you can still see some of them in a whole (germinated) form in the chips. I appreciate that. I also like the simple, uncluttered design of the bag and the way that it doesn't really look like a bag of chips, or at least it doesn't look like the bags of chips I buy with half-guilt. The bag isn't shiny and doesn't use bold colors. There's a pretty sunflower, so that I can feel more connected to nature as I eat my processed food. In other words, the package screams wholesomeness, which is good since a serving of these chips contains 11% of my daily fat intake.

But, they're good enough that I bought a second bag. It helps that my grocery store has them on sale for $0.48 a bag. That's beyond practically giving them away, especially as we move into summer, and especially on my very small budget. These products are also gluten-free and kosher, if you're wondering (but you can find out those details on the way better website).

Sunday, January 22, 2012

Product Review: Salpica Mango Peach Salsa

I bought Salpica Mango Peach Salsa from my food co-op a couple of months ago with an immediate use for it -- only I wound up not needing it because what type of party needs three different (but similar salsa), especially when two are fresh? Not mine.

Anyway, I opened this salsa the other day, only to realize how runny it is. It's a bit like chunky, flavored tomato juice--which makes sense because filtered water is the second ingredient. The flavor is good (a little sweet, like it should be with fruit -- but did it also need sugar? Really? I don't think so) if you like slightly sweeter salsas, but that's not really my preference. I prefer the salsas that incorporate fruit without incorporating additional sugars. It's not particularly strong on onion or garlic flavors, for a salsa, or of the tangy bite of hot peppers, even though it's in the "Medium" hotness range. These are all things you should keep in mind if you're buying this salsa and have particular ideas about how bottled salsa should be.

However, I do appreciate that I can see evidence of roasting. And peaches and mangoes. And the occasional chunk of something like a pepper, tomato, or onion. But really, when I'm looking for salsa, I'm looking for something with more substance than this particular salsa, which I had trouble keeping on a chip--much less on veggies (which, is sometimes my preference -- like today, when I didn't really want corn chips).

The label claims "made in Texas" but my bottle, at least, is distributed from Illinois, which isn't so much of a surprise since this is where Rick Bayless (as an institution) is based and Salpica salsa comes through the Frontera supply chain. Either this is a horrible inefficiency or a marketing scheme. Anyone remember the "Made in New York City?? Get a Rope" commercial? There are a few versions out there, but when I was reading the label (more carefully at home so I could write this review than I did in the store) that's the commercial I immediately conjured.

It claims "no preservatives" and "all-natural," which are both technically true if you're talking about artificial preservatives, but most salsas contain preservatives -- citric acid in some form, usually -- especially ones that have been bottled. I'll take my citric acid and spare myself the case of botulism, thanks.


All in all, I might buy this salsa again. If it was on sale. And if the other salsas nearby didn't appeal, or if I was buying it with a specific salsa need -- I just can't think of what such a need might be.

Friday, January 20, 2012

Oven Roasted Chickpeas

It seems like a lot of bloggers recently (the past year or two, anyway, if that really counts as recent) have written about oven-roasted chickpeas. They're a good, high protein snack, moderately cheap to make (especially if you're not buying a can of them--or if you get said can on sale), and you can flavor them a lot of different ways for different tastes. They store well for hikes or trips to the zoo, they're easy to eat with fingers (making them good for kids, or for road-trips), and they're (depending on what you put on them) mostly or very "whole" as in non-processed.

The first time I read about these was about two years ago. The first time I tried them: about 18 months ago. The first time I tried freshly made ones, with Annie, last spring. I thought she'd blogged about it -- but then I couldn't find it on her site.

The recipe below is for a savory (and very garlicky -- now there's a surprise) roasted chickpea. I started with dried chickpeas that I soaked for about 24 hours before cooking in lightly salted water. They cooked up very quickly though, about an hour and then roasted for about 40 minutes at 375 degrees--the same temperature I needed for baking brown rice. Convenient!

The chickpeas came out crispy on the outside, some a little soft on the inside, and because I live in a fairly dry environment, they didn't go soft again too quickly -- a complaint I saw others making on other blog posts.

Garlicky Oven-Roasted Chickpeas
12 ounces cooked chickpeas
1 tablespoon (or a little less) olive oil
1/4-1/2 teaspoon garlic powder (to taste)
1/4-1/2 teaspoon onion powder (to taste)
Pinch salt

Preheat oven to 375 degrees. Mix all ingredients together in a bowl and then spread on a foil- or parchment-lined cookie sheet. Bake  about 40 minutes, stirring 2-3 times during the cooking process to avoid scorching.


Tuesday, December 13, 2011

Tuxedoed Oreos (repost)

I originally published this recipe -- by no means original -- a year or so ago, but since it's so appropriate for the holidays, I wanted to post it again. I just made these during a cookie-making party E and I held, and here are pictures of the little beauties.

They're best if they've had a day to marinate -- the filling becomes creamier, more like a bon-bon. You can keep them in the refrigerator, or leave them on the counter (but only for a couple days). I recommend keeping them in the refrigerator, if possible. I'll be making more for a holiday party soon.
From the first snow of the season

It's not absolutely necessary that you use oreos -- a chocolate-vanilla wafer cookie generally (and generically) works well, as long as you like the flavor of the initial cookie. Oreos, however, are vegan, and you can use vegan cream cheese if you want to make these vegan (though if you choose this measure, make sure you choose a vegan white chocolate -- they do exist, but some types contain milk products). These are definitely not gluten-free.


They are easy though, and pretty much no-bake (okay, they are no bake, but a microwave or stove top is useful for melting the white chocolate), which makes these an activity kids can help with easily!


Oreo Bon-Bons

1 pound reduced-fat oreos
1 8-ounce block neufschatel (reduced fat cream cheese)
Powdered sugar for coating OR
White Bark coating (about 1/2 pound) (recommended)

Smash the oreos so no huge chunks remain. This can be done with a gallon bag and a rolling pin--just be sure to get all the air out of the bag before you start hammering it. Or, you can toss them in your food processor and pulse it to break up the cookies. In a large bowl, using a fork, mix together the cream cheese and oreos until the color is even and it starts to come together to form a ball.

Roll small, equally sized balls of the cookie-cream cheese mixture. These can be any size you want, but it's easier to coat these if they're evenly sized--especially if you're using the white bark coating. Chill the small balls for an hour or two (stick 'em in the freezer), until firm.

Spread the powdered sugar in a shallow dish, if using, or melt the white bark coating (follow instructions on the package, but generally you can do this in a double-boiler or by microwaving it on HIGH for 1 minute and then stirring. Microwave on HIGH for additional 15-second intervals until it is completely melted).

Dip or roll the balls through the powdered sugar or melted white bark. Let set and then store in refrigerator.

Thursday, November 24, 2011

Butternut Squash Soup with Three Types of Sweet Potato


Joyous thanksgiving. Let us use today as another reminder to focus on the things we are thankful for now (my friend Erica, over at Kinds of Honey is particularly good at finding small moments of beauty in the everyday and she reminds me, through her blog posts to be a more grateful and gracious person, something I am quite thankful for) and, at some future point, discuss the problems with celebrating Thanksgiving.

This dish was born out of a mini-dinner party, and a request for butternut squash stew. E wanted a chunky soup (more like a stew), with veggies--and I'm not one to stay no to veggies! When we went to the grocery store, we picked up sweet potatoes, three varieties, to add color, texture, and taste to the soup. We also decided to add carrots (because I always, always have carrots around). This is an easy, moderately low-fuss soup and could easily be made for Thanksgiving if you're prowling for a last minute idea!

At our grocery store, we actually had more than three types of sweet potato to choose from, plus yams. But we went with a white-fleshed, white-skinned sweet potato (O'Henry), a garnet sweet potato, and a Japanese sweet potato. For the soup, I cut these into moderately large bite-size chunks and scrubbed but didn't peel them, since all of the sweet potatoes were organic). If you can't find three types of sweet potato in your local markets, don't worry about it. Just buy three medium sized sweet potatoes and go with it. 
 
For the butternut squash: organic, canned butternut squash puree has been ridiculously inexpensive at my grocery store for several weeks now, so that's primarily what we used. But, I also had a butternut squash I wanted to roast up anyway, so we used about 1 pound of freshly oven-roasted butternut squash in the soup and I save the rest of the meat for another meal. I roasted the butternut squash while I cleaned, walked the dog, and was waiting for the bread to rise appropriately.

Pureeing about half the veggies you use lends to a thicker soup (you could also use less water, but with big chunky veggies, I think this looks weird and the flavor is pretty strongly "autumn" anyway). This is easier with an immersion blender, but could also work in a food processor or a regular blender. If you use one of these methods, please let the soup cool sufficiently so you don't scald yourself, or cause a lid to blow off from heat!

While I worked on the soup, E set a lovely table. She was excited about the opportunity to have a real dinner party, complete with a local wine, and a properly set table. And, truth be told, I felt excited about it too. She arranged my winter squashes and pie pumpkin around a piece of tableware from her family, and then we lit a lovely "holiday" scented candle.

The recipe I based this on actually uses shallot instead of onion, so if you've got easy access to that, I encourage you to use shallots . E and I didn't have shallots on hand and operate on a pretty limited grocery budget. If you wanted to make this vegan, you could use olive oil in place of butter, and coconut milk (perhaps 3/4 cup) in place of the whipping cream.

Butternut Squash Soup with Three Types of Sweet Potato
3 tablespoons unsalted butter
1/4 large onion, chopped fine

1 White sweet potato, with white skin (O'Henry), chopped
1 Garnet sweet potato, chopped
1 Japanese sweet potato (red skin with white flesh), chopped
3 medium carrots, sliced into coins
1 small apple (I used three large crab apples)

3 pounds butternut squash puree (see my notes above about this)

8 cups water
1 teaspoon salt

2 teaspoons dark brown sugar
1/2 teaspoon grated nutmeg
2 teaspoons lemon juice

½ cup heavy cream, scant

Melt the butter in a large soup pan, over medium heat. Add the onion and saute 1-2 minutes, until the onion begins to wilt. 
Stir in the chopped sweet potatoes and carrot coins. Cook 5-7 minutes, stirring infrequently, so the potatoes will begin to caramelize. Add the apple and cook another 3 minutes. 

Add the butternut squash puree and 4 cups of water. Bring to simmer and cook 5 minutes. Remove from the heat. Use an immersion blender to puree about 1/2 the chunky vegetables. Return to the heat and add remaining 4 cups of water. Bring to a simmer again. Stir in the salt, brown sugar, nutmeg, and lemon juice. Cook until all the vegetables are tender (to your liking; I like them with a little crunch the first day so they're not complete mush the second day).

Stir in the heavy cream. Adjust seasoning if necessary. Serve hot. 

Serves 4-6

Sunday, November 13, 2011

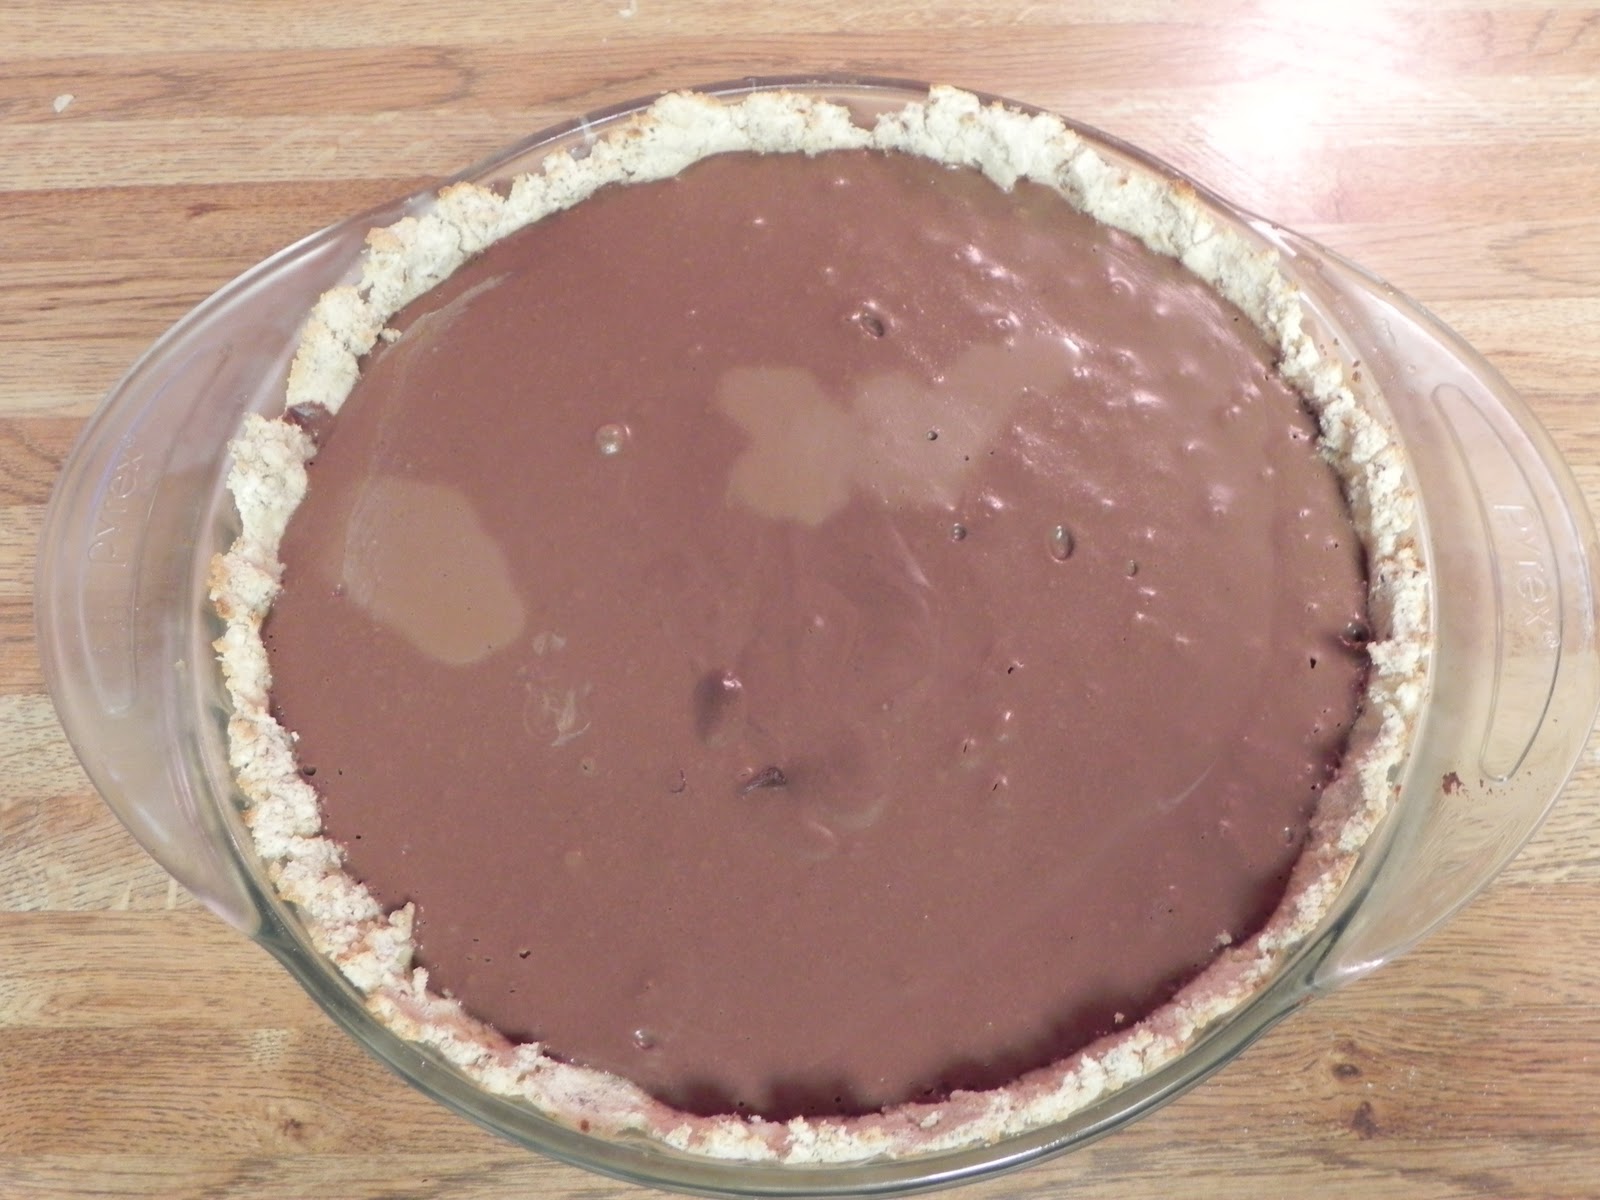
Vegan Chocolate Pie with Coconut Crust

Lately, I haven't really wanted sweets. Probably that's a good thing. But I have wanted chocolate. Not just any chocolate, but really dark chocolate. If it's not dark chocolate, I'm not interested. I could keep this trend, except I'm kinda also getting sick of chocolate--even while I still want it. I might resort to buying either the ridiculously dark chocolate or cocoa nibs, except those are outside my budget.

I'm hoping this pie will cure me of wanting chocolate. I've been wanting to make this pie for a while, but actually got around to making it because I had a friend coming to town. A friend who appreciates dessert. A friend who's open to trying the oddball things I make. Willing guinea pigs are always nice to have around. And I'm also hoping E will help me eat some of it. There are plenty of variations of vegan chocolate pie around. The type I like, I originally got from Alton Brown's "moo-less" chocolate pie and have since modified somewhat. But I wasn't sure what the point of this pie was--true, Oreos are vegan*, but if you're aiming for something that's a little healthier--this isn't necessarily the pie for you. On the other hand, maybe you're just lactose-intolerant and this works fine for you.

This is, however, a pie I like. It's smooth and silky. This variation is pretty light and fluffy (there are versions that are slightly heavier). It's got a fair amount of protein. It's quick to put together. It usually makes a pretty presentation. Since going gluten-free, I've made up the filling and eaten it like pudding, once. But it's so much more fun (and impressive) as a pie.

A friend of mine makes a really fantastic gluten-free pie crust for coconut cream pies and pear tarts, with coconut flour and/or Bob's Red Mill GF All-Purpose, coconut flakes, and sometimes even coconut sugar. My goal wasn't to replicate this crust (though I might need to ask how she does this), but just to use it as a jumping off place for a slightly less sweet crust. I think the pie is plenty sweet without a sweet crust, and I think it's fun to have the contrast between the crust and the pie filling. I used agave sugar, rather than sugar, in the crust and flax to replace the egg binder most pie crusts use. To replace the butter, I used a vegan substitute.

Edible Flowers
This pie is pretty forgiving flavor-wise. I've offered a few alternatives I've tried in the past with the filling, but I imagine lavender essence could be used to replace the vanilla, or that, if you were so inclined, you could even incorporate lavender blossoms (dried) into the pie. Or, you could top slices of the pie with individual edible flowers, like poppies or pansies. As you consider serving the pie, think about how you might plate it, based on the flavor profiles available in the pie -- chocolate-covered coffee beans, peppermints or mint leaves, candied orange peel, or raspberry sauce squiggled over the plate before you slip the slice from the pie dish. Presentation, I'm told, can make a huge difference in how people perceive your food--and if you're using a high quality chocolate, you can play up flavors already present in the chocolate as you plate it.

Vegan Chocolate Pie with Coconut Crust
For the crust:
1/2 cup coconut flour
1/4 cup quinoa flour
2 tablespoons vegan margarine
1/4 cup unsweetened coconut flakes
1 tablespoon flax mixed with 1/3 cup cool water
2 tablespoons agave nectar
Olive oil

For the pie:
12 ounces Mori-Nu soft silken tofu
1/4 cup almond milk (or other dairy free milk, or coffee, peppermint orange or chocolate liquor**)
1 tablespoon agave nectar
1 teaspoon vanilla
8-9 ounces vegan semi-sweet chocolate

Crust:
Cut the butter into the flours until it resembles coarse crumbs. Stir in the coconut flakes. Add the flax-water and agave nectar and stir until it forms a very loose dough (it should not form a ball, but should hold together when pressed). Add more water, 1 tablespoon at a time, if necessary. Press the dough into a 9" pie pan lightly greased with olive oil. Prick bottom of crust lightly with fork. Cover and refrigerate at least 1/2 hour.

Preheat oven to 350 degrees and bake the pie crust 15-18 minutes, until it turns a light golden brown. Remove from oven and cool completely.
Coconut Crust

Pie:
After the pie crust has cooled, blend the tofu, almond milk, agave nectar, and vanilla in a blender until smooth. Meanwhile, melt the chocolate in a double-boiler (or very heavy bottomed sauce pan) over low heat, stirring often to avoid scorching. Once the chocolate has fully melted, scrape it into the blender and process until well mixed, scraping down the sides, as necessary.

Pour the filling into the crust, cover, and refrigerate at least 2.5 hours, or until the pie filling has set. Serve cold.

*Though not necessarily made with vegan sugar. And this depends on where you live in the world. In some places, apparently Oreos contain whey powder, which makes them non-vegan.

**I've also made this with peanut butter and sunflower seed butter, both of which work well--but didn't seem like they would be the best compliments to a coconut-based crust. If you're looking for something like a healthier chocolate peanut butter pie, you could certainly incorporate peanut butter or another nut butter into this, or layer peanut butter on the bottom and pour the chocolate-tofu filling on top. One day, I might post one of these recipes.

Monday, October 31, 2011

Fancy Dipped Apples, Cupcake Monsters, and Were-rabbits

Apple of My Eye
No recipe this time. I'll just put that out there right now. But I've been walking past these apples at least once a day for the past week (or at least ones that look like these apples--hopefully not actually the same apples) and they were too Halloween-y adorable not to share. Something to aspire to, perhaps, if I want to ruin a perfectly good apple in order to decorate it.

Were-rabbits
A friend of mine went to culinary school and I remember listening to her talking about her chocolates classes -- and being amazed by the beautiful creations she came up with. Creations like those, and like these apples and were-rabbits, are exactly the type of thing that makes me want to seriously investigate how to work with chocolate, maybe even take classes. But then, I think of all the things I could better use that money for. And so instead, I consider possibly working at a place that would teach me how to make creations like these. I haven't ruled that out yet.


One thing I've got to say about Halloween--and other holidays--is that it certainly makes walking past bakeries, chocolate shops, and other such places much more interesting. I've already posted a picture of a "pan muerto" from our local growers market. In fact, I like window displays a lot when it's holiday time--especially when people aren't too terribly concerned about the political correctness of their displays. I think too, even in my Halloween grumpiness this year, the window displays in town have helped me feel a little more in the spirit. It's hard to not feel a little bit of fondness for the holiday when there are skeletons in wedding dresses, apples like these, little monster cupcakes, etc. Last year, in my previous town, I took pictures of fancy cupcakes at my favorite bakery (pictured left). The lighting was pretty horrible for pictures, but you get the general idea.
Such cute monsters...though I'm not
a fan of the pipe cleaners.

In my mind, one of the big problems with specialty cupcakes is that amount of frosting that's used. Maybe I only feel this way because I'm not a huge fan of frosting--or dye--but also because these specialty cupcakes (even ones that are much less fancy-decorated than these) cost so much, when really the ingredients are often very cheap to buy. The profit margin must be huge--and for products, that when I've tried them, aren't really worth it.

Speaking of things I'm not a fan of: caramel apples. That's a little ironic, perhaps, considering that was the impetus of this post. However, I don't understand why anyone would ruin a perfectly delicious apple by putting caramel on it--much less dipping it caramel and peanut butter. Or caramel and M&Ms. Or, well you get the point. I don't care much caramel, but even if I did, this just seems like a sugar-overload. I'd love to hear from a few of you who like caramel apples. Why do you like them and when do you eat them? People's food memories are always great.

The average American eats about 120 apples a year (hm, considering I pretty much eat an apple a day most of the year, that makes me concerned for the low consumption by other people). The average caramel apple has between 230-340 calories, according to one site I found. But these are (white) chocolate dipped apples--and probably "cost" a lot more than 700 calories. I'm guessing this number, because one of the only uber-indulgent caramel apples I could find statistics on, Rocky Mountain Chocolate Factory's Apple Pie Caramel Apple, supposedly contains more than 700 calories.

Something maybe we should eat more of? The relatives of these carved babies. Pumpkins you carve are edible but they're not super good like the smaller pie pumpkins. E, her boyfriend, and her co-worker K carved these beauties last night. E's boyfriend and K both carved pumpkins they'd grown and I'm proud (or something like that) to say E's pumpkin was "pamper'd." The label said so. Hers is the eye. And it's a little blocked by the boyfriend. Alas. Happy Halloween.

K's kitty in the window, A's Jack, E's Eye


Tuesday, October 25, 2011

Ghost Bites (aka Muddy Buddies), a Halloween Snack

Regardless of exactly how you make it, or what you call it, chocolate-peanut butter-powdered sugar covered cereal is pretty addictive--and super quick to make. I don't think I've ever spent more than about 15 minutes from start to finish (though it does take me longer when I go the route of stove-top melting the chocolate, peanut butter, and butter). When I lived in the Midwest, I could reliably bring this to parties and people would gobble it down--and tell me their puppy chow (that's what they all seemed to call it) memories.

This snack is easy to make vegan* and gluten-free**.

I've heard it called:
Muddy Buddies ("technically" the Crispix recipe)
Puppy Chow (this is the recipe on the side of the Rice Chex box)
Kibble
White Trash (though this is made with white chocolate about as often and often has actual peanuts and sometimes mini-pretzels as well)

Ah, the joys of living all over the country and hearing colloquialisms.

In honor of Halloween, I'm dubbing it Ghost-Bites. I also took these to a movie night where we watched a scary movie and Ghost-Bites seemed a bit more in the spirit of the evening. We watched a supposed comedy, Super, which turned out to be not so much of a comedy in the laugh-out-loud or even dark humor sort of way, but a comedy in the variety of "I laugh at gratuitous violence and at the mentally ill." To keep my review short and avoid spoilers, I doubt people will see this movie and think, "Hm, I should become a superhero." At the end of the movie night, I think all seven of us felt pretty uncomfortable. E and I went home to watch a couple episodes of Coupling to help erase the images of Super.

But back to Ghost Bites (which, I was surprised, were new to several of the movie-night attendees).

If I'd thought about it early enough, I probably would have dyed my powdered sugar orange (and really, it's not too late. I have more of all the ingredients and so I might make a small batch, just to post here).

I seem to use a little less sugar than any of the recipes I've seen -- which call from anywhere between 1 bag of powdered sugar (so much waste!) to 3 cups to 1.5 cups (Chex). I use about a cup.

I tend to mix this in a paper grocery sack, because I always seem to have extra, and because it absorbs a little of the extra grease. For the same reason, I let the Ghost Bites cool on a paper grocery sack that I've cut down the sides to increase the surface area that lies flat on the counter top and let it cool several hours (preferably overnight when I don't need my kitchen counters).

A note on peanut butter: I personally like using freshly ground peanut butter, which isn't quite as smooth as some natural peanut butters, but is smooth enough. You could use chunky peanut butter, I suppose, if that's all you've got, but I would recommend a smoother version just because it makes coating the cereal a little easier.

Ghost Bites
1 cup semi-sweet chocolate (you can also use vegan chocolates if you're making a vegan version)
1/2 cup natural, unsweetened peanut butter
1/4 cup butter (or vegan margarine)
1 teaspoon vanilla
9 cups rice or corn (or a combo) Chex
1 cup powdered sugar

In a saucepan, over low heat, melt together the chocolate, peanut butter, and butter, stirring often so you don't scorch the chocolate. As an alternative, you can microwave these ingredients in a microwave safe bowl on HIGH for 1 minute. Stir and microwave for another 30 seconds, if necessary. Stir in the vanilla.

In a separate, large bowl, measure 9(ish) cups of cereal. Pour the chocolate-peanut butter mixture over the cereal and stir until the cereal is thoroughly coated.

In a large paper grocery sack, or in a sealable 2-gallon plastic food storage bag, measure your powdered sugar. Pour in the chocolate-coated cereal, close the bag, and shake until the cereal is well coated. Spread out on a cookie sheet (or another paper grocery sack slit in half) to cool. Store in an air-tight container.

*If you're making this vegan, be sure to check with your vegan and make sure you're using a vegan powdered sugar (or see if they care), vegan chocolate, and vegan margarine.

Puppy Chow
**If you're making this gluten-free, be sure to check ingredient labels. Use certified GF products.

Monday, October 24, 2011

Roasted Carrot Carrot Cake (and muffins!), Gluten-Free

On a mountain
It must be fall. I'm in serious baking mode. French-style bread. Gluten-free risen bread. Monster cookies. Brownies (semi-failure). Chocolate pumpkin cake. Carrot cake. If only I had more time. The day I made this cake, I also hiked a nearby mountain with a co-worker and then volunteered to yank invasive species out of the ground at a local park for three hours in advance of Make-a-Difference Day since I'll be at work on the actual day. Then, I went home to walk S (okay, okay, hike with S) and call a couple of people who I've been playing phone tag with for a week or so. There's so much to cram into weekends.

I had this much carrot
when I gave up grating
To say the least, this cake was inspired by general feeling of "there's no way I'm going to stand here for 45 minutes and hand-grate carrots for this carrot cake," which I was making at the request of my supervisor for another co-worker who's birthday had recently passed. I said yes, because I love to bake (and I knew I could try and make it gluten-free) and when I said yes, I had no idea how much time I'd invest into other activities during my weekend.

Rather than grate the carrots, I decided to pan roast them (which I define as different from sauteing only because I didn't stir them very often at all) until they were very soft and then mash them before adding them into the cake batter. Pan roasting the carrots let me:

1) work on making dinner, which was good, since I'd only had a carrot since breakfast
2) do a little kitchen clean-up
3) mix up other cake ingredients
4) turn on Chain of Lakes because I had carrot-free hands
5) feel less irritated by the very slow process of hand-grating carrots (I did hand grate about 1/2 cup before I got fed up with the process and you could do this too, if you were so inclined--I just added the grated carrot with the mashed carrots to the cake batter.)

Roasting the carrots also makes them sweeter and deepens their carrot-y flavor.
Look at those brown sugar-spots

The base recipe for this carrot cake came from one of my favorite carrot cake recipes--a vegan recipe (though I used regular cream cheese in the images you see--I have made it the other way and actually prefer the way Tofutti  Better Than Cream Cheese tastes to regular cream cheese, but that's just me--because the person I'm making this for is neither GF or vegan).

I'm still experimenting with gluten-free flours and trying to avoid that not-so-lovely GF flavor. Since I started helping a friend out with her pie stand at the local growers market, I've heard several people say "I don't like anything gluten-free," to which I have a hard time not being snarky ("do you realize how much you eat that's naturally gluten-free?"). But to be fair, a lot of gluten-free baked things not only taste gluten-free, but they have a particularly grainy texture that's not so appealing. In this cake, I used a mixture of brown rice flour, GF oat flour, quinoa flour, and millet flour.

I poured the batter into an 8x8 pan and still had plenty of batter left to make a dozen cupcakes (muffins, I'm not adding extra sugar to them all and if I were to intentionally make them as muffins, rather than cake, I'd probably scale back the sugar by at least 1/2 a cup--I think it's far too sweet right now for muffins).

Vegan Roasted Carrot Carrot Cake (Gluten-Free)
2 pounds carrots, washed and sliced into coins
Olive oil

3/4 cup brown rice flour
3/4 cup oat flour
1/2 cup quinoa flour
1/4 cup millet flour
2 teaspoons guar gum
2 teaspoons baking soda
1 teaspoon baking powder
1 tablespoon cinnamon
1/2 teaspoon allspice
1/4 teaspoon each cardamom, cloves, nutmeg
1 teaspoon salt
3/4 cup light brown cane sugar 
3/4 cup cane sugar
3 egg equivalents (I've used both flax eggs and Ener-G Egg replacers with this recipe, both work fine)
1 teaspoon vanilla
3/4 cup vegetable oil
1 14-oz can crushed pineapple, drained
1 cup shredded coconut
nuts and raisins, optional

Faux Cream Cheese Frosting
(again, you could use regular cream cheese and butter if you're not vegan or preparing this for a vegan, but this is really good frosting)
1 8-oz package vegan cream cheese
1/3 cup vegan margarine, softened
1 teaspoon vanilla
2 cups vegan powdered sugar, sifted

Preheat oven to 350 degrees Fahrenheit (really, you should do this after you've mashed the carrots to save energy, but this type of information is usually at the front of recipes, so here you go). Roast the carrots in a saute pan, lightly coated in oil, over medium heat, stirring occasionally until the carrots are beginning to caramelize and are very soft.

Carrots ready to pan roast
If you're under time constraints* or your carrots just don't seem to be getting soft, you can add a little water to the pan and cover it for a few minutes to steam them after they've begun to brown. Let the carrots cool a little and then mash them until you've got very few chunks. You will want about 1 1/2 cups of mashed carrots total.
Carrots, almost ready to mash--get them a little browner than this
While the carrots are roasting, in a medium bowl, mix flours, guar gum, baking soda, baking powder, spices, and salt.

In a large bowl, mix sugar and egg replacer until creamy (use an electric mixer if you can get your hands on one--it makes life so much easier). Add the vanilla and combine, then add the vegetable oil and mix well. Mix wet and dry ingredients together, combining well (one of the great things about gluten-free foods is that it's a bit harder to over mix). Stir in the carrots, pineapple, and coconut. Add nuts and/or raisins, if using.

Grease a pan (9" x  9" pan for a thicker cake--I promise it won't fit into an 8" x 8"--or 9" x 13" for a thinner cake) and smooth the batter into the prepared pan. Bake 40-45 minutes (for a thicker cake--reduce time if you're using a 9" x 13"), or until a toothpick comes out clean. Let the cake cool entirely before frosting.

Above and Below: Roasted Carrot Carrot Cake Muffins
(1/2 of which turn into cupcakes because E requested  it)
For the frosting:

Beat together the cream cheese and margarine in a medium-large bowl until smooth. Add the vanilla and incorporate well. 1/2 cup a a time, beat in the powdered sugar. Beat in the powdered sugar until smooth before adding more. The frosting should be very thick. On a humid day, you might have to add more powdered sugar.

Frosted Cupcake
*For my carrots to get soft enough to mash, it took about 45 minutes of pan roasting in a medium-large saute pan over medium to medium-high heat and I did add about 1/4 of water and let them steam for about 10 minutes at the end to make sure all the carrot coins would mash pretty well.

Tuesday, October 18, 2011

Chocolate Pumpkin Cake

Okay, so the name is a bit deceptive. Maybe more than a bit. The only thing that's pumpkin about this cake is the color and (kinda) the shape. E's boyfriend asked for a "very moist" chocolate cake for his birthday and he wanted it pumpkin-themed. The cake, not the birthday (though a pumpkin-themed birthday would be pretty sweet--coming from someone who loves carrot cake and pumpkin bread).


Those were his requirements. When E shared this, I immediately started looking up recipes for moist chocolate cake. But I'm skeptical of any recipe that informs me that it's moist. If you need to advertise it, usually I think you're lying. Or at least not being fully honest. Eventually, I fell back to a recipe I've used (and made gluten-free) several times, the vegan chocolate avocado cake on Joy the Baker's website. If you're interested in the gluten-free version, please take a moment to look at those modifications.


At first E seemed skeptical. "Avocado?" she asked from the other end of our dining room table. 


I nodded and she wrote it on her shopping list.


We only made the cake part of Joy the Baker's vegan chocolate avocado cake, and then added (non-vegan) orange frosting to the outside. The orange frosting came from a bag (which was a total revelation to me--I didn't know you could buy frosting mix--and now, after watching E put it together, I'm not sure why you would. To me, it seemed like selling really expensive confectioners sugar and vanilla since we still had to add milk and butter to the mix. The frosting turned out super-thick and in an attempt to make it just a little thinner E added too much milk and made it a bit runny--which was fine, since we had extra confectioners sugar and could thicken it back up some.). We added orange (well, yellow and red) coloring after making up the frosting.


We did decide to make this a layered cake, so I also made a chocolate frosting from cocoa powder, butter, sugar, and non-fat yogurt. I didn't measure ingredients there, so the recipe is approximate and you'll probably have to play with it or wait for me to have another occasion to make chocolate cake and try that recipe again (and this time measure).


To achieve the pumpkin shape, we used a bundt cake pan and, because we only had one pan, baked the two parts of the cake one after the other. If I were to do this again, I probably wouldn't want to do it two batches, but instead make one larger (taller) cake that was less round, but probably equally pumpkin-shaped. For the cocoa, we used Dagoba unsweetened cocoa powder, but any unsweetened dark cocoa will do.


Chocolate Pumpkin Cake

3 cups all-purpose flour
6 Tablespoons unsweetened organic cocoa powder
1/2 teaspoon salt
2 teaspoons baking powder
2 teaspoons baking soda
2 cups granulated sugar
1/4 cup vegetable oil (we used olive oil)
1/2 cup soft avocado, well mashed, about 1 medium avocado
2 cups water
2 Tablespoons white vinegar
2 teaspoons vanilla extract
Buttercream frosting (see note about this above)
Chocolate wafer cookies

Sift together all of the dry ingredients except the sugar.  Set that aside too. 

Preheat oven to 350 degrees F.  Grease and flour two 8 or 9-inch bundt pans.  Set aside. 


Mix all the wet ingredients together in a bowl, including the super mashed avocado. 

Add sugar into the wet mix and stir. 
Mix the wet with the dry all at once, and beat with a whisk (by hand) until smooth. 
Pour batter into a greased cake tins. Bake for 30 to 40 minutes, until a toothpick inserted comes out clean. 
Let cakes cool in pan for 15 minutes, then turn out onto cooling racks to cool completely before frosting.

Cake with Chocolate Yogurtcream Frosting
Chocolate Yogurtcream Frosting
(Strange, but it works! Remember, these proportions are approximate--but if I make it again (when I make it again) I will post updates about quantities.)

1 1/2 cups powdered sugar
1 Tablespoon unsalted butter
1/4 cup Dagoba chocolate powder
1 Tablespoon plain, nonfat yogurt
1 teaspoon vanilla extract

Cream together the sugar, butter, and cocoa powder . Add the yogurt and vanilla and mix until creamy. If it's too thick, add a touch more yogurt. If it's too thin, add more confectioners sugar.

To assemble the cake:
Once both cakes have cooled, you'll want to have them both with bundt-cake top (the part that was nearer to the rack as it baked) down on the cooling rack. Spread the chocolate yogurtcream frosting on one of the cakes (you probably won't use it all, but maybe it's really thick and you really like chocoalte). Flip the other cake on top, making sure the bundt-cake edges align.
Aim for something more or less like this
Carefully spread on the (orange) buttercream frosting. 
E Spreading frosting

It's best if this is thicker than the pictures show so you can smooth it into the contoured shape of the cakes. 
Our frosting is a bit runny, but so tasty (and super sweet!)
Once you've frosted the cake, carefully insert the chocolate wafer cookies (if you can get a green wafer, more power to you) to create a stem-effect.

Our first attempt at pumpkin shaped cake is complete!

Saturday, March 12, 2011

Cappuccino Cookies - Vegan & Gluten-Free


Cappuccino Cookies (they're vegan and gluten-free!)
As regular readers know, a friend of mine requires a gluten-free diet and her boyfriend is vegan. Cooking and baking for them isn't a challenge, exactly, but it is always an adventure, especially when I've been eager to try a new (non-vegan and/or GF) recipe. Luckily, the vegan is happy whenever someone bakes him something (the best type of customer!) and my GF friend is more than willing to provide me with xantham gum when I'm trying to convert a recipe to GF -- which is good because xantham gum is expensive, especially if you're not planning to use it on a regular (to me this means weekly or more often) basis! As I've mentioned in previous posts, xantham gum is binding agent and is necessary in most gluten-free recipes since you've lost the binding ability gluten provides.

Dough balls


I noticed this recipe on Joy the Baker's blog back in February and knew I had to try it (well, minus the white chocolate, not a favorite of mine). But, I didn't have an occasion (or the time) to make the 2 dozen cookies the recipe yields (note: I actually got a little over 3 dozen, I must have made mine smaller though they're plenty big in my opinion).

Fortunately, there was a potluck on Friday evening and I needed to bring a side or a dessert. Excellent excuse, right? Especially excellent since the crowd I'd be with drinks a lot of coffee. It's a group of writers, what can I say? We definitely live up to the stereotype in that department. But, I wanted to make sure my vegan friend and my GF friend could eat whatever I brought also. I decided it was worth at least trying to convert this recipe -- if it didn't work, I could always bring a side dish.

The original recipe calls for 1 egg and 1 egg yolk. Egg replacer works great for the egg, because it binds and helps create a fluffy product. Ground flax seed works well for the egg yolk because of the higher fat content and the ability to easily adjust liquid (usually you should mix 1 tablespoon of flax seed to 3 tablespoons of water to create a "flax" egg--in this recipe, I mixed 4 teaspoons of flax with 3 tablespoons of warm water). This was the first time I'd tried this replacement combination and was glad it worked!

These cookies taste like coffee and chocolate, which I think is pretty lovely, and get thin (usually I prefer thicker, chewier cookies). Like other gluten-free products they don't brown as well, so it can be hard to tell if they're "brown around the edges," but if you look closely, you'll see they do. They were a hit at the potluck!

I used Bob's Red Mill Gluten-Free All-Purpose flour (although this seems to taste particularly "gluten-free" compared to some other brands I've tried), because that's what's on hand at my closest grocery store, vegan margarine, and vegan chocolate chips. As I've warned before, some vegans will not eat refined sugars -- the vegan who will eat these cookies doesn't care. Be sure to ask your vegan if you have doubts!

Cappuccino Cookies - Vegan & Gluten-Free
Makes: about 3 dozen cookies

1 cup (2 sticks) vegan butter (i.e. – Earth Balance), softened
3/4 cup brown sugar
3/4 cup granulated sugar
1 ½  Ener-G egg replacer, mixed with 2 tablespoons water until thick
4 teaspoons ground flax seed, mixed with 3 tablespoons water
2 teaspoons pure vanilla extract
2 1/4 cup gluten-free all-purpose flour
½ teaspoon, rounded, xantham gum
1 teaspoon baking soda
¾ teaspoon salt
3 tablespoons instant espresso powder
1 cup vegan chocolate chips, coarsely chopped.

Place racks in the center and upper third of the oven and line two baking sheets with parchment paper. Set aside and we'll preheat the oven after we chill the dough.

In a medium bowl, whisk together flour, xantham gum, baking soda, salt and instant espresso powder.

Beat together butter and sugar until light and fluffy (about 5 minutes, by hand or 3-5 in a stand mixer). Scrape down the sides of the butter-sugar mixture with a spatula and add the egg replacer, flax seed egg, and vanilla. Beat until fluffy, about 1-2 minutes.

Add the dry ingredients, all at once. Mix until just combined and then fold in the chocolate chips until well combined. Cover the dough with plastic wrap and refrigerate at least 1 hour (an hour and a half seemed to work better for me).

Just before you're ready to bake the cookies, preheat the oven to 350 degrees F.

Scoop cookie dough by the heaping tablespoonful onto the prepared baking pans. Bake for about 12-13 minutes, until lightly browned around the edges. Remove from the oven, allow to cool on the baking sheet for about 10 minutes, then remove to a wire rack to cool completely. Store cookies in an airtight container.

**Hint: These cookies spread a fair amount, so give them space on the pan. Dropping them about 2” apart seemed to work pretty well, though some of the edges touched.