Pages

Showing posts with label quick. Show all posts

Thursday, December 26, 2013

Tea "Biscuits"

Ah, one of the joys of being an American is that a "biscuit" brings to mind something that you use as a side dish -- to pretty much any meal. You can have gravy on it (sorry, not my thing) or wedge a sausage patty in it. You can put it as a side to a dinner of meat (or not) and greens. You can spread jam or honey on it. You can do a lot of things to a biscuit. And, depending on where in the country you live, biscuits might be fluffy (Southern influence) or thinner and crispier (Northern influence).

SO MANY OPTIONS.

But, Americans don't usually hear biscuit and think "a sweet."

These tea biscuits are definitely more like cookies, if you're an American reader. They're sweet (yet have protein because of the g-bean flour!), and very versatile. The original recipe comes from the Flying Apron Bakery Cookbook, and calls for placing beautiful little berries in the center of each cookie. That's yummy (and frozen blueberries work great, btw). But you can also season these with sweet spices and create something that's (still) totally appropriate for eating with a mug of hot tea (or coffee), any time of day.

I make my tea biscuits much smaller than the original recipe recommends (it recommends baseball sized, mine are closer to golf-ball sized -- but then, I'm also not selling them in a bakery). A thought about this: If you're making them for a fundraiser or something along those lines, definitely make them big. I didn't have to make much of an adjustment to the baking time, so you should only need to leave them in for a few extra minutes. 

I like that these come together pretty quickly (though they do want to hang out in the refrigerator for a few hours -- you can make the dough in advance and just make a few at a time this way), but they will leave your hands sticky (something I'm less thrilled about). I recommend making the dough as listed below, and then modifying it however you'd like (suggestions also below, probably you don't want to try all the variations at the same time).


Tea Biscuits
2 1/2 cups brown rice flour
1 1/2 cups, plus 1 tablespoon garbanzo bean flour
1 teaspoon baking powder
1/2 teaspoon baking soda
3/4 teaspoon sea salt
1 cup canola oil
Scant 1 cup cane sugar
1 cup soy milk
Berries (optional)

Additions (probably only try 1-2 at a time, based on preference):
1/2-1 cup mini vegan gf chocolate chips (such as Enjoy Life)
4-5 drops pure orange oil (a little goes a long, long way -- and orange essence is not the same thing)
1 tablespoon of cinnamon
1/4 cup minced, candied ginger

Combine the brown rice flour, garbanzo bean flour, baking powder, baking soda, and salt in a large bowl. In a separate bowl (or if you have a stand mixer, in that), beat together the canola oil and cane sugar until well mixed. Stir in the flour mixture and the soy milk a little at a time, alternating, until well mixed. Chill* the dough at least three hours (it can go less, but believe me, you want that garbanzo bean flour to hydrate).

Preheat the oven to 350 degrees. Place golf ball sized balls of dough on a cookie sheet that has been greased or covered with parchment paper, about 1 inch apart (these don't spread much). Lightly flatten the balls with the palm of your hand. If you're using berries, press 2-3 into the top of each cookie.

Bake until golden and firm to the touch, about 20-24 minutes.

*Optional:
Stir in the mix-in to some (or all) of the dough before you let it rest in the refrigerator. If you're only making a few cookies and want to try out one of these options, I definitely recommend reducing the amount of ingredient you're choosing to mix in. You don't want to overpower the delicate flavors in these tea biscuits.

Monday, December 23, 2013

Vegan Peanut Butter Blondies (grain-free too!)

It's been nearly a year since I last updated this blog. It's not that I haven't been cooking and baking a lot -- I have. And, it's not for lack of inspiration about vegan and gluten-free things to make. It's that I've been deciding the personality overhaul of this blog. I'm not "flexitarian" anymore, but it's not wholly accurate to call myself vegan.
A lava flow?! That has nothing to do with this post!
Taken at Craters of the Moon National Park, ID
Summer 2013

I eat vegan, most of the time. But, if a non-meat or cheese (cause I really dislike the taste of meat and most cheeses) happens to have egg in it and it's gluten-free and it's chewy (because omg, chewy not-like-bricks gluten-free items are quite the find), I'll probably make it/eat it (shhh, don't tell), if it's free and going to go to waste otherwise -- so, for instance, if it's free at the soup kitchen or another place my roommates and I can glean from. I recently learned that vitamin D3 comes from an animal source most of the time (industrially, it's apparently produced by exposing lanolin to sun) and that it's in a lot of my cereal and I'm okay with that too, cause cereal is easy when I feel like I'm already out of the house a lot / not cooking much.

I'm still not sure what this will mean for the blog. I won't be removing recipes and I'm not set (yet) on changing the name of the blog. If I do, I'll try to create a fair amount of advance notice.

This recipe is something I recently made, a veganized version of a recipe I posted a few years ago. It uses lentils (?!?) which gives the bars a consistency a little like they have chunky PB in them, and they're super-moist. I didn't get pictures before my housemates inhaled them, but if you make them and want to send me pics, that would be great (and I'm happy to give you photo credit of course!). Otherwise, next time I make these, I'll try to get pictures as soon as I pull them from the oven.

The lentils used in this recipe are brown lentils. They'll hold up better when cooked and are definitely still evident when you eat the blondies.


Peanut Butter Blondies (vegan, grain-free)
1 cup cooked brown lentils (salted)
¾ cup granulated sugar
2/3 cup smooth, natural peanut butter
3 tablespoons garbanzo (or oat*) flour
¼ cup ground flaxseed mixed with ½ cup warm water
1 teaspoon baking powder
½ teaspoon ground cinnamon
¼ teaspoon salt
1 teaspoon vanilla

Puree lentils and granulated sugar in a food processor, until moderately smooth. Transfer to a large bowl and mix in remaining ingredients. Stir well and allow to rest for at least half an hour to give the flaxseed and garbanzo flour time to hydrate.

About ten minutes before you want to put the blondies in the oven, begin preheating the oven to 350 degrees. Pour the batter into a greased 11x7 pan. Bake for 35-45 minutes (I'm now baking at high altitude and still learning how to convert back down for baking times!), or until the center feels moderately firm to the touch.

Allow to cool completely before cutting into bars.

*If you use oats, this is no longer grain free. You could also use coconut flour if you had it on hand. Resist the urge to add any extra water with coconut flour. It's very absorbent. 

Thursday, December 27, 2012

Sweet and Fluffy Coconut Cornbread

Confession: I grew up not eating sweet cornbread. In the south, sweet cornbread is well, a bit blasphemous. It wasn't until I left my parents' house that I got sweet cornbread on a regular basis. Does that mean that I love sweet cornbread? Hardly. Pretty frequently, I opt instead for a spicy cornbread with whole kernel corn and jalapenos.


But, today seemed like a good day for a nice, warm sweet cornbread that I could pair with a vaguely chili-like stew. A friend of mine recently attempted to make a coconut cornbread that used coconut flakes and coconut oil -- and was disappointed that the coconut flavor didn't come through very strongly. I wanted to increase the coconut flavor (you should think coconut! when you taste this) when I worked with this recipe. The trickiest part was figuring out how much liquid to use (I guess coconut flour absorbs a lot of liquid -- this definitely used more water than I expected and you should see my note below about this, in case it was my cornmeal and not my flour greedily hogging water).

This is a vegan, gluten-free recipe that gets baked in an 8 x 8 baking dish, though I imagine it would also do well if you cooked it in a cast iron skillet (and it would probably have a better crust on the skillet side!). Serve it with a hearty stew for dinner, eat it as a snack, or pour some warm milk on it and serve it as a warm cereal for breakfast -- whatever makes you happy.

Coconut Cornbread
1/2 cup coconut flour
1/2 cup tapioca starch
1/2 cup unsweetened coconut flakes
1 cup finely ground cornmeal
2 tablespoons brown sugar
1 tablespoon baking powder
3/4 teaspoon salt

1/3 cup agave nectar
1 cup water
1/3 cup coconut, almond, or soy milk
2 tablespoons vegan buttery spread (or coconut oil)
1 tablespoon canola oil

2 flax eggs (2 tablespoons flax + 6 tablespoons warm water)

Preheat oven to 400 degrees. Mix together the dry ingredients (coconut flour through salt) together in a medium-sized bowl. In a small saucepan, over low heat, mix together the agave nectar, water, milk, buttery spread, and canola oil. Once the buttery spread has just melted, add the flax eggs to the liquid mixture, and then add the liquid mixture to the dry ingredients. Stir until smooth (note: you might need to add up to another 1/2 cup of water -- you want a batter that is a little thicker than cake batter).

Pour the cornbread mixture into a greased 8 x 8 pan, and bake for about 25 minutes, until it is golden brown on top, and a toothpick inserted into the center comes out clean.

Cool at least 15 minutes before cutting and serving.

Saturday, December 22, 2012

Cocoa Roasted Almonds

 Flavored nuts seem incredibly popular right now. Where I last worked, we often had a spicy chili-lime almond available, as well as toffee and mocha almonds. These made a nice snack, and, frankly can be pretty addictive (at least if you're me) -- but also a bit spendy, which is a problem on a small budget.

Fortunately, they can also still be (not too bad?) good for you because nuts are packed with protein and minerals. Almonds, in particular, work well because they're already naturally a little sweet and they don't seem to scorch as easily as some other nuts (walnuts, I'm looking at you!).

I had the chance to try straight cocoa roasted almonds after a martial arts seminar -- they're a great energy boost, and the small amount of quick sugar is nice after an intense workout. But, as Chelsey (whose post inspired the particulars of my version) points out, most of the commercial brands contains modified food starch of one type or another. I share her sentiment why?? modified food starch? Why?

I still use a highly processed flour here (sweet white rice flour), but I'm going to hold that that's still better than a modified version of a starch that's already starchy. It's not the by-product of a by-product. I opted for sweet white rice flour because it's already naturally a little sweet and very glutinous, which will help the cocoa powder bind with the agave.

That's right, this uses agave. It's vegan friendly, gluten-free, and has a lower glycemic count than the same snack made with many other sweeteners. If you have the option, buy your almonds in the bulk section of your local grocer -- it's probably cheaper than buying a bag of them and depending on your particular grocery store (and the time of year) the bulk almonds are likely a little fresher.

Cocoa Roasted Almonds
1 1/2 cups raw almonds
1 1/2 tablespoons agave nectar
1/4 cup cocoa powder
1 tablespoon sweet white rice flour (really, any flour would work)

Preheat oven to 275 degrees. In a small bowl coat the almonds with the agave nectar, stirring until the almonds are evenly coated. Set aside while you combine the cocoa powder and white rice flour in a separate small bowl. Add the almonds to the cocoa powder mixture and stir until the almonds are evenly coated. Spread the coated almonds onto a cookie sheet lined with parchment or a silpat. Roast for 25 minutes, stirring every 5-10 minutes so the chocolate doesn't scorch. Allow to cool completely before storing in an airtight container.


Monday, August 13, 2012

Polenta -- made from masa!

I spent the last year living on a very minimal budget. As in, after rent (which is modest and included utilities), I had slightly less than $200 for the month. Some months, because of odd jobs, I had a bit more. But this $200 needed to buy:
  • Gas (occasionally; mostly I bike)
  • Dog food (and her yearly vet bill) for a mid-sized dog
  • Toiletries
  • Food
Occasionally, I allowed myself treats. E and I, for instance, have made one of our housemate-bonding experiences a weekly trip to a fro-yo place where we sit and watch traffic violations and talk about our weeks, books, or television. Or, for example, sometimes I really just want to buy that GF Vegan cookie from the co-op that's so yummy, or to buy coffee out with a friend. Or I needed some article of clothing or pay an insurance. This year, there were also plane tickets -- one a mental break from my rough spring and the other to a funeral.

French Lentils with Marmalade over Masa Polenta
Fortunately, before this year, I had three years of grad school to practice living on a tight budget while still eating moderately well. If you're a regular follower of my blog, you've heard me talk about cooking on a budget before.

But now I'm probably moving soon and I'm trying to use up things I bought over the year. One of those: tamale masa. For a recent Sunday dinner, I made French lentils with orange marmalade and this polenta, made from masa -- all because these were things in my cupboard that I want (and need) to use before I move.

This is a soft polenta, but if you chill it over night, it gets pretty thick and I'm moderately sure you could make fried polenta cakes out of it (let me know how it works if you try it!). 

Masa Polenta
2 cups tamale masa
4 cups water
1 teaspoon salt, or to taste
Freshly ground black pepper, to taste

In a medium-sized pot or a large pan, combine the masa, water, and salt. Turn the heat on under the pan to medium and stir constantly until the masa has thickened enough that when you drag a spoon through it, it doesn't immediately run back together (with my masa, this took about 10 minutes). Adjust salt if necessary, and grind in some black pepper. Serve.

Wednesday, August 8, 2012

Watermelon-Basil Salad

So, as regular readers might remember, I joined a CSA (community supported agriculture) this year with the hope that, in addition to supporting the local foods movement, I would also be forced into the kitchen more to actually cook and be inventive with food, something I find hard to do when I'm only making food for myself.
Watermelon Basil Salad

To some degree this has worked -- but you've probably notice a serious lack of posts recently. That's because I've reverted back into "hm, let me just saute these veggies together that could more or less go together..." or eating raw food (which is fine, but not a particularly thrilling blog post).

Sundays are different. Sundays, I actually make real food because E and I have a couple of friends over. That inspires me to cook (or at least be slightly more creative in the kitchen). It's nice to have something that resembles a family dinner once in a while.

This past Sunday, one of our friends brought a lovely cucumber salad, and I asked our other friend who usually comes to bring a seedless watermelon so I could create a watermelon-basil salad. Cool salads sounded particularly good since we're in the middle of a hotter-than-normal period of the summer. I based this salad off the first recipes that came up on Google under "Watermelon-Basil Salad" that didn't have feta. I wanted a vegan salad.

This recipe is super flexible, so I'm not providing amounts (though I do provide estimates below the recipe if you want to start with an approximation). Some people might like basil more than others (or your particular basil might be stronger/milder). The basil I used came from my CSA and this week it was Genovese. I asked my friend to bring a seedless melon because that made my job simpler (and they're cheaper at the store this week). If you prefer (or have) seeded watermelon, use that -- just remove the seeds as much as possible in advance or give it a good stir right before serving to push any seeds that have come loose toward the bottom of the bowl.

Watermelon-Basil Salad
Seedless watermelon, cubed
Basil, chiffonaded
Salt
Ground black pepper

Place all ingredients in an appropriately sized bowl and stir well. Let rest at least 15-20 minutes and stir again before serving.

That's it! Some recipes use vegetable oil, but I don't see the point. The salt will cause the watermelon to release a lot of liquid, so you may want to opt for serving this with a slotted spoon, but that's entirely up to you. Allowing the salad to sit for 15-20 minutes provides the opportunity for flavors to mingle.

Because I told you I'd provide estimates of quantity (this could have served 6):
1/2 medium-sized seedless watermelon
1/4 cup (tightly packed) basil
1/2 teaspoon salt
1/2 teaspoon black pepper

Thursday, June 14, 2012

Garlickly Lambs-quarters with Orange Juice

In my CSA box, I found lambs-quarters, which excited me because I'd read about them in my foraging books, but never tried to pick them (or find them for that matter). Some people apparently don't like them very much because they can have a strong flavor -- though not as strong as spinach, and keeping that in mind, I decided to try putting them together in a way that would hide that strong flavor if I found it unpleasant. I also decided to make only half the lambs-quarters I received so that if I didn't like them I didn't have to eat a lot of them and if I did like them, well, I'd have some leftover.

I should mention that other common names for lambs-quarters include goosefoot (apt, based on leaf-shape) and pigweed (because pigs like to eat it). According to Edible and Medicinal Plants in Wild (and Not So Wild) Places, lambs-quarters were brought to the United States from Europe. It usually grows 3-5 feet high, has no odor, and is very common. It does well in poor or disturbed soil, so look for it in overgrown fields, vacant lots, and (unsprayed) urban parks. Apparently it dries well and can be easily reconstituted (something new to try, perhaps).

So, when I prepared my lambs-quarters, the reasonable thing to do, it seemed, was to continue to use the ingredients I received from my CSA share -- plus add a little frozen OJ concentrate that I tend to have in my freezer. This dish turned into just enough for a small side dish and I loved it. I love the rich, green-earthly flavor, the tenderness of the plants, the way they smelled cooking. If you can get your hands on some lambs-quarters, do it. Then try this recipe. If you absolutely can't get your hands on them, you can use spinach. But go find lambs-quarters. Now.

Garlicky Lambs-quarters with Orange Juice
1 teaspoon oil (I used sunflower)
1/2 large garlic scape, chopped
2 tablespoons spring onion, chopped
1 large handful lambs-quarters, coarsely chopped
2 teaspoons frozen OJ concentrate
Dash salt
1/2 teaspoon ground black pepper

Heat the oil in a medium-sized skillet over medium heat, then add the garlic scape and onion.
Garlic Scape & Onion

Saute 1-2 minutes, or until onion becomes translucent. Add the lambsquarters, orange juice, salt, and pepper and saute another 1-2 minutes, until lambsquarters wilt. Serve immediately.
Just before serving

Wednesday, June 13, 2012

CSA Pickup 1 - plus CSA Salad with Garlic Scape Dressing

I picked up my first CSA share just the other day and was delighted with my produce -- not only was my produce beautiful, I found way more of it in my bin than I expected! Here's what I got:
First Pickup from my CSA
  • Green Romaine Lettuce
  • Red Butterhead Lettuce
  • Red Russian Kale
  • Carrots
  • Japanese Turnips
  • Kohlrabi
  • Spring Onions
  • Sugar Snap Peas
  • Lambsquarters (so excited about this)
  • Edible flowers (caledula -- the yellow & orange ones; bachelor buttons)
  • Garlic Scapes
My CSA also sent along a recipe to encourage me to use the garlic scapes (when I joined last week, they gave me a handful for free since they weren't selling this year -- apparently people are hesitant to buy them, which makes me sad because they're one of my favorite things as far as early produce goes!). The credit for that recipe (below -- anything in parentheses are my suggested changes based on dietary restrictions) goes to HappyDirt Veggie Patch (unless, of course, they took it from someone they didn't credit in the letter included with my produce).

The opportunity to support local, chemical free produce farmers excites me because I've wanted to join a CSA for several years, but as I mentioned before, haven't felt stable enough in a place. This year, in part because I'm trying to shift to more conscious living in general, I decided that it was important to me to support local agriculture (especially because I have so little room for my own garden) and to make a real effort toward more creative cooking and eating more whole foods. Plus, there's the opportunity for surprise plants, like the lambsquarters (which is another plant you can forage in many areas) that I'll get to figure out how to use.

First CSA Salad
For my first dish with these lovely veggies, I decided to make a large salad using the butterhead lettuce because from past experience, I know that won't last as long. On top of that, I added some thinly sliced carrot (1), thinly sliced Japanese turnip (1) and chopped turnip greens, and then sprinkled some edible flowers over it all. My friend Caitlin joined me for dinner and brought tempeh for protein, which made this a lovely meal.


I made the dressing basically as directed, except subbing in agave for honey (since I was out of honey) and reducing the amount of oil by a fair amount. I can't stand salad dressings that leave my lips feeling greasy even though I know the chemistry behind salad dressings does actually dictate a certain amount (not sure that that is) of oil to the rest of the base. Those changes are not reflected in the recipe below, which is supposed to prepare about 1 cup of dressing -- enough for several salads!

Garlic Scape Dressing
2 garlic scapes, coarsely chopped
Equivalent amount spring onion, coarsely chopped
1 teaspoon honey (or agave)
2 teaspoons Dijon mustard, or similar brown mustard
4 tablespoons red wine vinegar
1 tablespoon lemon juice
dash salt
1/8 teaspoon fresh ground black pepper
1/2 cup extra virgin olive oil

In a blender, combine all ingredients, except the olive oil, and blend until smooth. With blender on low, slowly add the olive oil until well blended.

Monday, May 28, 2012

Green Smoothie - Spinach-Mint

It's summertime (well, in just under a month) and I've been craving the fresh fruits and veggies that come with summer for quite a while now. Fortunately, my farmers market is already up and running and the local produce is coming in at the co-op and my favorite grocery store.

But beginning during the winter, when E and I were swimming several nights a week, I started making green smoothies. They were the perfect end to a workout, especially since we got home late and I didn't really want to eat dinner beforehand. The nice thing about green smoothies like the the one here is that some greens really start coming in over fall & winter -- and if you're on top of your game, you can get these greens fresh, cook them up and then freeze them in little smoothie-portioned chunks. If you're not on top of your game (and I wasn't this year, since I moved), you can also just buy frozen greens. Or, if you've got a better blender than mine, use fresh greens.

The mint extract in this smoothie helps tone down any bitter qualities of the greens, and the banana makes it smooth. Normally, as regular readers of my posts know, I'm not a fan of using bananas. Even when I buy them organic/fair-trade they're not the best environmental decision. Other options for making it smooth include: nut butters, yogurt, or (possibly) oats (my friend Marissa, over at We*Meat*Again just wrote about this possibility). 

If you have it on hand (which I do now--pineapple mint, if you're curious), you can also use fresh mint -- but it takes a lot more! The portions suggested below are just suggestions. If you think it needs to be sweeter (this may depend on the ripeness of your banana as well as your personal tastes), add some agave, honey, or other natural sweetener of your choice. Sometimes my smoothie comes out a little thick -- if this happens, just add a little water or more milk and that should solve the problem beautifully

Spinach-Mint Smoothie
1 cup almond milk (or other milk of your choice)
1/2 cup frozen spinach
1 large frozen banana, slightly thawed (again, unless you have a super-awesome blender -- which I don't)
4-5 drops mint extract or 1/4 cup fresh mint leaves, packed
1/4 cup chocolate chips (optional)

Add all ingredients to a blender, and blend until smooth. If you don't plan to drink it right away, store in a container that you can shake up later (in case of separation) and store in refrigerator.
Green Smoothie in a peanut butter jar

Wednesday, January 25, 2012

Quick & Convenient Cranberry Sauce

Making a couple nights ago for E and another friend, I wanted to include a bit of color -- and to make the meal feel a little fancier than rice & beans (posts on this later). I have a ton of cranberries in the freezer (and plan to buy more) and thought a cranberry sauce would be lovely to go with -- color, a bit of tart flavor to go with slightly spicy beans, and plenty of all those good things that come from cranberries. And when I paired it with a bit of guacamole from an avocado I've had for a while and which finally ripened, I thought the presentation was pretty lovely.

But the cranberries: I also had a bit of frozen raspberry-lemonade in the freezer, from when a transient friend stayed here for a few nights and didn't want to repack it (or forgot about it?) in his cooler. That's kinda like orange juice in the traditionally cranberry-orange flavors, but a bit more...fun. Or so I hoped.

Turns out, that's a pretty okay combo and this cooked up, over medium heat in about 15 minutes. It didn't cook so long that the cranberries collapsed completely, which was also nice. Plumpish cranberries in cranberry sauce are, well, nice.

Cranberry Sauce
1/2 pound fresh cranberries
1-2 tablespoons (to taste, I used about 1 1/2) frozen raspberry-lemonade concentrate
2 tablespoons water

Combine all ingredients in a small sauce pan over medium-high heat for 3-4 minutes and then reduce heat to medium, stirring frequently, until the cranberries are soft, but retain their shape (about 15 minutes). Serve hot or cool.

Note: You can also keep this over "warm" for a while if you want, but make sure to check it from time to time to see if you need to add more water, so that it doesn't scorch to the bottom. You could cook it down for a while to create jam or preserves, if you wanted, but you will want to make sure that if you go this route you stir it often enough that it doesn't burn as the water evaporates.

Saturday, January 14, 2012

Toffee!

Now that we've all had a little time to recover from the sugar-shock of the winter holidays, let's talk about candy. Specifically, toffee. I first had a variation of this toffee when a co-worker brought it in to a staff meeting. Hooray for buttery, sugary goodness during the holidays -- or something like that.

Toffees are made by boiling sugar (or molasses, apparently) with butter. The version presented here is akin to English toffee -- which according to my research pretty much just means that it uses almonds. The sugar-mixture needs to reach "hard crack" stage for hard toffees, which is what this recipe creates. This means getting the heat up to about 300-310 degrees Fahrenheit, so please be careful when you make this recipe. It needs attention, a lot of stirring (or more effectively, whisking), and precision. However, I label it "easy" because it doesn't take long and it's pretty forgiving if you err on the side of not getting it hot enough. If you scorch your sugar, I can't help you as much.

My version actually doesn't use almonds because almonds aren't very much in my budget -- and because I'd rather just eat the almonds I happen up (my current bag of almonds was a generous gift) than toss them into toffee. That being said, I've made this now with cashews "bits and pieces" as the store calls the cheaper cashews (cashew brittle style) and peanuts (very much like peanut butter), as well as chocolate covered. I also add vanilla, which the original recipe doesn't call for, mostly because I love the smell of butter cooking with vanilla and it adds just a hint of flavor at the end.

Let me tell you about my toffee "oops!" that happened with the last batch I made, specifically to send to a friend. I haven't been able to find my candy thermometer, even though I'm pretty sure it moved with me. And I don't have a different type of food thermometer. That means I have to eye-ball the confection getting to the right temperature. Fortunately, I've made candies before  and successfully made this toffee twice without thermometer. Unfortunately, I felt rushed and impatient. I didn't let enough of the water boil off or allow the temperature to climb quite high enough. The result? Even after the toffee sat in the freezer for several hours while I played frisbee with a friend, it didn't get hard. I felt grumpy.

I broke the toffee into bits and threw it back in my pan with just a sprinkle of water to encourage it to dissolve, then heated it slowly (medium heat) until it melted entirely before turning the heat back up to medium-high and stirring often as it bubbled furiously at me. The toffee bits had already been coated in chocolate, but this didn't seem have a negative effect. The next time I spread it on my cookie sheet and stuck it in the freezer, voila! I had hard toffee, just like I wanted--even if it did look a bit dark from the chocolate that also got stirred in.

So, the moral of that story: if it's under-cooked after you freeze it, just melt it and cook it again. The toffee would have been fine if I wanted soft, slightly-grainy pralines you so often find in certain parts of the southwest -- but wouldn't ship as well.

Since I don't keep corn syrup around, I used agave nectar. You could also use Lyle's Golden Syrup or honey.

Toffee Brittle
1 cup sugar
3 tablespoons water
1 teaspoon vanilla
1 tablespoon agave nectar
1/2 pound butter
1/4 teaspoon salt

Optional
5 ounces slivered almonds, OR
3/4 cup peanuts, cashews, or other nut/seed
Chocolate (about 2 ounces)

In a heavy-bottomed, medium-sized saucepan, over medium-high heat, combine sugar, butter, vanilla, water, and salt. Stir frequently until everything has melted and the sugar has dissolved. As the mixture begins to bubble and rise within the confines of the pan, switch to a whisk if you have one (this will pop more of the bubbles) and whisk rapidly until the mixture begins to thicken, darken, and pull away from the sides of the pan*. Stir in the nuts, if using, and leave on heat, continuing to stir for another 1-3 minutes. You want the mixture moderately thick.

Pour onto a baking sheet lined with parchment paper and smooth with the back of a spoon or spatula. Break up bits of chocolate and drop them on top, if using. They should melt pretty quickly**. Place baking sheet in freezer and allow to freeze until hard, about one hour. Remove from freezer, and (carefully) break toffee into bits using your hands. Store in an air-tight container.

*If you have a candy thermometer, stick it in as you're just starting to melt everything together and adjust it so that it does not touch the bottom of the pan. When the thermometer reaches just below 300 degrees, add the nuts.


**Hershey's candy bar melts really well, but -- it's Hershey's. I used Hershey's kisses twice because E had so many around the house from Christmas, but the last time I made it, I topped it with an organic FT dark chocolate. It didn't melt as well, but worked fine.
Toffee with Chocolate & Peanuts

Wednesday, January 11, 2012

Coconut Ice Cream in a Bag + Regular Ice Cream in a Bag

At work, later this month, we'll run a quick Make-Your-Own-Ice Cream activity. We'll do some "make ice cream in a bag," and some with liquid nitrogen. It should be pretty fantastic. Today though, I'm only going to talk about making ice cream in a bag.

The process is pretty simple -- add milk/cream, sugar, vanilla/cocoa together in a zip-close sandwich bag & seal it, put that bag in another sandwich bag & seal it, and then put those in a freezer bag (I use quart, but most website seem to suggest gallon-sized) and add ice (you'll need a fair amount) and rock salt. Seal the freezer bag and shake until you get ice cream the consistency of soft serve. It takes 7-10 minutes and gloves come in handy because your hands get cold.

Coconut Ice Cream
You'll notice the double-sandwich bagging. If you buy cheap baggies (and even if you don't) there's a good chance one of them will break. Who wants salty ice cream? Probably not many people. The double-bagging helps prevent that, though it's not fool-proof either. When I made my batch of coconut-milk ice cream, the bag definitely split (but I also added more than I'm telling you to add, which was probably part of it, since as you'll remember from science classes, things that are water-based expand when they freeze.

The difference between these, aside from the taste and lactose? The coconut milk ice cream turned out a lot...grainier...than the ice cream made from regular milk, especially after I let it get really cold in the freezer overnight. However, if you're looking for a lactose-free option, it works pretty well and tastes a lot like the commercially-made coconut-based ice creams.

This is a fun recipe to make with kids and is something that you can do on your own (at least it's a little workout before you eat your ice cream? At least you know what goes into the ice cream?) if you're just having one of those days when something cold and creamy really appeals. 

Coconut Ice Cream in a Bag
1/2 cup coconut milk (because this is what I usually buy -- vanilla would work fine too)
1/4 teaspoon vanilla extract
1 tablespoon sugar

Rock Salt
Ice cubes (I used about 1/2 pound, maybe a pound of ice)
1 quart-sized freezer bag
2 zip-top sandwich bags

Pour coconut milk, vanilla, and sugar into one zip-top sandwich bag, squeeze out most (but not all) of the air, seal. Place this bag in the second zip-top sandwich bag, again squeezing out most (but not all) of the air. Place both of these bags into the freezer bag, add ice to pretty much fill the bag (you may need to add more ice after some of it melts if your coconut milk hasn't turned into ice cream) and add 2 tablespoons rock salt. Seal the freezer bag and shake the bag vigorously until the milk turns the consistency of soft serve (about 7-10 minutes; add more ice and rock salt if necessary). Remove the bag with the ice cream in it from the other two bags, cut off one corner, and squeeze into a bowl to serve.

***


Ice Cream in a Bag
1/2 cup whole milk
1/4 teaspoon vanilla extract
1 tablespoon sugar

Rock Salt

Ice cubes (I used about 1/2 pound, maybe a pound of ice)
1 quart-sized freezer bag
2 zip-top sandwich bags

Pour milk, vanilla, and sugar into one zip-top sandwich bag, squeeze out most (but not all) of the air, seal. Place this bag in the second zip-top sandwich bag, again squeezing out most (but not all) of the air. Place both of these bags into the freezer bag, add ice to pretty much fill the bag (you may need to add more ice after some of it melts if your milk hasn't turned into ice cream) and add 2 tablespoons rock salt. Seal the freezer bag and shake the bag vigorously until the milk turns the consistency of soft serve (about 7-10 minutes; add more ice and rock salt if necessary). Remove the bag with the ice cream in it from the other two bags, cut off one corner, and squeeze into a bowl to serve.

Monday, December 19, 2011

Peanut Butter Blondies (gluten-free)

 
You'll have to trust me on this one. I've been eyeballing black bean brownie recipes for a while (I was reminded of them after reading about garbanzo bean brownies by my friend Victoria over at Easy Gluten Free). And for longer than that, I've been meaning to make a pot of beans (either black or pinto) and haven't gotten around to it--I want to start a crockpot of beans one morning and come home to it in the evening. Why haven't I? Good question. You'll know when I make them, I'm sure.

This recipe came about because I intentionally bought black beans so I could make black bean brownies. But when I got home, I discovered I hadn't bought black beans after all, but pinto beans. Sigh.

Look at the chocolate and peanuts!
Okay, I'm sure pintos would've worked just fine in brownies. They're pretty mild, after all. But black beans definitely wouldn't work in blondies and since I had a set of beans that would work, I decided to go with it. The pinto beans replace the flour in this recipe and add protein, without leaving a bean-y taste (at least if you've rinsed them well.). You'll notice in the picture, I have a carton of coconut milk--but I decided once everything was mixed together that it didn't need the couple of tablespoons of milk called for in the recipe I based this on. 

These blondies are also pretty low fat (for peanut butter blondies). I used up the last tablespoon of butter E and I made recently, mostly to get it out of my fridge, and because I wanted to up the peanut butter flavor by increasing the peanut butter from the 1/3 cup called for in the original recipe to 1/2 cup.

These blondies, when warm, practically melt in your mouth. They're super-moist, and nicely peanut buttery. The peanuts and chocolate on top add a nice bit of spunk (both presentation and flavor-wise), but if that's not your thing, then by all means leave the topping off.

Peanut Butter Blondies
1 can pinto beans, well rinsed
¾ cup granulated sugar
1/2 teaspoon baking powder
1/4 teaspoon salt
1/2 cup creamy peanut butter
1 tablespoon butter, melted and cooled slightly
1 teaspoon vanilla extract
2 large eggs, lightly beaten
2 tablespoons ground flax
1/4 cup semisweet chocolate chips or chocolate chunks, chopped

2 tablespoons unsalted peanuts, chopped
Cooking spray

Preheat oven to 350°.

Place the pinto beans and sugar in a food processor and process until smooth.
Blended Pinto Beans & Sugar
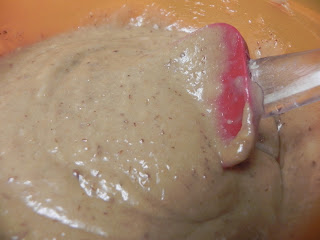
Transfer into a medium-sized bowl and add the baking powder, salt, peanut butter, butter, vanilla, eggs, and flax and combine well.
Combining well
Pour into a lightly greased 9” pie pan (or 8 x 8 baking dish).

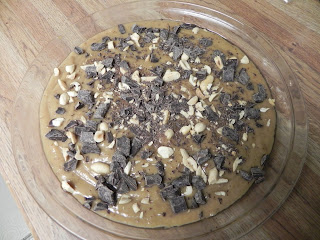
Sprinkle the chopped peanuts and chocolate chips on top of the batter.
Adding Chocolate and Peanuts
Bake at 350° for 25 minutes or until a wooden pick inserted in center comes out with moist crumbs clinging. Cool in pan on a wire rack.
Yum!

Tuesday, December 13, 2011

Tuxedoed Oreos (repost)

I originally published this recipe -- by no means original -- a year or so ago, but since it's so appropriate for the holidays, I wanted to post it again. I just made these during a cookie-making party E and I held, and here are pictures of the little beauties.

They're best if they've had a day to marinate -- the filling becomes creamier, more like a bon-bon. You can keep them in the refrigerator, or leave them on the counter (but only for a couple days). I recommend keeping them in the refrigerator, if possible. I'll be making more for a holiday party soon.
From the first snow of the season

It's not absolutely necessary that you use oreos -- a chocolate-vanilla wafer cookie generally (and generically) works well, as long as you like the flavor of the initial cookie. Oreos, however, are vegan, and you can use vegan cream cheese if you want to make these vegan (though if you choose this measure, make sure you choose a vegan white chocolate -- they do exist, but some types contain milk products). These are definitely not gluten-free.


They are easy though, and pretty much no-bake (okay, they are no bake, but a microwave or stove top is useful for melting the white chocolate), which makes these an activity kids can help with easily!


Oreo Bon-Bons

1 pound reduced-fat oreos
1 8-ounce block neufschatel (reduced fat cream cheese)
Powdered sugar for coating OR
White Bark coating (about 1/2 pound) (recommended)

Smash the oreos so no huge chunks remain. This can be done with a gallon bag and a rolling pin--just be sure to get all the air out of the bag before you start hammering it. Or, you can toss them in your food processor and pulse it to break up the cookies. In a large bowl, using a fork, mix together the cream cheese and oreos until the color is even and it starts to come together to form a ball.

Roll small, equally sized balls of the cookie-cream cheese mixture. These can be any size you want, but it's easier to coat these if they're evenly sized--especially if you're using the white bark coating. Chill the small balls for an hour or two (stick 'em in the freezer), until firm.

Spread the powdered sugar in a shallow dish, if using, or melt the white bark coating (follow instructions on the package, but generally you can do this in a double-boiler or by microwaving it on HIGH for 1 minute and then stirring. Microwave on HIGH for additional 15-second intervals until it is completely melted).

Dip or roll the balls through the powdered sugar or melted white bark. Let set and then store in refrigerator.

Wednesday, November 9, 2011

Homemade Horseradish

I was recently gifted horseradish. What, I wondered, does one do with horseradish root? Aside from make it into ground horseradish root, pickled with vinegar and salt. A quick internet search returned the result "not much." One can also make it into a relish with beets and onions, apparently, or turn it into an apple soup. But mostly it acts as a flavor enhancer and is used moderately sparingly. The apple soup uses 1/2 cup (pretty impressive--maybe I'd make it if I had apple juice around and let you know how it is). But generally, it isn't meant to be the main flavor.

That's not too much of a surprise. Horseradish is super-hot in the same kind of flash-in-the-mouth way of wasabi--not too much of a surprise, since they're in the same family, Brassicaceae and are used (and prepared) in moderately similar ways.

A couple of fun facts about horseradish:

  • It will tarnish silver.
  • 10 tablespoons fresh = 6 tablespoons dried, powdered
  • The young, tender leaves of the horseradish plant are edible and can be used in salads.
When I was in my early 20s, a friend gave me horseradish from her garden--horseradish to transplant, not to eat. She advised me to put it in a large container, rather than in the ground, because apparently horseradish spreads pretty crazily (at least if allowed to go to seed). A quick google search turned up close to 140,000 results. I did this and not long after had a lovely horseradish plant. I didn't know what to do with it though and after it chocked out the lettuces I'd planted along with it, I just let it die in its container. That being said, I don't think most people will need as much horseradish as is easily produced, so if you're considering planting it, you might also consider who you want to give it to when its ready to be harvested come autumn!
Horseradish about to be pureed
I pureed the horseradish with a little water, salt, and vinegar. I'm not reposting the recipe I used, because nothing was an exact, measurable amount. But basically, these are things that every "make your own horseradish" recipe called for, a pickling amount. Because that's, in part, how you preserve horseradish root--by pickling it.

Monday, November 7, 2011

Product Review: Sonoma All Natural Gluten-Free, Wheat-Free Wraps in Ivory Teff

Since going gluten-free, I miss flour tortillas. Really good ones, the type that melt in your mouth, the type patted out by hand at The Original Donut Shop on Fredricksburg, in San Antonio. The type that Chevy's restaurant chain makes on tortilla machines. The type you can buy at HEB groceries--usually still steaming--if you live in Texas. I even miss the less-than-stellar fresh flour tortillas I'd occasionally make (mine usually turned out overworked, but I was getting the hang of it, right about the time I figured out I should probably avoid gluten).


To fully understand this you should know: for me growing up, Mexican food was comfort food. We were homesick Texans--and for a time, in grad school, I was a regular follower of Homesick Texan's blog. My family made tacos on the weekends. Pretty much every weekend. We made tamales and fresh salsa and huevos rancheros and moles. We ate fish tacos and occasionally smoked things in plantain leaves. We made corn tortillas and sometimes drank horchata. You've probably got the point. Even when we stopped eating as much Mexican food--we replaced it with Indian, to some extent, we still probably had something Mexican once or twice a week. Rick Bayless visited our house weekly via his public television show and my dad tried his recipes. We would find new favorites and replace old ones.

So giving up flour tortillas, in a way, was hard. Fortunately, I'd also moved to the Midwest, where I couldn't seem to find fresh flour tortillas unless I'd made them myself. That made it a little easier just because I wasn't eating as many.


When I moved again, I found La Tortilla Factory's Sonoma brand ivory teff wraps (they also apparently come in dark, but I haven't seen those at my local grocer). The full name is a mouthful and in the title for this post, so I'm not repeating it here. These wraps, when heated, become very soft, smooth and pliable, have a rich, complex flavor and just enough chewiness to be reminiscent of gluten. They almost melt in your mouth and leave a slightly sweet aftertaste, the way a good flour tortilla will. When they're cold, they're less pliable. I might almost describe the mouth-feel as a bit rubbery. Not in a bad way, but in a way that makes me just not want to eat them cold if I have the option to eat them hot. The flavor is less complex because there's no steam rising to your nose, helping you smell the grains.

These wraps--really not tortillas, unless you subscribe to the "burrito size" jumbo tortilla idea so many people seem fond of right now--only come in a size I'd call "too large." I never want a full one, which is good since a 6-pack of the ivory teff wraps runs $4-5 depending on which store I buy them at. Not outrageous (at least by market standards) for an organic, gluten-free product, but pretty expensive on my budget.

These wraps, like many gluten-free products, start with a lightweight flour (usually either cornstarch or tapioca flour--in this case, tapioca), and also include teff and millet flours, and guar gum--plus a number of other ingredients, including among other things: soy lecitihin (this is in almost every processed food you eat), canola oil, corn syrup solids, and "colloid powder" which is cellulose gum, maltodextrin, carrageenan), honey. You can just taste that note of honey if you're eating these wraps plain (but heated), or with a mild spread, such as cream cheese.

If you can't find these wraps in your local store, that might be because their distribution outside of Northern California is spotty, at least according to the website. If you're craving flour tortillas though, and are gluten-free, it's worth talking to your local grocer(s) and seeing if they can get their hands on some. I don't eat mine particularly quickly, if you're concerned about that, and they store just fine in my refrigerator, as long as I'm careful to reseal the bag properly. I suspect that like many flour tortillas--and an obscene number of gluten-free products--these wraps also probably freeze pretty well, but I haven't given it a shot yet.