Pages

Showing posts with label side dish. Show all posts

Saturday, November 17, 2012

Masa Harina Cornbread (GF)

First, let me apologize for the lack of pictures in this post. You'll have to just trust me.

When I started to make black beans the other day (now in March, when I was still eating animal products, since I didn't remember to take pictures the next time I made this either), I realized I didn't have enough rice. Oops. Oh well, I had some masa harina (tamale style, though I'm not convinced it really makes a difference). I poked around on the internet until I found a masa harina cornbread recipe. That recipe, apparently, didn't come out very fluffy but had a strong corn tortilla taste. 

To counteract the flat nature of the cornbread, I didn't use a preheated skillet and I increased the baking powder from 1 teaspoon to 1 tablespoon. I also used melted butter because, growing up in the south, I never once saw a cornbread recipe that didn't use melted butter. I reduced the amount of butter and added some olive oil (because why not), but you could certainly use all butter if you were so inclined. It definitely leaves a lightly buttery flavor in the cornbread at this ratio. I increased the amount of honey because 1 tablespoon seemed too low and added a dash of cinnamon for a little extra complexity--and to complement the flavors in the black beans.

The cornbread that came out was light, rather than dense, and had a nice corn flavor without being overwhelming. I wasn't really reminded of "corn tortillas," probably because I added a little extra sweetener, and because of the cinnamon.

I let it cool for about an hour before I cut into it, so I can't attest to how well it will hold together still hot, but at "lightly warm" it held together beautifully, without adding any binders other than the ones you see. I saw one variation similar to this one, meant to be gluten-free, that added xanthan gum and an extra egg--lots of extra binder in other words. Not necessary and that just increases your overall cost, so I recommend against it. Plus, let's face it, it increases the "tastes gluten-free" factor. 

Masa Harina Cornbread
1 1/2 cups masa harina
1/2 cup brown rice flour

1 tablespoon baking powder
1 teaspoon salt
1/4 teaspoon cinnamon (optional)


2 tablespoons melted butter
2 tablespoons honey
1 tablespoon olive oil

2 eggs, beaten

1 1/2 cups milk


Preheat oven to 400 degrees. 

In a large bowl, combine the dry ingredients. Add the butter, honey, and olive oil and stir to combine well. Add the eggs, mix, and then add the milk. The batter should appear moderately wet at first, but will quickly start to thicken. Pour into a greased pie pan and bake at 400 degrees for 10 minutes and then turn up to 425 degrees for another 15-20 minutes until golden brown on top.


Thursday, June 14, 2012

Garlickly Lambs-quarters with Orange Juice

In my CSA box, I found lambs-quarters, which excited me because I'd read about them in my foraging books, but never tried to pick them (or find them for that matter). Some people apparently don't like them very much because they can have a strong flavor -- though not as strong as spinach, and keeping that in mind, I decided to try putting them together in a way that would hide that strong flavor if I found it unpleasant. I also decided to make only half the lambs-quarters I received so that if I didn't like them I didn't have to eat a lot of them and if I did like them, well, I'd have some leftover.

I should mention that other common names for lambs-quarters include goosefoot (apt, based on leaf-shape) and pigweed (because pigs like to eat it). According to Edible and Medicinal Plants in Wild (and Not So Wild) Places, lambs-quarters were brought to the United States from Europe. It usually grows 3-5 feet high, has no odor, and is very common. It does well in poor or disturbed soil, so look for it in overgrown fields, vacant lots, and (unsprayed) urban parks. Apparently it dries well and can be easily reconstituted (something new to try, perhaps).

So, when I prepared my lambs-quarters, the reasonable thing to do, it seemed, was to continue to use the ingredients I received from my CSA share -- plus add a little frozen OJ concentrate that I tend to have in my freezer. This dish turned into just enough for a small side dish and I loved it. I love the rich, green-earthly flavor, the tenderness of the plants, the way they smelled cooking. If you can get your hands on some lambs-quarters, do it. Then try this recipe. If you absolutely can't get your hands on them, you can use spinach. But go find lambs-quarters. Now.

Garlicky Lambs-quarters with Orange Juice
1 teaspoon oil (I used sunflower)
1/2 large garlic scape, chopped
2 tablespoons spring onion, chopped
1 large handful lambs-quarters, coarsely chopped
2 teaspoons frozen OJ concentrate
Dash salt
1/2 teaspoon ground black pepper

Heat the oil in a medium-sized skillet over medium heat, then add the garlic scape and onion.
Garlic Scape & Onion

Saute 1-2 minutes, or until onion becomes translucent. Add the lambsquarters, orange juice, salt, and pepper and saute another 1-2 minutes, until lambsquarters wilt. Serve immediately.
Just before serving

Friday, January 20, 2012

Oven Roasted Chickpeas

It seems like a lot of bloggers recently (the past year or two, anyway, if that really counts as recent) have written about oven-roasted chickpeas. They're a good, high protein snack, moderately cheap to make (especially if you're not buying a can of them--or if you get said can on sale), and you can flavor them a lot of different ways for different tastes. They store well for hikes or trips to the zoo, they're easy to eat with fingers (making them good for kids, or for road-trips), and they're (depending on what you put on them) mostly or very "whole" as in non-processed.

The first time I read about these was about two years ago. The first time I tried them: about 18 months ago. The first time I tried freshly made ones, with Annie, last spring. I thought she'd blogged about it -- but then I couldn't find it on her site.

The recipe below is for a savory (and very garlicky -- now there's a surprise) roasted chickpea. I started with dried chickpeas that I soaked for about 24 hours before cooking in lightly salted water. They cooked up very quickly though, about an hour and then roasted for about 40 minutes at 375 degrees--the same temperature I needed for baking brown rice. Convenient!

The chickpeas came out crispy on the outside, some a little soft on the inside, and because I live in a fairly dry environment, they didn't go soft again too quickly -- a complaint I saw others making on other blog posts.

Garlicky Oven-Roasted Chickpeas
12 ounces cooked chickpeas
1 tablespoon (or a little less) olive oil
1/4-1/2 teaspoon garlic powder (to taste)
1/4-1/2 teaspoon onion powder (to taste)
Pinch salt

Preheat oven to 375 degrees. Mix all ingredients together in a bowl and then spread on a foil- or parchment-lined cookie sheet. Bake  about 40 minutes, stirring 2-3 times during the cooking process to avoid scorching.


Wednesday, January 18, 2012

Baked Brown Rice with Red Pepper Flakes

I love Alton Brown's baked brown rice, in part because I've never screwed it up, and in part because it saves pretty well if I don't finish it. But I never want a full recipe, so I usually cut the recipe in half. And I add pepper flakes (and sometimes dried herbs) most of the time, because 1) they're super pretty and 2) they add nice flavor.

This recipe is also pretty easy in that it requires almost no attention once you pop it in the oven--as long as you don't forget about it. Another major plus, especially at the end of the work day. Here's how I do it:

Baked Brown Rice with Pepper Flakes
3/4 cup brown rice
1 1/4 cups water
1/2 tablespoon unsalted butter (I often use olive oil instead, and this would make it vegan)
1/2 teaspoon kosher salt
1 teaspoon red pepper flakes
1/2 teaspoon dried thyme/oregano/fines herbes (optional)

Preheat the oven to 375 degrees. Dump the rice into an 8-inch square baking dish, or into a small casserole dish (I use a tiny dutch oven). Add the butter, salt, pepper flakes, and herbs if using. Bring the water to a boil and then pour it over the rice. Stir to combine. Cover the dish tightly with foil or an oven-safe lid, and then bake in the oven for 1 hour. Fluff the cooked rice with a fork and serve.

Tuesday, December 27, 2011

Ambercup Squash with Forbidden Rice and Cranberries

When my local growers market was still running, I bought several varieties of squash I hadn't tried before, or had only tried once or twice. I've been slowly working through the pile and recently tried my ambercup squash. I hadn't tried this type before because in my grocery stores past, it was always just in a pile of winter squash with no flavor profile descriptors to be seen. Fortunately my growers market did a much better job with describing it -- though for the life of me, I can't remember what the sign near the bin of these squash said.

Forbidden Rice
I wanted to bake my squash and stuff it and so I looked at my ingredients and saw I had some forbidden rice (a black rice) I'd purchased from my co-op around the same time I bought the squashes. I decided to boil it up, adding split red lentils and some flavorings, and then stuff the rice mixture into the baked squash.

This recipe was nice, because of the small size of the ambercup squashes I used. I could cut them in half and stick two halves in my toaster oven (I could have also used my regular oven, but I didn't actually need to make all the filled squash right away), start the rice, and take the dog on a run -- and do all this after work. After 30 minutes, the squash was quite tender, the rice was ready for lentils and cranberries, and I only had a little bit longer to wait for dinner.

I made the conscious decision to make this recipe vegan, because I know at the beginning of the year, a lot of people make promises to themselves about the eating habits they will adopt in the coming year. My regular readers know I play with vegan recipes regularly, but if you're new to the blog this is a great recipe to start with -- it's savory, filling, and doesn't use (too many) bizarre ingredients. If you don't have access to forbidden rice, you could certainly use a short grain brown rice in a very similar way. Nutritional yeast, which provides a lovely cheese-y flavor without cheese, is available at most major grocery stores now -- but certainly in the bulk section of stores that focus on whole food approaches to eating and online. And this filling could go in a number of different winter squashes, be eaten on top of salad, or (in the summer, though you might have to sub out the cranberries unless you're like me and stock up on cranberries while you can or happen to live in a place that keeps them in the freezer section of the grocery store year-round) stuffed in a large tomato.

Without Sunflower Seeds
You can use fewer cranberries, but I really like cranberries and try to eat as many as I can while the season permits, hence the wide range. They'll definitely add a tart flavor to your dish if you use way too many, but I liked the lightly tart taste they provided for this meal.

After all the hyper-indulgent food from the past month, this dish is a welcome respite, and full of flavors that still match the season without being the flavors of the season.

Roasted Ambercup Squash with Forbidden Rice and Fresh Cranberries
2 small/medium ambercup squash, cut in half with seeds removed
2/3 cup forbidden rice
2 cups water
1/4 cup split red lentils
1/2-1 cup fresh (frozen) cranberries (to taste)
1/2 teaspoon red pepper flakes
1/4 teaspoon fines herbes
1/4 teaspoon salt
2-4 tablespoons nutritional yeast (to taste)
Shelled sunflower seeds, optional

Bake the squash, cut side down in a baking dish covered with a thin layer of water, for 30 minutes at 350 degrees then remove and allow to cool.

Meanwhile, combine rice and water in a small saucepan over high heat. When it boils, turn the heat to low and cover the pot. Cook 30 minutes.

After the rice has cooked for 30 minutes, increase the heat, remove the lid, and stir in the lentils, cranberries, and red pepper flakes. Cook 10 minutes and then stir in the fines herbes, salt, and nutritional yeast. Cook another 5-7 minutes to allow flavors to combine (add a small amount more water if the mixture begins to stick to the bottom of your pan -- you want it dry, but not so dry that it sticks).
Rice, lentils, cranberries, pepper flakes
Spoon the rice mixture into hollow part of the squashes and sprinkle the top with sunflower seeds, if desired.
(I like that they add a bit of extra crunch) Use salted and roasted, or raw, depending on your personal preference. Serve warm as a side dish, or a main meal.

Friday, November 25, 2011

A Very Veggie Breakfast

A quick reminder: the follower drive is still going on. Follow this blog and tell your friends to do so too!

I'm still in my "I want to eat veggies. Lots of veggies. Lots and lots of veggies. Especially green veggies..." stage and I've been making sautes and stir-fries for breakfast because the idea of sweet breakfast turns my stomach a little. In particular, I've been making some variation of this for breakfast almost daily, either using kale, chard, collards, or cabbage, depending on what I have in my refrigerator (aka, depending on what I got cheap at the growers market or the grocery store).

This is nice for breakfast because it's simple. I can start it after I walk the dog, even on days I'm feeling somewhat more rushed than I'd like in the mornings. I can steep my coffee (French press) while my food caramelizes, perhaps get my lunch ready to go on my weekdays, and even turn on my computer to check email and other things, all the while, giving my food an occasional quick stir so it doesn't burn.

As a post-Thanksgiving day breakfast, this is fun, light, and doesn't involve leftovers--which there will be plenty of, for many people, in the coming days (and weeks! So glad that's not me this year.). Plus, if you pair it with a piece of whole grain toast or other whole grain, then you will have plenty of stamina for shopping, cleaning, decorating, or whatever it is you do with your Black Friday. Usually, I would make tamales. This year, I work. But as I said, I've been eating this, or some variation of this, for several weeks and I find it a lovely way to start my day in a veggie-intense way that doesn't involve a smoothie (kinda cool for that this time of year, and the blender noise is obnoxious first thing in the morning).

In the variation of this depicted by the picture, I'm using Lacinato kale, which (apparently) has a long tradition in Italian cuisine. I'll have to remember that next time I buy some -- I definitely want something with tomatoes and Italian flavoring soon, probably also for breakfast. Lacinato kale is the same thing as dinosaur kale (my personal favorite name for it), Tuscan kale, and black kale among many other names. This is simply the kale that's looked best at both the growers market and the grocery store.

Sometimes I add mushrooms, because I really like them. I don't always want mushrooms though and so I'm not including it in the list of ingredients. When I do add mushrooms, I usually add 4-6 sliced (depending on the size) a couple of minutes after I add the onions, but before I add my greens. They add a lot of extra flavor though, so if you like mushrooms and have them on hand, I highly encourage you to use them.

This makes a great main dish breakfast for one or two, or could be used as a side dish for several. You could also use it for lunch or dinner, if you're so inclined (and I've been doing some of that too, just changing up what specifically I add).

I've also been craving, recently, baked beans on toast with stewed tomatoes. Maybe all these British shows E and I have been watching are rubbing off. Fortunately, or unfortunately, I don't usually have baked beans or stewed tomatoes on hand. Maybe though, I'll make that happen.

It's Good to Be Green (and orange!) Breakfast (or dinner)
1 teaspoon olive oil
1 tablespoon chopped ginger
1/4 cup chopped onion
1 clove garlic, sliced
1 carrot, sliced in coins, or 1/4 cup chopped sweet potato
1 bunch kale, chopped
Salt (I use about 1/4 teaspoon, at most)
Red pepper flakes (I use about 1/4-1/2 teaspoon)
Red wine vinegar (if you don't have this on hand, use lemon juice)

One or more of the following:
1/4 cup raisins, optional
1 teaspoon curry powder, optional
2 tablespoons chopped or slivered, toasted almonds
2-4 tablespoons goat cheese
1/2 thinly sliced, firm apple such as Arkansas black or pink pearl 

Heat the olive oil in a saute pan over medium heat. Add ginger, onion, garlic, and carrot. Stir to coat with oil and then only stir occasionally (every 2-3 minutes, perhaps) until the onions and carrots just begin to caramelize (about 7-10 minutes total, depending on your pan).

Add the kale (or cabbage), salt, and red pepper flakes. Saute until the kale begins to wilt and then add the red wine vinegar.

Remove from heat when the kale is mostly wilted and stir in the raisins, curry powder, almonds, goat cheese, or apple (I wouldn't recommend using all of these at once--but perhaps two or three, with a specific flavor-idea in mind as you're doing it), if using. Serve hot.

Wednesday, November 2, 2011

Brown Rice Risotto with Butternut Squash & Swiss Cheese

Sometimes, the road you're on seems to lead no where.  That's when
it's time to decide whether you want to forge your own path, or
just continue down the road and hope for a scenic detour.
(Photo taken October 25, 2011)
I wanted to make a brown rice risotto because I really, really like brown rice--at least as far as rices are concerned. And I've been enjoying the lemon risotto E's been making, but last time she made it, she said we needed to try another risotto recipe--and I thought she was right. I also wanted to figure out how to use up the remaining Swiss cheese I bought for another recipe.

The interwebs didn't tell me much about brown rice risotto that used Swiss cheese. Or about risottos that used Swiss cheese without using other cheeses. And for the brown rice risottos, many seemed to use cornstarch to make it creamy (ick! I'm sure it's fine, but it doesn't sound appealing). I finally a recipe that used just a splash of cream (okay, 1/4 cup) at the end to create this effect and I liked the idea (if nothing else, it would potentially smooth out the flavor at the end) and co-opted it, using milk instead--the milk we had in our fridge. Normally, I might use skim milk if I used a dairy-based milk at all.

I added nutritional yeast to increase the sort of bright flavor that parm usually lends to risottos, and because E said I'd have to be pretty sneaky to get her to eat it (second night in a row, E, second night in a row!). The Swiss lends a lovely nuttiness to the risotto, which complements the natural flavor present in brown rice and also the earthiness of the butternut squash (which for the record, pretty much disappears by the time it's been cooked with the rice, if you're the type that needs to hide veggies from your family).

Because brown rice takes longer to cook than white rice, this risotto takes longer to cook than risottos based on arborio rice. I cooked it while talking on the phone to a friend in the Midwest (who, when he learned I was adding cumin, encouraged me to make it into a palak dal--and I'll admit, it was tempting and maybe a soon-to-eat meal with E) for a while and the rest of the time while E sat our kitchen table talking with me and knitting. I think, from start to finish, I spent perhaps 90 minutes on it (including prep!), which makes it a very time-intensive meal, even for a risotto, but I think it was pretty worth it. It tastes rich and creamy (and is rich and creamy) and has a salty-savory kick that seems especially appropriate for autumn.

This could easily be served as a main dish (how E and I ate it) or as a side dish. Although it's time intensive, it's also pretty easy to make -- you stir often, but not constantly, you can get other things done if you want (such as making puppy chow, like I did). The key is mostly not to get too distracted because brown rice isn't as traditionally starchy as arborio, which is a big part of what makes risotto so creamy.

A quick note about the herb water -- I don't tend to buy veggie broth or keep it on hand. This was my variation of making a vegetable broth. The fines herbes, once the water begins to simmer, steep into a weak tea-color and the salt gets absorbed slowly into the rice. I didn't find it overly salty, but depending on your rice and on your Swiss cheese, you might need more or less.

The picture I was able to get isn't super-great -- the risotto didn't work with the lighting in my kitchen. If I remember to take a picture again next time I make it, I'll post a better photo!


Brown Rice Risotto with Butternut Squash  & Swiss Cheese
6 ounces frozen butternut squash, cubed
1 teaspoon olive oil
1 tablespoon butter
1/3 large onion, chopped
2 large or 3 medium cloves garlic, sliced thinly
1 teaspoon ground cumin
1 teaspoon red pepper flakes
1 1/2 cups long grain brown rice
1/4 cup nutritional yeast
6 cups water heated to simmering with 1 tablespoon fines herbes and 2 teaspoons salt
1/4 cup white wine (optional, but deepens the flavor)
3 ounces Swiss cheese, cubed
1 teaspoon lemon juice
2 tablespoons milk (preferably whole)

Saute the butternut squash in olive oil and butter, over medium heat, for 1-2 minutes, until defrosted and beginning to brown. Add the onion and garlic and saute until the onion turns translucent. Add the cumin and pepper flakes and saute about 30 seconds (until fragrant) then add the rice. Stir occasionally until the rice begins to turn white. Add 1 1/2 cups herb-water and the nutritional yeast to the rice. Stir constantly until the water has mostly been absorbed. Add the remaining herb-water 1/2 cup at a time, stirring frequently between additions, until the water has been used up and the rice is plump and tender. Add the white wine and stir until absorbed. Add the Swiss cheese and stir until the cheese is melted and well incorporated. Add the lemon juice, stir to incorporate, and then add the milk. Taste and add salt, if necessary. Serve hot.


Friday, October 28, 2011

A Little Medusa's What I Need (Garlicky Swiss Chard with Raisins)


Pan Muerto...well, kinda, not really
When I was a the Growers Market the other day, I couldn't resist taking pictures of a few of the more innovative Halloween-ish decorations. The bread coffins above were one of my favorites though and could turn into an easy Halloween decoration if you needed something last minute--or just something to help you get a little more in the spirit (I'md definitely in that category).

Also as regular readers know, the other day, I blogged about my little crocheted devil. I've also crocheted a tiny medusa, using the same yarns and the same book. She was a little more difficult to put together, mostly because of her snake hair and placing her head on her body. I think my medusa might be looking downward a bit much -- just look at this picture!

But, that's okay. She was a good project to work on during Knit at Nite and she went together quickly, which I appreciate in a project. It's nice, sometimes, to be able to sit down and finish the majority of a project during an evening knitting at a local bar with friends. Yes, really. As a friend I ran into on my way to the bar pointed out, "what a wild night." I think he realized how this sounded because he continued by telling me that he learned, when he lived in Norway, a woman wasn't a real woman until she could knit. Nice save, friend. Nice save.

Something about Medusa--probably her greenness and my vague sense of guilt about buying greens and then not eating them right away--did inspire me to cook up the chard I bought the other night though. This is a pretty simple recipe, perfect for a quick dish after a day at work. It's inspired from a favorite tapas that I first had when I was 13. If you're serving this to kids around Halloween, you could call it Medusa-hair (green snakey swiss chard with raisin eyes!).

This dish goes well with steamed brown rice drizzled with just a touch of tamari, or with roasted butternut squash. Or, if you're me and you don't have either of those on hand or easily prepared, you can also pair this with a nice bread (I used gluten-free, spread with a little bit of Tofutti cream cheese) and an heirloom apple, bought from my favorite farmers at the Growers Market, sliced.

Garlicky Swiss Chard with Raisins
Olive Oil (about 1 teaspoon)

3 medium cloves garlic, peeled and thinly sliced
1 bunch Swiss chard, thoroughly washed and chiffonaded 

Salt
Red pepper flakes, to taste (I used about 1/4 teaspoon)
1/4 cup raisins

Heat a small amount of oil in a pan over medium-low heat and add the garlic.
Uncaramelized garlic
Stir frequently, until the garlic has just begun to caramelize. It should only be a light golden color.
Caramelized Garlic

Increase the heat to medium-high. Add the Swiss chard and saute 4-5 minutes, until the chard begins to will.
Chard, just before I add it -- I don't remove the stems unless they seem particularly tough
 Add the salt and red pepper flakes, cook another minute. Add the raisins and cook 2 more minutes, stirring occasionally. Serve hot.

Garlicky Swiss Chard with Raisins


Thursday, October 27, 2011

Lemon-y Snickett Risotto

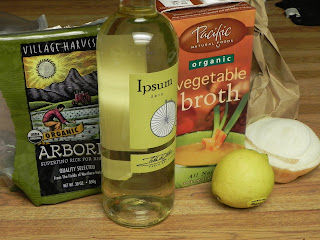
Ingredients, minus dairy products
It's almost Halloween! What better to do than to have Halloween-themed food (which I fully intend to do for at least a couple of posts--hopefully that intention will actually happen!)? This post is inspired by E's recent endeavors into a (wonderful) lemon risotto. She's made it a couple of times now and it seems worthy of sharing with others. I'm not sure which site she got it from originally, either, but I am going to try and write it up to best reflect what she does when she makes it.

So, what makes this risotto lemon-y snickett risotto? Honestly, not much. Okay, not anything. Totally unauthorized re-use of the name (hence Lemon-y with a hyphen and snickett with two "t's") BUT, this basic lemon risotto can be dressed up with little "lumps of coal" (aka black olives), reptile tongues (aka carrot curls), or fire flecks (aka red pepper flakes).
Risotto in Pot
E seems to have endless patience for stirring the risotto rice--but honestly this doesn't take that long to make, as far as risottos go. In the past, I made a risotto that took forever to cook. And I don't remember it being as tasty as this one. The original recipe calls for parsley, but we haven't used it yet. I imagine it would brighten up the flavor nicely and provide lovely little flecks of green to make it look even fresher (serpent scales to go with the theme of lemon-y snickett?). We also haven't used shallots, but instead just use a bit of yellow onion. I suspect that the lightly garlicky flavor of shallots would be beautiful in this dish, so if you can get your hands on it, you should definitely use shallot in favor of the onion. Don't skip the lemon zest. It'll taste fine without it--but you get an extra hit of lemon flavor whenever you bite into a zesty curl.

Like many risottos, this dish is rich. But fabulous. And I would happily make/eat it for breakfast if I wanted something savory/lemony one morning and had all the ingredients handy. I might also saute some mushrooms and add that, but E doesn't like fungus, so we haven't tried that.

Lemon-y Risotto
4 cups vegetable broth
2 cups water
1 1/2 tablespoons butter
2 teaspoons olive oil
1/2 cup onion, chopped
2 cups arborio rice
1/4 cup dry white wine
ZestingTools & Zest
1 cup freshly grated Parmesan cheese (about 3 ounces)
3 tablespoons lemon juice (at least!)
4 teaspoons grated lemon zest

Bring broth and water to a simmer in a large bot over medium heat. Reduce heat to low; cover to keep warm. Meanwhile, saute onions in the olive oil and butter over medium-low heat, until tender, about 6 minutes. Reduce heat to low, add the arborio rice; stir one minute. Add wine and stir until evaporated. Add 1 1/2 cups broth; simmer until absorbed, stirring frequently.

Add remaining broth 1/2 cup at a time, simmering until completely absorbed before adding more broth. This will take about 35 minutes. Stir in cheese, then lemon juice. Add zest just before serving.
Risotto with "fire flecks"

Monday, September 19, 2011

Snake Melon & Heirloom Tomato Salad

A friend recently gifted me a snake melon aka an Armenian cucumber. I looked at it, long and thin with pale green, ribbed skin, and said thanks and then wondered "what the hell do I do with this??" But, I like cucumber, which is what this (botanically speaking) melon tastes like and so I was pretty sure I could come up with something. I stuck it in my fridge and forgot about it for approximately a week.

Then I saw it again the other evening. It lay, accusingly it seemed, in my crisper (still crisp, by the way) and so I pulled it out. I'd picked up cheap, organic, heirloom cherry tomatoes from a local farmers market the day before and I resolved I'd put the cuke and the tomatoes together and come up with something to dress them up a bit.

Armenian Cuke aka Snake Melon
Armenian cucumbers, as I said before, are actually melons--muskmelons, to be exact, which puts them as a close relative to what Americans call cantaloupe. The Armenian cucumber is reputed to get a good slicing cuke (whatever that means--I don't think I've had an experience I would call "bad" slicing cucumber) and came from Armenia to Italy in the 15th century, at least according to one of the website I found online while researching this post. It's gaining popularity as an heirloom crop and supposedly grows well both on the ground and from trellises. All of this is wonderful, but there are almost no recipes for it online.

Here, I must admit I like Greek food. A lot. And although I only live a few blocks from a Greek restaurant, I don't think eating-out Greek food is in my near future. So, I poked through my spices and dried herbs, and as I already knew, I didn't have dill weed. Okay, new plan. Kinda. I wasn't ready to give up on my plans for Greeking-up my Armenian cucumber.

So, I chopped the Armenian cucumber and halved the tomatoes, then topped them with a locally-made European style yogurt, then gave it just a sprinkle of onion powder and black pepper. Greek? No. Delicious. I think so. I'm going to see if my friend has more of these cucumbers she'd be willing to part with -- something tells me, the way cucumbers grow (all ready all at the same time) she probably does.

Snake Melon (Armenian Cucumber) & Heirloom Tomato Salad
1 snake melon, approximately 24" long, quartered & chopped
15-20 heirloom cherry tomatoes, halved
1/4 cup plain European-style yogurt (this is a thin, runny yogurt), or to taste
Onion powder
Ground black pepper

Put the chopped snake melon and cherries in a bowl, then drizzle the yogurt on top. Sprinkle a dash of onion powder and a dash of black pepper, then toss gently and serve.

Serves 1-2.


Thursday, September 15, 2011

Scalloped Potatoes with Chevre

My roommate, E, and I made dinner together Sunday night. She wanted to make her scalloped potatoes with chevre (almost all the ingredients came from our growers market) and asked me to pick up something to go with them. I picked up broccoli crowns (which we steamed) and beets (because I like them and wanted some for the week), which I roasted. More on that later, in a separate post.

E had bought some lovely waxy potatoes from a local grower that were red on the outside with a pink ring in the flesh. After some research, I'm still not sure what type of potatoes these are (and she didn't remember what the grower told her), but I think they might have been red thumb potatoes. These potatoes had a very waxy coating that she had to scrub off thoroughly (it looked a little like she was peeling a sunburn from these potatoes), but after this coating was removed the potatoes had an absolutely brilliant crimson skin. She sliced them thinly, into circles, then layered them with chevre, threw on some whipping cream and topped them with double-seasoned breadcrumbs from a local bakery. Once the potatoes finished baking, the creamy base had turned just faintly pink and the potatoes were tender, but held their shape beautifully.

She didn't use a recipe or measure, so the recipe that follows is entirely my estimation and you should make adjustments as you see necessary (and to taste). We ate this as a main dish, but you could certainly serve it as a side dish.

E's Scalloped Potatoes with Chevre
5 medium, waxy potatoes, thoroughly scrubbed and sliced into 1/8" slices
6 ounces chevre
3-4 ounces milk or heavy cream
Dried basil
Garlic powder

breadcrumbs*
2-3 teaspoons olive oil
1/4 teaspoon garlic powder
1/4 teaspoon black pepper

In a 10" round baking dish, add one layer of the sliced potatoes and then spread a small amount of chevre on each potato slice. Sprinkle with a small amount garlic powder and basil. Top with another layer of potatoes and cheese. Repeat until all your potatoes have been used, ending with a layer of potatoes on top (we had three total layers of potatoes). Pour on the milk or cream. It should not cover the potatoes.

In a medium bowl toss approximately 1 cup of breadcrumbs with the olive oil, garlic powder, and black pepper, then spread the bread crumbs evenly over the top of the prepared potatoes.

Bake at 350 degrees for 30-35 minutes, or until bubbly and golden. Test to make sure the potatoes are tender before serving. Serve hot.

*E used a bread with rosemary incorporated into it already, which is why I referred to them as double-seasoned breadcrumbs. The hint of rosemary helped make the flavor of this dish bright, so consider adding a pinch of rosemary.

Steamed brocs, scalloped potatoes, and roasted beets
If you're making this gluten-free, use gluten-free breadcrumbs or leave them off entirely (though you might want to add a bit of garlic and black pepper to the milk/cream before you pour it over the potatoes--but then I just really like garlic and black pepper).

Tuesday, September 13, 2011

Salad with Saltwort, Fresh Berries, and Brie


My new farmers market has an abundance of things I've never heard of, but the one that first caught my attention was saltwort, aka Batis maritima. One of the local producers has carried this the past few weeks and the first week, the week I actually bought it (a sign said it went well in salads) I had trouble finding out anything about it on the internet.

Saltwort (aka turtleweed), according to the producer, grows in salt marshes. That was the knowledge I started off with--and I've found out since that it does particularly well after storms and can deal with water-logged soils for a long time, which makes it an early colonizer after devastating storms, like hurricanes. It's a succulent shrub that reaches a little over 3 feet in height. Apparently it grows better in less salty soil, which seems a bit ironic to me, since it likes salt marshes, but whatever. In the coastal, southern U.S. this is a moderately common plant (though not along all of the coastal areas). It also grows in Hawaii and California, as well as Central and South America. If you want to know more about it--such as the types of wildlife it attracts, there's plenty of information out there that doesn't actually say much at all. It attracts butterflies and has small flowers. It doesn't like shade. Et cetera. My definite impression is that most people don't know much about it--so if you know about saltwort and want to weigh in, I'd love your comments.

When I got home with my saltwort, I looked at it. It looked kinda like limp rosemary and tasted lightly salty when I picked off a couple leaves and popped them in my mouth. Salad was the suggestion I'd been given, so salad it was. I tend to trust what farmers say about how to prepare the things they're growing.

Certainly saltwort was too salty to stand alone in the salad, so I stripped the leaves off the woody stems and gave the saltwort leaves a base of lettuce. To dress up the salad, I added blackberries picked fresh from the backyard along with some of the heirloom tomatoes (also berries) I'd purchased at the growers market and some picked (and still warm) from the yard. And because I had it, and because I don't usually), I added some brie to the salad. I dressed it with a tahini-based salad dressing from my food co-op and was set with my pre-dinner salad.

I don't know where this might grow where I could actually forage it (my growers have cultivated this plant), but it's definitely a plant you can forage and in my attempts to get more people into the urban foraging movement, I encourage you to seek it out if you live where it grows!

Salad with Saltwort, Fresh Berries, and Brie
Note: The amounts below assume you're only serving yourself. Please increase accordingly for the friends that join you

Lettuce (I like salad and used about a cup and a half)
1/8 cup saltwort (leaves only), coarsely chopped
10-12 small tomatoes, halved
5 blackberries
1/2 ounce brie, cut into small chunks
Dressing

Layer the salad in the order listed above and serve. In the picture above I used golden currant cherry tomatoes (so sweet! so tiny!). In one variation of this salad, I also included a green-striped tomato, called Green Zebra with an unknown variety of orange cherry tomatoes.

(For more information about heirloom tomatoes, this site is wonderful, as is Dave's Garden.)

The tahini-based dressing I used, combined with these ingredients, went well with a glass of Viogner from a local vineyard.

Cheers!


Monday, August 8, 2011

Tortillas with Stone Fruit, Mixed Greens, Goat Cheese, and Sun-Dried Tomatoes

Okay, so strictly speaking the tortillas aren't critical. But they make a nice base for this light, simple summer meal. You could certainly use flour tortillas, but since I'm avoiding gluten and rice tortillas are really kinda expensive to buy, I'm featuring this using corn tortillas. The tortillas also make great absorber of stone-fruit juices.

The stone fruits, if you're not familiar with the term, include: nectarines, peaches, and plums among others. You can also include the almond, olive, cherries, and elderberries. Probably any of these things (except maybe the almond) could work in a variation of this dish. I've had this to eat a couple of days in a row now, which may speak less to it's goodness (though I do think it's good) than to my transient state of being. I don't want to have a lot of ingredients on hand, take up much room in other people's refrigerators, or feel like I'm weighted down by food. The sun-dried tomatoes and stone-fruits in this dish would make me think of summer even if I ate this at a different time of year (and thanks to the wonders of mass transportation of veggies, I technically could eat this any time of year, but I don't think I will).

Last summer, I made a ton of oven-dried tomatoes when I had a vendor who would sell them to me cheap (a large box of "cooking" tomatoes--meaning ones that were bruised, split, or otherwise ugly--for less than $5). But I haven't lucked out in that way this summer. Instead, I've been buying my sun-dried tomatoes from an Italian foods market for an incredibly reasonable price. Needless to say, I've used fewer sun-dried tomatoes this year than in previous years. Oh, how I yearn for the day when I have a garden of my own and a bunch of tomatoes! In this dish, sun dried tomatoes add a nice earthiness and color to the top of your salad-on-a-tortilla.

This Goat is Trying to Eat my Camera Strap
Marinating the stone fruit in agave, honey, or another sweetner allows the natural juices of the fruit to be released from the cells--the technique is called macerating and if this seems unfamiliar to you, this same technique is often used with strawberries meant to top waffles, ice cream, or angel food cake. For best results, you'll want to chop your fruit moderately finely (smaller than the fruit--peaches--I show in the pictures here).

When I make this dish, I think of my friend Brenna and her boyfriend, Will. This past November, they braved a wet, Midwestern late-fall day to trek two hours west with me to visit a goat farm. We all fell in love with goat cheese that day--I liked it already, but didn't realize that as goat cheese ages, it becomes "goatier"--the quality I didn't like in some goat cheeses.

Tortillas with Stone Fruit, Mixed Greens, Goat Cheese, and Sun-Dried Tomatoes
4 8-inch tortillas (I use corn, but you could use rice, flour, or another type)
4 peaches, plums or nectarines, or a combination, chopped and marinated in 2 teaspoons agave or honey for at least 10 minutes
8+ ounces mixed greens (feel free to use more, especially if you're opting out of tortillas entirely)
2 ounces soft goat cheese*
3-4 sun-dried tomatoes, cut or sliced into very thin strips
Balsamic vinegar

Place each tortilla on a plate. Spread 1/4 of the chopped fruit on each tortilla and allow to rest for 5 minutes, so that the juices begin to saturate the tortilla. (If you're not using a tortilla, you might want to place the chopped fruit on top of the salad greens).


Add 1/4 of the mixed greens on top of the fruit, on each plate, then crumble 1/2 ounce of goat cheese on top of the greens.

Arrange the sun-dried tomatoes over the greens and goat cheese, then drizzle with some balsamic vinegar, to taste. Serve.

*To make this vegan, make sure you use agave instead of honey, tortillas made without animal products (i.e. lard), and instead of soft goat cheese, leave it off entirely or mix vegan cream cheese with some fresh herbs. This last variation is what I've done twice now, using plain Tofutti Better Than Cream Cheese (because I had that on hand).

Tuesday, July 12, 2011

Eating Weed: Warm Purslane Salad with Garlic and Raisins

On Saturday, at the farmers market, I was able to buy purslane from a local, organic farmer. Why, you might ask, would I buy something that I could forage so easily (purslane, I've learned from the internet grows all over the world and in the United States can be found pretty much everywhere)? Because my town sprays everything. In spring and fall, especially, lawns are unnaturally green and weed-free. It's unusual to spot dandelions in the manicured lawns here and most homes seem to come equipped with a "keep children and pets off for 24 hours" sign because of recently applied chemicals. These all seem like good reasons not to harvest this edible.

Purslane thrives in poor soils and is a sprawling plant (though it can grow vertically as well). When the plant is young, the leaves and stem are both green. As it grows older, the stems begin to turn red. Many people consider purslane a weed (one of its nicknames is "pigweed") and just rip it out of sidewalk cracks and gardens indiscriminately.

Purslane
Purslane (Portulaca oleracea if you were wondering) is a small succulent with yellow flowers and, like many succulents, has a clear substance flow from it when you break off a piece (such as the stem). The leaves are a good source of vitamin C (surprise, surprise -- a leafy green that's high in Vitamin C) and omega-3s. It also contains calcium, sodium, potassium, magnesium, iron, zinc, copper, and thiamine. Often, it's eaten raw as part of a salad (or the salad itself), but can also be steamed or sauteed lightly and served like you might a spinach dish. When you eat it like a traditional salad, you'll taste it's slightly lemony, slightly salty taste more distinctly than you will in the warm salad I made. 

When purslane goes to seed, the seeds are tiny and black, and can be dried and roasted, and are a good source of protein and fat. These seeds can also be ground into a flour. I haven't tried any of these things.

Instead, what I tried was a warm purslane salad. I use the term "salad," because I used red wine, lemon juice, and olive oil while cooking my purslane, which created a sort of vinaigrette. This dish worked well for two veggie-loving people, when placed on a plate with other seasonal veggies (such as fennel and yellow squash) and a small quinoa salad.

Purslane with Garlic and Raisins
Olive oil
1 tablespoon chopped onion
1 pound purslane, roughly chopped
1 teaspoon minced garlic
2 tablespoons red wine
1 teaspoon lemon juice
2 tablespoons raisins (optional)
Salt

Heat a skillet over medium heat and then add just enough olive oil to lightly coat the bottom of the pan. Saute the onions until they turn brown, then add the purslane and minced garlic. Saute 2-3 minutes, until the purslane begins to wilt (depending on the size of your skillet, you may not be able to add all your purslane at once. This is okay). Add the red wine, lemon juice, and raisins, then cover the skillet for 2-4 minutes, until the purslane is wilted and raisins have begun to plump. Season with salt (to taste, I used just a sprinkle) and serve warm.
Warm Purslane Salad next to Quinoa

Wednesday, July 6, 2011

Sauteed Red Chard with Garlic Scapes and Raisins

Sauteed Red Chard with Raisins and Garlic Scapes
There are many varieties of chard--Swiss chard, "bright lights" or rainbow chard, and red chard are what I see here most often (this has to do with their broad popularity, I suspect, which makes grocery stores more likely to carry these varieties), though I've also seen silverbeet. Apparently, if you buy/grow a variety with a colored stem, you shouldn't eat the stem because it's "tough," but as long as the stems are narrow-ish I've never found this to be a problem. Also, throwing away the stems seems wasteful to me. A solution: slice thinner before you cook them and throw them in before the leaves, if you find you're struggling with how tough the stems are. A little extra cooking solves this problem for me.

The chard is supposedly coming in, by which I really mean that it's starting to not look sickly in the stores. The local chard at the farmers market is still prohibitively expensive, but in a week or two that won't be the case. Nonetheless, I picked up some organic red chard from my local food co-op and rode home with it in my backpack--sticking out of the top.

In Austin, MN (if you read my post on BBQ hummus), this would've warranted strange looks. In my town, however, this type of behavior is pretty much par for the course.

Garlic Scape, at the joint
I sliced it up (about 1/4-inch strips) and then cut my strips in half. In an attempt to replicate a tapas I particularly enjoy (fresh spinach with pine nuts and raisins, sauteed with garlic in olive oil), I sauteed my chard with those ingredients, minus pine nuts--which are expensive and which I don't really love. And technically, instead of garlic, I used garlic scapes because those are in season here and I have a dozen I bought at the farmers market this weekend. A garlic scape, if you're not familiar, are the flowering stalk of hardneck garlic--and completely edible (and very garlicky). I first encountered garlic scapes three or four years ago in a small town in the Southeast, where they were a prominent menu feature at a seasonal-foods-only restaurant.
Don't garlic scapes look a little like snakes?
If you don't have garlic scapes or their season has ended where you live, that's fine. Use regular fresh garlic, minced.
A tangle of garlic scapes on my kitchen table

I ate this as a main dish for just myself, but you could certainly use it as a side dish for 2-3 people (depending on how much they like veggies!).

Sauteed Red Chard with Garlic Scapes and Raisins
1 tablespoon olive oil
2 large garlic scapes, chopped (or about 2 teaspoons fresh, minced garlic)
1 bunch red chard (5-6 large leaves with stalks), cut into 1/4-1/2-inch strips
2 tablespoons raisins or currants
Salt

Heat a saute pan over medium-high heat, then add your oil and coat the bottom of the pan. Add your garlic scapes and saute for one minute. Add the chard and saute until it just begins to wilt, about 3-4 minutes. Add the raisins and a sprinkle of salt, and saute another 2 minutes. Serve hot.

Tuesday, July 5, 2011

Barbecue Hummus!

Hormel Nature Center Wildflowers, West Prairie Loop
I had the opportunity this weekend to go visit a friend who is living in Austin, Minnesota for the summer. My friend and I biked around town (deviant behavior! Most people drive everywhere, though the town is small, with wide streets and wide shoulders) and visited the Hormel Nature Center (aside from the people finishing up a bike race, we were the only people we saw the entire time we wandered) where we walked about four miles, looked at prairie flowers and grasses, waded through streams, and got attacked by swarms of hungry mosquitoes. After this, we biked to Hy-Vee grocery and picked up supplies for dinner. I wore sunglasses pushed back on my head and we both had on backpacks. My friend pointed out that at least one person gave us a strange look. We bought grapes, apples, and peaches (apples and peaches for immediately consumption), and the black-bean burger ingredients his pantry was missing. At the checkout, I told the bagger I didn't need a bag--I'd just put things in my backpack. Another strange look. My friend said the same thing and the bagger looked disgusted with us.

You should know, when I arrived, his host parents asked first if I was a cyclist also (yes), and if I was also a vegetarian (yes). Austin, Minnesota, if you didn't know, is the home of Hormel and, as my friend later shared, his host family makes gentle (my interpretation, not his) fun of anything remotely deviant. They consider his bike to work (3 miles) a long bike. He has a car there, he just doesn't use it--and is considering getting rid of it altogether.

While we were making Veganomicon black bean burgers (with vital wheat gluten and bread crumbs despite my suspected gluten sensitivity--he knows about this and offered to leave both items out; I didn't feel like trying to figure out how to fix it if it went wrong and now thing that these could both be left out with no problem, fyi if you decide to try the recipe), my friend mentioned that since his experiment with Swiss chard hummus worked out, he wanted to try making barbecue hummus next.

Barbecue hummus! What a great idea (crediting this to him)! I asked how he planned to make it barbecue flavored and he responded "um, with barbecue spices, I guess. I thought about using barbecue sauce but decided that would be cheating." I agreed (though that didn't make the idea of using barbecue sauce less appealing--there are a couple of barbecue sauces made locally that I adore). My mouth watered for barbecue hummus after my friend mentioned this plan.

And so when I got home Sunday, I proceeded to make my own variation of barbecue hummus. I wanted to use up some of my dried beans, so I used about 1/4 pound of dried lima beans and a cup of red lentils (I didn't measure, so this is very approximate). I soaked them before cooking, and cooked them on medium heat for about an hour, adding water as needed. I added minced garlic halfway through the bean cooking time, and at the end, added barbecue spice (which I had on hand as a "free" sample--meaning if I came in and spent at least $5 they'd hand me a tiny jar as a reward--from the local bulk spice dealer, Penzey's). The result: delicious!

I don't currently have tahini, so it isn't included in this recipe, but if you have tahini and like it in your hummus (and I do, don't get me wrong) you should definitely add it.

Barbecue Hummus (amounts are approximate)
1/4 pound dried Lima beans
1 cup dried red lentils
Water
1 tablespoon minced garlic
1 tablespoon barbecue spices (I used BBQ 3000), or to taste
2 teaspoons smoked paprika
1 tablespoon lemon juice
1/4 teaspoon salt, optional, to taste

Soak your limas and lentils by boiling them in water (I use approximately a 2:1 ratio for soaking) for 1 minute and then covering and allowing to rest, off the heat, for 3 hours. Add more water (I like my hummus thin, but not runny) and boil the beans and lentils for 30 minutes, adding water if needed. Add the garlic and continue to cook another 30 minutes, or until tender. Stir in the BBQ spice, paprika, and lemon juice, then blend until smooth (I use an immersion blender, but a food processor or mashing by hand would work also) . Taste and add salt, if desired.

Chill and serve.

Note: The hummus will thicken as it cools. Also, there aren't pictures of the hummus itself, because it turns an unappealing (on the camera) color. Mine looks prettier in person--BUT the exact color will vary based on the spices you use.

Sunday, September 13, 2009

Squashes with Onions and Brown Sugar

I was eating dinner with a couple of friends last night: poached salmon was the star dish, accompanied by feta-roasted bell pepper muffins (to die for!), watermelon and grapes tossed together in the same bowl, and some squash.

The friend hosting dinner had been given several squash by her well-meaning parents, but wasn't sure what to do with them. She had zucchini and yellow squash, plus some dumpling squash and a beautiful spaghetti squsah. When I admired them, she told me if I could use them, to go ahead. So I did--at least with the summer squashes (the zucchini and yellow squash). Our other friend, who said she'd never had squash she liked took two very large servings! The key is to get the onions only golden before adding the squash and then to only cook the squash long enough for the flavors to blend.

Squashes with Onions and Brown Sugar

3 medium summer squash (zucchini and yellow squash, if you can), quartered and then sliced into 1/2" nuggets
1/2 medium purple onion, chopped
1/4 teaspoon salt
2 tablespoons brown sugar
1 tablespoon parsley, chopped
Olive oil

Prepare the squash before you begin to cook. This makes life much easier. Saute the onions in 1-2 teaspoons of olive oil (enough to coat bottom of pan) over medium heat for 2-3 minutes or until the onion begins to turn golden. Add in the squash and turn the heat up to medium-high. Saute another 2-3 minutes and then add the salt and sugar. Stir and then allow the squash to sit and carmelize 2 minutes before stirring again. Let the squash cook for another 1-2 minutes with disturbing it, stir again, and if all the squash is lightly cooked, remove from heat, toss with parsley, and serve.

Tuesday, May 26, 2009

Fruit, Rice, and Seed Salad

What do you take to a Wild Boar Roast?

That was what I asked myself during the last week before the end of the semester, when one of the other women in my program invited me to come join her (and 20 other people) for a boar roasting--an in-law had provided the Alabama boar at Thanksgiving and in May my friend and her husband had yet to eat the thing. Fortunately, the (well meaning) in-law had only given them 1/2 the pig.

Since I didn't plan on eating the boar and the woman who was hosting the roast is an excellent baker and cook, I wanted something 1) I would eat and 2) she probably wouldn't already make--which ruled out all desserts, hummus, and bread.

The next question was, "What do I have on hand?" I'd been trying to eat down the perishables (and non) since I wasn't going to be there over the summer and didn't really want to run out to the grocery store for anything.

I flipped through a couple of my Moosewood cookbooks and Madhur Jaffery's World Vegetarian until I found a couple of rice salad recipes I thought sounded good, but not great (mostly because I didn't have all the ingredients for either salad on hand). I tried to figure out what I thought would be the best aspects of both salads and combine them to create this dish. The sesame seeds were a last minute addition--and add a nice, nutty flavor to the entire dish. If you can't eat sesame seeds because of diverticulosis, try substituting 1/2 teaspoon of the canola oil for toasted sesame oil.

Orange Rice Salad with Fruit
1 1/2 cups basmati rice (1/2 cup may be wild rice, if you have it)
3 cups water
½ teaspoon salt
1 tablespoon frozen pineapple-orange juice concentrate, or the zest of one orange

Dressing

2 tablespoons of frozen pineapple-orange juice concentrate, mixed with 4-5 tablespoons water
2 teaspoons canola oil
2 tablespoons cider vinegar
2 teaspoons chopped fresh rosemary, or ½ teaspoon dried
½ teaspoon salt
¼ teaspoon freshly ground black pepper

½- ¾ cup currants, dried cranberries, or raisins
10 ounces canned pineapple chunks, cut in half if desired
1 small tart apple, chopped
2 tablespoons roasted sesame seeds

In a small saucepan with a tight fitting lid, bring to a boil, the water, rice, ½ teaspoon salt and 1 tablespoons pineapple-orange concentrate. When wells start to form in the rice, cover tightly and cook on low for 10 minutes. Turn off the heat and allow the rice to rest for at least 15 minutes.

Meanwhile, in a small bowl whisk together the ingredients for the dressing and set aside. When the rice is done, place it in a large bowl and allow to cool at least 10 more minutes. Add the dressing and toss well. Stir in the fruits and sesame seeds. Set aside at room temperature for at least 30 minutes to allow flavors to blend. Serve at room temperature.