Pages

Thursday, December 29, 2011

Winter Veggie Cobbler (gluten-free)

Gluten-free friends, rejoice! A gluten-free recipe that actually browns beautifully. Okay, so it's not really that exciting for most people, but if you're used to eating GF, then you're also used to things that are slow to brown, or which don't brown at all -- which for bread recipes, can be rather frustrating.

I've had a version of this recipe on my fridge for a while, courtesy of a food co-op, but hadn't gotten around to trying it. I didn't have what I needed. Or I didn't have the time. Or I didn't have the creative energies for making it. Or...well, there were lots of excuses. And that's the thing. There are always excuses about why we should make something simple, or even why we should just go grab food to go, or have it delivered. 

I finally did make it when I had a lazy weekend, and E and I were going to go swimming in the evening after she got off work. I wanted something that would be pretty much ready for us when we got home -- and this can certainly be easily prepared up to a point and then left in the oven for an hour or so and quickly rewarmed, which is exactly what we did. That's nice, really nice, because let's face it, most of us are pretty busy. That being said, this recipe does take a fair amount of prep time before it actually goes in the oven, but it's pretty low-key prep. Chopping, sauteeing, stirring the topping mix. 

Chopped Turnip and Celery Root
I used the winter veggies I had on hand. The original recipe, for instance, called for parsnip (not turnip), among other things, and I suspect the recipe would be fairly forgiving in general of changes. My word of caution with that would be to use caution when thinking about how much you want to include of strongly flavored veggies, such as turnip.

It was a lovely dish to come home to on a day off that had been filled with wandering around town in the pale sunshine of late December. If you're vegan, I imagine this would be pretty easy to convert to a vegan recipe using a vegan margarine or shortening in place of the butter and coconut milk (or another non-dairy milk of your choice) in place of the whole milk in the dumplings. In this case, I'd probably add some lemon juice to create a vegan buttermilk and 1/2 teaspoon baking soda . 

Because this used red wine, and because we were feeling cozy, E and I mulled wine to go with this dish. Just a suggestion, but it was pretty fantastic.

Winter Veggie Cobbler
Topping
1 cup brown rice flour
1/2 cup white rice flour
1/2 cup tapioca flour
1 teaspoon guar gum
1 teaspoon sea salt
1 tablespoon and 1 teaspoon baking powder
3 tablespoons unsalted butter cut into small cubes
1 ½ cups whole milk or half butter milk and milk
2 tablespoons mixed fresh herbs like thyme, marjoram or parsley, finely chopped (I used about a teaspoon dried instead and it worked fine. Who has this many fresh herbs in winter?)

Veggies
1 tablespoon olive oil
1/2 large yellow onion , chopped
4 large carrots cut into ½ inch rounds then quarters
1 medium size celery root peeled and cut into 1 inch pieces
1 medium turnip peeled and cut into ½ inch rounds
1/2 medium size sweet potato cut into 1 inch dice
3 cloves garlic, minced
1/2 cup dry red wine
3 tablespoons tomato paste
2 ½ cups veggie stock or water
2 tablespoons fresh herbs like thyme, marjoram or parsley chopped fine (again, I used dried herbs)
1 teaspoon sea salt
Black Pepper

 Preheat the oven to 400 degrees.

Make topping first and let rest in the fridge while you make the veggie filling.

Topping: Sift the dry ingredients together in a bowl. Cut in the cold butter until the mixture resembles a coarse meal. Add herbs and the milk. Mix very lightly with a spoon until the batter just holds together (it comes out pretty liquidy, so make sure all the lumps are gone). Let rest in the fridge until you make the veggie filling.

Filling: Heat half of the butter and half of the oil in a large sauté skillet. Add the onion, stir for a minute, then all the carrot, celery root, and sweet potato. Brown well on several sides. In the last 3 minutes of cooking, add the minced garlic. Transfer veggies to a 9x13 baking pan.

Return skillet to high heat and add the tomato paste, toasting until fragrant. Add the wine and veggie stock. Bring to a boil, scraping up all the browned bits in the skillet. Simmer at a lowered heat for a few minutes.

Pour the liquid into the baking pan. Sprinkle with the herbs, sea salt and pepper.

Use a spoon to dot the surface of the vegetables with golf-ball sized dollops of the topping.

Just after removing the foil to bake longer
Cover baking pan with foil and bake 25 minutes at 400 degrees. Remove foil, return dish to the oven and bake uncovered until the topping is browned, about 25 minutes. Serve warm.

Beautifully browned veggie casserole


Tuesday, December 27, 2011

Ambercup Squash with Forbidden Rice and Cranberries

When my local growers market was still running, I bought several varieties of squash I hadn't tried before, or had only tried once or twice. I've been slowly working through the pile and recently tried my ambercup squash. I hadn't tried this type before because in my grocery stores past, it was always just in a pile of winter squash with no flavor profile descriptors to be seen. Fortunately my growers market did a much better job with describing it -- though for the life of me, I can't remember what the sign near the bin of these squash said.

Forbidden Rice
I wanted to bake my squash and stuff it and so I looked at my ingredients and saw I had some forbidden rice (a black rice) I'd purchased from my co-op around the same time I bought the squashes. I decided to boil it up, adding split red lentils and some flavorings, and then stuff the rice mixture into the baked squash.

This recipe was nice, because of the small size of the ambercup squashes I used. I could cut them in half and stick two halves in my toaster oven (I could have also used my regular oven, but I didn't actually need to make all the filled squash right away), start the rice, and take the dog on a run -- and do all this after work. After 30 minutes, the squash was quite tender, the rice was ready for lentils and cranberries, and I only had a little bit longer to wait for dinner.

I made the conscious decision to make this recipe vegan, because I know at the beginning of the year, a lot of people make promises to themselves about the eating habits they will adopt in the coming year. My regular readers know I play with vegan recipes regularly, but if you're new to the blog this is a great recipe to start with -- it's savory, filling, and doesn't use (too many) bizarre ingredients. If you don't have access to forbidden rice, you could certainly use a short grain brown rice in a very similar way. Nutritional yeast, which provides a lovely cheese-y flavor without cheese, is available at most major grocery stores now -- but certainly in the bulk section of stores that focus on whole food approaches to eating and online. And this filling could go in a number of different winter squashes, be eaten on top of salad, or (in the summer, though you might have to sub out the cranberries unless you're like me and stock up on cranberries while you can or happen to live in a place that keeps them in the freezer section of the grocery store year-round) stuffed in a large tomato.

Without Sunflower Seeds
You can use fewer cranberries, but I really like cranberries and try to eat as many as I can while the season permits, hence the wide range. They'll definitely add a tart flavor to your dish if you use way too many, but I liked the lightly tart taste they provided for this meal.

After all the hyper-indulgent food from the past month, this dish is a welcome respite, and full of flavors that still match the season without being the flavors of the season.

Roasted Ambercup Squash with Forbidden Rice and Fresh Cranberries
2 small/medium ambercup squash, cut in half with seeds removed
2/3 cup forbidden rice
2 cups water
1/4 cup split red lentils
1/2-1 cup fresh (frozen) cranberries (to taste)
1/2 teaspoon red pepper flakes
1/4 teaspoon fines herbes
1/4 teaspoon salt
2-4 tablespoons nutritional yeast (to taste)
Shelled sunflower seeds, optional

Bake the squash, cut side down in a baking dish covered with a thin layer of water, for 30 minutes at 350 degrees then remove and allow to cool.

Meanwhile, combine rice and water in a small saucepan over high heat. When it boils, turn the heat to low and cover the pot. Cook 30 minutes.

After the rice has cooked for 30 minutes, increase the heat, remove the lid, and stir in the lentils, cranberries, and red pepper flakes. Cook 10 minutes and then stir in the fines herbes, salt, and nutritional yeast. Cook another 5-7 minutes to allow flavors to combine (add a small amount more water if the mixture begins to stick to the bottom of your pan -- you want it dry, but not so dry that it sticks).
Rice, lentils, cranberries, pepper flakes
Spoon the rice mixture into hollow part of the squashes and sprinkle the top with sunflower seeds, if desired.
(I like that they add a bit of extra crunch) Use salted and roasted, or raw, depending on your personal preference. Serve warm as a side dish, or a main meal.

Sunday, December 25, 2011

Chocolate Roasted Potato Cake

E and I recently hosted a double-birthday/holiday potluck. My friend whose birthday was approaching said she wanted something "chocolate," when I asked her what I could bake her -- not terribly helpful, but she's also super laid back, so I wasn't too concerned either.

I, however, don't like chocolate cake and even though I wasn't planning to eat any of it (even if I'd made it gluten-free, using my standby chocolate gluten-free cake recipe), I wanted to at least try to make something that wouldn't, well, be dry and tasteless. And, I told myself, I'm not on a budget that really lets me try multiple variations of things. So, whatever I did with a chocolate cake, I needed to make sure that it was something that I wouldn't mess up--or that I'd have alternate ingredients for if I did mess it up.

E suggested the brownies I posted in November. Doable, definitely. Even if I messed up the cake. But, this was an opportunity to try making something new and how could I pass that up? In recent weeks, I've felt barely able to write--or even think about writing--much less do anything more than put rather routine (for me) food in my mouth. I haven't wanted to be creative. My friend's birthday though, seemed like a good opportunity to spark some of that kitchen-creativity again. So, I thought: chocolate. And I thought: birthday. To me, this surely equals some sort of cake.

I remembered my friend Kim, a talented writer and generally wonderful person, had a potato party while I lived in the Midwest. She'd bid on a bushel of potatoes during an auction and won--and wanted help eating them all. One of the things she made: chocolate potato cake. And, I remembered seeing recipes for potato cakes (and sauerkraut cakes) in my parents' German cookbook.

I remember trying Kim's chocolate potato cake--before I went GF--and thinking that it was surprisingly good--and delightfully moist. And this, I decided, was what I wanted to make. But, most of the recipes I looked at called for unseasoned mashed potatoes. I understood that, to some extent. The process of creating mashed potatoes necessarily creates a little additional moistness. But I know how to make things more moist. I wanted to subtly up the flavor a little. I'm in favor of roasting things--especially in the winter, when I can also use it to warm up the house (though I pan roasted the potato for this, so not applicable). And because I didn't have enough potato for any of the recipes I looked at, I added a couple of carrots to the roasting process. I always have carrots on hand.

I also thought about making this cake into a Mexican chocolate cake, with cayenne and cinnamon. But I couldn't bring myself to do that either--at least not to the whole cake. It can surprise come as a surprise if you're not expecting all those extra flavors in your cake.

Chocolate Roasted Potato Cake

1 cup unseasoned mashed potato/carrot mixture (for me, this was one medium potato and two large carrots all finely diced which I pan-roasted for about 45 minutes before processing in my food processor until nearly smooth)
1 cup buttermilk
1 ¾ cups sifted all purpose flour
1 cup unsweeted dutch cocoa powder
2 1/4 teaspoons of baking powder
1/2 teaspoon baking soda
½ cup salted butter (softened)
1 ¾ cups granulated sugar
1 teaspoon vanilla extract
2 large eggs
1/3 cup mayonnaise
Confectioners’ sugar for garnish

Preheat oven to 350 degrees. Grease and flour two 9-inch round baking pans and set aside.

Place mashed potatoes/carrots into medium bowl. With a small whisk, gradually beat in buttermilk to form smooth mixture.

Sift together flour, cocoa powder, baking powder, baking soda, and salt.

In a large bowl, use an electric mixer to combine the butter, sugar, and vanilla extract until well blended. .
Add eggs and blend well. Add mayonnaise and beat at medium speed for 2 minutes.

At lowest speed, alternate adding both the dry ingredients (from step 3) and smashed veggies (a little dry ingredients, a little smashed veggies, a little dry, a little smashed veggies etc.) until all are incorporated.

Turn equal amounts of batter into prepared baking pans. Bake in preheated oven 27 to 32 minutes (for a 10” cake pan; 15-18 minutes for cupcakes), rotating once about halfway during the baking process.

Cake is cooked when a toothpick inserted into the center of the cake comes out clean. When done remove to a cooling rack. Cool completely before removing from pans and cutting. If desired, frost or sift confectioners’ sugar over top of cake after the cake has cooled completely.


Note: The pictures you see of the iced cupcakes use just a basic buttercream.

Saturday, December 24, 2011

Snickerdoodles - thin

E wanted snickerdoodles at Christmastime. Not my favorite cookie (though the fact of cinnamon does help the fact that they're sugar cookies), but ones that are super-simple to make--or at least uses only ingredients I tend to have around (and ingredients that tend to be cheap).

Sadly, I didn't have cream of tartar. I could have subbed in baking powder--but didn't remember that little trick until after it was too late. And that means that my snickerdoodles didn't puff much. Still, they smelled like snicerdoodles--and presumably tasted that way. I didn't bother trying to make them gluten-free.

However, I did take a fair number of them in to work so I could make more, this time with a much more conscious effort to make them soft and chewy. Part of what I suspect I need: more flour. The dough seemed a bit soft. And part of what I need, of course, is the thing that makes baked goods puffed. So that I can stay in my happy, tiny budget, I'll probably just use baking powder because E and I already have that. And I'll add a little more flour than this recipe calls for. And I'll chill the dough. But aside from that...

The recipe below makes snickerdoodles that would be perfect for:

  • Crumbling over ice cream
  • Pressing (the dough) into a pie pan to make a snicker-doodle pie crust (I'd precook it first as it expands a lot initially and then collapses down about the time it's ready to come out of the oven)
  • People who like thinner, crispier cookies
Thin Snickerdoodles (not gluten-free)
1/2 cup butter, softened
1/2 cup shortening
1 1/2 cups white sugar
2 eggs
2 teaspoons vanilla extract
2 3/4 cups all-purpose flour
2 teaspoons cream of tartar
1 teaspoon baking soda
1/4 teaspoon salt
2 tablespoons white sugar
2 teaspoons ground cinnamon

Preheat oven to 400 degrees F (200 degrees C).

Cream together butter, shortening, 1 1/2 cups sugar, the eggs and the vanilla. Blend in the flour, cream of tartar, soda and salt. Shape dough by rounded teaspoons into balls.

Mix the 2 tablespoons sugar and the cinnamon. Roll balls of dough in mixture. Place 2 inches apart on ungreased baking sheets. They expand a lot—so this space is really important.
Bake 8 to 10 minutes, or until set but not too hard. Cool 2 minutes on sheet and then remove from baking sheets and place on wire racks. .

Friday, December 23, 2011

Tomorrow's Just an Excuse -- plus Oatmeal Raisin Cookies

One recent morning, as I sat down to write, Smashing Pumpkins' "Thirty-Three" played on one of my Spotify playlists. I didn't come to Smashing Pumpkins until I was an adult, or at least not really, even after listening to my friend Sanna talk about them pretty often when we were in 7th grade, and even after trying to listen to them around that same time.

I guess you could say I wasn't ready for that type of music then.

In fact, it took until a curly-haired friend with a big smile and always-a-twinkle-his-eye expressed amazement at  a bar in Iowa that I hadn't heard (or, as it turned out, didn't realize I had actually heard) "Tonight, tonight." He went up to the DJ and requested it, then as it came on, started rocking out at our table. This friend caused me to relax a lot around myself, and around him, because he seemed so comfortable in the man he was--and because of that, could act with kindness toward pretty much everyone he met. I admired this about him, and wanted to emulate it until it became part of the way I saw myself, and the world, as well.

Travels -- literally and figuratively -- made me ready for The Smashing Pumpkins, and for sitting down at the table, at the bar ($2.50 your call!) with that friend. That same night, he handed me a copy of the book Shantaram, a gift, the first time someone who didn't know me all that well had given a book that, when I read it (pretty much starting immediately), I liked. Or loved. I'm still not sure. It's a book I will need to revisit -- a book about travels, finding a place, learning about oneself, about, to some extent, the things I've been doing for the past four years (only on a more extreme level).

Listening to "Thirty-Three" also seems particularly appropriate for the season, because of the line "Deep in thought I forgive everyone," --what we should be doing this season, and every day.

Although I like to listen to music when I write, I also like to have music playing while I'm baking. Making these cookies, I listened to my Spotify mix that I titled simply The Stranger, after the Lord Huron song -- but it includes music from The Beatles and The National to Jonathan Coulton (re: Your Brains), Iron & Wine, and Chain of Lakes, among many others. The songs on the playlist are about distance, about the people we thought we knew (but discover we don't), about strangers, lost love, and missed connections, about becoming (or being) a stranger in the place you live. The songs explore the distances between us. Maybe I listen to this mix while I bake because I like to imagine that baking brings us together--even with people who have left us, even with people we never met--if nothing else, through the sharing of recipes.

This recipe is adapted from one by Deb from Smitten Kitchen so that it's gluten-free. Pretty much though, if I wasn't avoiding gluten, I would make these cookies as she describes. Oatmeal-raisin are among my favorite cookies (something like tied--depends on my mood--with spice cookies and/or gingersnaps). If you haven't checked out Deb's recipes, please do yourself the favor of exploring Smitten Kitchen. The photography is beautiful, the recipes tasty (and often quite innovative), and the writing wry, tight, and honest.

Remember, some people who are gluten-intolerant also react negatively to GF rolled oats (oats contain a different type of gluten than wheat--so many people are okay), so if you're making these for someone else please ask first.

Oatmeal Raisin Cookies (Gluten-Free)
1/2 cup (1 stick or 4 ounces) butter, softened
2/3 cup light brown sugar, packed
1 egg
1/2 teaspoon vanilla extract
1/2 cup GF oat flour
1/4 cup corn starch or tapioca flour
3/4 teaspoon guar gum
1/2 teaspoon baking soda
1 teaspoon ground cinnamon
1/4 teaspoon ground cloves
1/4 teaspoon salt 
1 1/2 cups GF rolled oats soaked in 1/3 cup warm water
3/4 cup raisins
1/2 cup walnuts, chopped (optional)

Preheat oven to 350°F (175°C).

In a large bowl, cream together the butter, brown sugar, egg and vanilla until smooth. In a separate bowl, whisk the flours, guar gum, baking soda, cinnamon, cloves and salt together. Stir this into the butter/sugar mixture. Stir in the oats, raisins and walnuts, if using them.

At this point you can either chill the dough for a bit in the fridge and then scoop it, or scoop the cookies onto a sheet and then chill the whole tray before baking them. You could also bake them right away, if you’re impatient, but I do find that they end up slighly less thick.

The cookies should be two inches apart on a parchment-lined baking sheet. Bake them for 10 to 12 minutes (your baking time will vary, depending on your oven and how cold the cookies were going in), taking them out when golden at the edges but still a little undercooked-looking on top. Let them sit on the hot baking sheet for five minutes before transferring them to a rack to cool.


Thursday, December 22, 2011

Nilla Wafer BonBons & a Book Plug

In the middle of my holiday cookie making frenzy, E asked what bonbons made with Nilla Wafers would taste like. I wasn't sure, but agreed to make some (they look deceptively like the chocolate-peanut butter buckeyes I used to always make at Christmas, in part because I coated them in dark chocolate). What?? A new type of cookie? One where I get to be inventive? Yes please.

The process is basically the same as making tuxedoed oreos -- but (to me) less satisfying. There's something about blending the chocolate wafer cookie with the cream filling that I love. I had to add a little extra liquid to account for the lack of cream filling and the filling didn't initially hold up as easily. I also managed to give myself a first degree burn on my index finger pulling a bowl from the microwave that was oven safe, but apparently (no note on it one way or the other) not microwave safe. Alas, the hazards of the kitchen.

E didn't care for them as much as the tuxedoed oreos (I imagine the nilla wafer version is moderately flavorless moderately flavorless) but was curious what they would have been like with white chocolate. It's an interesting question and a good suggestion. If someone tries them, please let me know what you think. I also think they could be interesting made into smaller balls and served atop frozen bananas (maybe with a dab of chocolate to hold them in place). But then, I think vanilla wafer cookies should really only be used for banana pudding, if they must be used at all. Or spread with PB and stuck together to make little sandwiches.

However, these would be incredibly kid friendly, both to make and eat, much like the tuxedoed oreos. Speaking of kids, Erica, over at Kinds of Honey, just published her juvenile fiction eBook, Riding the Neighbors' Horses. I haven't read it yet, but I hope to soon, because Erica's a talented writer (and crafter, and many other things). I wanted to make sure to pass this information along though, in case you were looking for the right gift-of-words for some young person in your life.

Nilla Wafer BonBons


1 12-ounce box nilla wafers
6 ounces cream cheese, softened
1-3 tablespoons milk
Chocolate for coating (I used a little less than a cup)

Pulverize the nilla wafers using a food processor, or by placing them in a durable zip-top bag and pounding them with a rolling pin.

Combine cream cheese and wafer crumbs in a medium bowl, until well mixed. Add enough milk (if necessary) to help wafters and cheese form a very thick dough that isn't sticky and holds together when rolled in a ball between your hands.

Form balls (mine were a little smaller than ping pong balls) with the dough and place on plate covered with foil or waxed paper and then stick in the the freezer for 30 minutes-1 hour.

Melt the chocolate using a method of your choice either in a shallow bowl (or transfer to a shallow bowl once it is melted). Rolls the balls through the chocolate, using clean fingers or a spoon to guide the ball. Shake off any excess chocolate and then place back on the foil or waxed paper to set (this won't take long since the bonbons are cold). Store in the refrigerator until about 20 minutes before you are ready to serve.

Wednesday, December 21, 2011

Sweet Potato Orange Soup

I believe I've told you before that I first tried carrot soup, cold, at a French restaurant near Berkley when I was about 15. It was okay. I don't really remember it. I also had rabbit roulades that day -- Thumper. But something about that meal, that experience did convince me to try carrot soup again -- and to try several types of carrot soup until I found some I liked. Now, I love carrot soup. And I'm mostly vegetarian. Take from that what you will.

I had the pleasure of trying the inspiration for this soup at my local co-op, one afternoon when I decided I absolutely had to have something warm for lunch. The soup I tried was a beautiful orange color, lightly sweet, and gently spiced. It wasn't until after I'd finished the soup that I noticed the distinct taste of garlic. I tried it again another day, and this time paid attention to the taste of garlic. Sure enough, it was there all along. However, it's nicely softened by the cinnamon and orange juice.

The sweet potato makes this soup silky, the carrots boost the veggie content, and this is the perfect soup to make if you dislike onions, or have found that you've suddenly (gasp!) run out of onions. It doesn't use celery, which my friend Lauren would appreciate, and it doesn't use black pepper (which she would also appreciate).

I found it helpful to have an immersion blender, but you could certainly do this in a regular blender or food processor, in batches. This is an excellent soup for a cold day, makes enough to feed 5-6 people easily (especially served with bread and/or a salad), and is festive for the holidays! Even better, it makes use of things a lot of you probably have around for holiday meals anyway. I've tried this soup cold too, for breakfast, and while that definitely changes the flavor profile, I think it's pretty good eaten that way as well.

I wish I could have gotten better pictures of the soup -- but the lighting was not cooperating with an orange soup. If I get better pictures later, I'll update this post again. In the mean time, I'm off to eat some Sweet Potato Orange Soup!

Sweet Potato Orange Soup
2 teaspoons oil
1 large sweet potato, cubed
5-6 medium large carrots (about 1 pound), cut into coins
5 cloves garlic, chopped
1/2 cup frozen orange juice concentrate
1/4 teaspoon red pepper flakes
6-8 cups water
1 teaspoon salt
2 teaspoons cinnamon

Heat the oil in a soup pan over medium heat. Add the sweet potato and carrots. Saute 3-4 minutes. Add the garlic and cook another 2 minutes, stirring frequently. Add the orange juice concentrate, pepper flakes, and water (6 cups for thicker soup; 8 cups for thinner soup). Bring to a boil, and then reduce to a simmer. Simmer 25-30 minutes, or until carrots and sweet potatoes are very tender.

Stir in the salt and cinnamon. Puree using a blender (or, my preference is for an immersion blender) until smooth. Taste and adjust seasoning if necessary. Serve hot.

Serves 4-6 as a main course

Monday, December 19, 2011

Peanut Butter Blondies (gluten-free)

 
You'll have to trust me on this one. I've been eyeballing black bean brownie recipes for a while (I was reminded of them after reading about garbanzo bean brownies by my friend Victoria over at Easy Gluten Free). And for longer than that, I've been meaning to make a pot of beans (either black or pinto) and haven't gotten around to it--I want to start a crockpot of beans one morning and come home to it in the evening. Why haven't I? Good question. You'll know when I make them, I'm sure.

This recipe came about because I intentionally bought black beans so I could make black bean brownies. But when I got home, I discovered I hadn't bought black beans after all, but pinto beans. Sigh.

Look at the chocolate and peanuts!
Okay, I'm sure pintos would've worked just fine in brownies. They're pretty mild, after all. But black beans definitely wouldn't work in blondies and since I had a set of beans that would work, I decided to go with it. The pinto beans replace the flour in this recipe and add protein, without leaving a bean-y taste (at least if you've rinsed them well.). You'll notice in the picture, I have a carton of coconut milk--but I decided once everything was mixed together that it didn't need the couple of tablespoons of milk called for in the recipe I based this on. 

These blondies are also pretty low fat (for peanut butter blondies). I used up the last tablespoon of butter E and I made recently, mostly to get it out of my fridge, and because I wanted to up the peanut butter flavor by increasing the peanut butter from the 1/3 cup called for in the original recipe to 1/2 cup.

These blondies, when warm, practically melt in your mouth. They're super-moist, and nicely peanut buttery. The peanuts and chocolate on top add a nice bit of spunk (both presentation and flavor-wise), but if that's not your thing, then by all means leave the topping off.

Peanut Butter Blondies
1 can pinto beans, well rinsed
¾ cup granulated sugar
1/2 teaspoon baking powder
1/4 teaspoon salt
1/2 cup creamy peanut butter
1 tablespoon butter, melted and cooled slightly
1 teaspoon vanilla extract
2 large eggs, lightly beaten
2 tablespoons ground flax
1/4 cup semisweet chocolate chips or chocolate chunks, chopped

2 tablespoons unsalted peanuts, chopped
Cooking spray

Preheat oven to 350°.

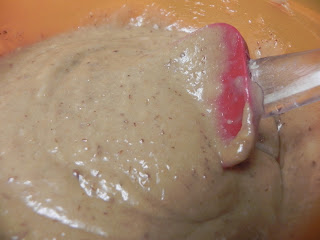
Place the pinto beans and sugar in a food processor and process until smooth.
Blended Pinto Beans & Sugar
Transfer into a medium-sized bowl and add the baking powder, salt, peanut butter, butter, vanilla, eggs, and flax and combine well.
Combining well
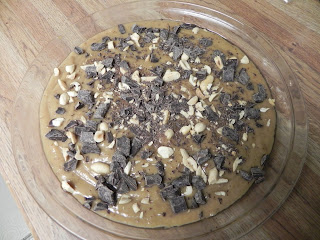
Pour into a lightly greased 9” pie pan (or 8 x 8 baking dish).

Sprinkle the chopped peanuts and chocolate chips on top of the batter.
Adding Chocolate and Peanuts
Bake at 350° for 25 minutes or until a wooden pick inserted in center comes out with moist crumbs clinging. Cool in pan on a wire rack.
Yum!

Sunday, December 18, 2011

Product Review: Hickory Smoked Tofu Jerky

When I moved from the Midwest to the West, my then-Co-op gave me a goodie bag of "food for the road," which I very much appreciate, and which I steadily worked on during the drive. One of the things I didn't get to though was the tofu jerky, by Primal.

Today, however, I did try it -- the Hickory Smoked version, which is gluten-free. And it was excellent. It pulled apart nicely, had the correct amount of tender-versus-chewy, created little strands that I could imagine (because I've never tried it) are reminiscent of real jerky, and had 10 grams of protein.

The hickory smoked taste wasn't overwhelming--I do like "smoked" things though--and I noticed definite bits of black pepper in the jerky, which I found added a pleasant spice and, of course, a lot of flavor. I would try other flavors of Primal's jerky, as long as they were also gluten-free versions (I know some versions aren't), if only they were a little more affordable. At my current co-op, the price runs about $1.25, and that's about the same price I've seen them other places.

I like that these are just the perfect size to pack for hiking (yes! hike more!), lightweight, and definitely not messy (minus the packaging). They also inspire me to try making my own tofu jerky, which I talked about in some detail with a friend this past summer, but never tried (I don't think either of us tried it, actually).

Saturday, December 17, 2011

Apple Cinnamon Yogurt Scones

Frosted Evergreen
When I lived in the Midwest, the restaurant across the street from my apartment sold wonderful scones -- which (probably for the best) I didn't try until my last year living there, thanks to a friend I met during a 2 week long field trip for a Sustainable Agriculture class. This friend talked up these scones endlessly and after losing a bet with him (I don't even remember what we bet on!), I brought him a blueberry-lemon scone from this restaurant, which was the one he requested. Since I had to buy one for him anyway, I bought one for myself, just to try it. And then I was hooked.

The scones had none of the qualities I dislike about scones. They were moist, namely, rather than crumbly. They had flavor, personality. I wound up buying a scone a week for a while, until I decided to give up gluten. Giving up those scones was one of the hardest things about going gluten-free. In fact, I've replicated them in the non-vegan version before, in one of my posts about things to do with mulberries.

Warning to those of you who have found my blog by looking for vegan or gluten-free recipes. This recipe is neither. I made these scones because I planned to take a few scones to a dinner party and I wanted something that wasn't nearly as sweet as the "breakfast" (dessert) style scones I'd made. These are much closer to many traditional scones in their lightly-sweetness, but still aren't the type of scones that crumble (or shatter) as you take a bite out of them. I've got no interest in making those.

However, this is apple season and I've got a few apples that are softer than I generally like for eating. I'm a bit picky about how soft apples are "allowed" to be, which in my mind, is "not at all soft." Apples should be crisp. For this recipe, I'm using one Gold Rush and one apple that I've already forgotten the name of, both bought from my local growers market--from a farmer who grows more than 60 types of apples and has been generous enough to talk to me about the apples (and recommend books about apple varieties and cultivation) for the past three months.

These scones are different from the standard buttermilk scones in that I use yogurt instead--the same principle, but less liquid. To help balance this, I use both yogurt and whipping cream (you could use 1/2 cup of yogurt instead, potentially, but you might need to add some additional liquid) that I've curdled with lemon juice--this also lets me reduce the amount of butter I use.

If you're in the mod for apple cinnamon scones, here are a few other suggestions:

*Chocolate chips with orange zest (like the Joy the Baker recipe originally called for)
*Blueberry-lemon
*Cranberry white-chocolate (use a white chocolate glaze with fresh cranberries and lemon zest kneaded into the batter)

There are many more combinations of course, depending on what flavors you like.

Apple Cinnamon Scones
makes four large or six small scones

1 1/2 cups all-purpose flour 
2 tablespoons granulated sugar
2 tablespoons nutritional yeast
1 teaspoon thyme
2 1/4 teaspoon baking powder
1/4 teaspoon baking soda
1/2 teaspoon salt
4 tablespoons cold butter
1 egg yolk
1/4 cup low-fat or non-fat yogurt
1/4 cup whipping cream mixed with 2 teaspoons lemon juice or cider vinegar


Easy Apple Compote (see my post on this)

Place rack in the upper third of the oven and preheat to 425 degrees F. Line a baking sheet with parchment paper and set aside.

In a mixing bowl, sift together flour, sugar, nutritional yeast, thyme, baking powder, baking soda and salt. Cut in butter until mixture resembles coarse meal. In another bowl, egg yolk, egg yolk, and whipping cream. Add to flour mixture all at once, stirring enough to make a soft dough.

Turn out onto a lightly floured board and knead about 15 times. Roll or pat out into a 1/2-inch thickness. Cut into 8 large or 12 small squares (or more).

On half the squares, spread a thin amount of apple compote(amount will depend on the size square you’re using and how much jam you want. I make small squares and use about 1-2 tablespoons compote). Place the remaining, squares on top to make a “sandwich.” 

Place scones on prepared baking sheet and bake at 425 degrees F for 12-15 minutes.  

Let cool for 5-10 minutes, and then serve.

Half have a maple syrup glaze

Friday, December 16, 2011

Decorating Sugar Cookies

The other morning, as I walked the dog, I was able to witness the better part of the lunar eclipse, which as the moon sunk beneath the earth's shadow, caused me to think about chocolate dipped sugar cookies. Again, these are neither vegan or gluten-free, but I had the opportunity to make sugar cookies with E and our friends Caitlin and I*--and how could I pass that up? Especially if it meant the opportunity to take photos?

I remember, as a kid, that one of my favorite parts of going to the grocery store (specifically Winn-Dixie) was the opportunity for a free sugar cookie. It was a lovely once-a-week-ish treat (they didn't always have them) and those sugar cookies--probably Pillsbury or something similar in retrospect, and knowing what I know now about many grocery store bakeries)--were far superior to the ones from the recipe my mom had. The grocery store cookies were large and sweet and chewy, with absolutely no odd taste. I couldn't say the same for my mom's, which made approximately a zillioin--far too many for me to stay interested in decorating them--and were never as chewy, sweet, or just...sugar cookie flavored.

The cookies featured below are a perfect addition to a cookie exchange, or in the case of what I was creating for taking into work, a cookie platter at a party. You can dip them in chocolate, paint them with a basic milk-and-powdered sugar glaze, or add sugar before baking. I haven't tried them, but the recipe is a Julia child recipe so it's probably pretty yummy! E, Caitlin, and I* seem to like them.

We cut out "Christmas salmon," and "Christmas rhinos," moose and candy canes and gingerbread men, among other things. As the evening grew later and we all got punchier (sugar from cookies for E, Caitlin, and I* plus hot mulled cider for all of us), we started laughing about the idea of Christmas rhinos and the "guiding light" of the "Christmas lighthouse"steering us toward Jesus. We were, we decided, probably going to hell for that blasphemy.

In the write-up that follows, I made a couple of modifications to describe the roll-out and baking process we used. We also did not use a combination of cake and all-purpose flours, because we didn't have them and that change is also reflected in the recipe that follows.

I'm not sure which cookbook this originally came from--but we all thought since it was Julia Child, it was sure to be good. Caitlin, who brought the recipe, brought it on an index card. We actually tripled the recipe--and therefore, worked on this for a good three hours.

Julia Child's Sugar Cookies

1 cup all-purpose flour
1/4 teaspoon salt
4 ounces (1 stick) chilled butter, cut into 16 pieces
3 tablespoons granulated sugar
1 egg yolk
1 teaspoon pure vanilla extract
1 tablespoon cold water, plus droplets
more water, if needed
  
Measure the flour, salt and butter into the container of a food processor and process about a minute, until the butter is thoroughly blended (you can also use two knives, or a pastry cutter, if you have those on hand and don't have a large enough food processor--we definitely don't). Add and process in the sugar, then the egg yolk, vanilla and water. Continue processing for several seconds, until the dough masses. Turn it out onto your work surface, form into a rough ball, then push out 2-tablespoon bits with the heel of your hand in 6-inch smears. Gather together into two or three small balls and refrigerate until well chilled, at least 1 hour. Roll out on a lightly floured surface and cut out the cookies, placing them on a lightly greased cookie sheet. Bake at 350 degrees for 4-7 minutes (depending on the size of the cookie), or until cookies are golden around the edges. Decorate when cooled, if desired.

Thursday, December 15, 2011

Easy Apple Cinnamon Compote

Easy and fast, I might add. This is a compote that I also use on my Apple Cinnamon yogurt scones (post on that to follow soon). Fortunately, this also saves pretty well for a couple of days.

Making an apple cinnamon compote was inspired by having a few soft-ish apples and by my friend Holly, who brought a lovely compote to a dinner E and I hosted not long ago. Holly's compote used raisins, lemon, cloves, cinnamon, and of course apples! Plus, what tasted like a fair amount of sugar. This compote is definitely a low-sugar compote, because I wanted something to go on the scones that wouldn't overwhelm people who didn't really want a super-sweet bite.

Compotes also go well on dark green veggies, over things like pork chops (if you eat meat), and on other savory dishes, adding a little complexity to each bite. Or you can be like me and just eat it straight, or as an ice cream topping. Whatever. You taste it and decide.

I made only a small batch of this compote because I only had a few apples I wanted to use up before they went  too soft even for this, but you could easily double or triple this. If you have fresh lemons you could zest for this, lemon zest would kick it up nicely. I didn't, so I don't include that in the recipe.

Easy Apple Cinnamon Compote
2 or 3 medium apples, peeled if desired (I never desire peeling), and chopped
1 tablespoon agave nectar or honey (remember agave is vegan, honey is not)
1 tablespoon lemon juice
1 teaspoon ground cinnamon
1/2 teaspoon ground cardamom
1/4 teaspoon ground cloves
Pinch of salt (don't leave this out!)

Mix all the ingredients together in a small saucepan and cook, stirring often, over medium heat until the apples have juiced and the sauce has thickened again, about 20 minutes. Cook longer, stirring frequently to prevent scorching, if a thicker/drier compote is desired. Store in an air tight container in the refrigerator up to 3 days, or serve immediately.


Tuesday, December 13, 2011

Tuxedoed Oreos (repost)

I originally published this recipe -- by no means original -- a year or so ago, but since it's so appropriate for the holidays, I wanted to post it again. I just made these during a cookie-making party E and I held, and here are pictures of the little beauties.

They're best if they've had a day to marinate -- the filling becomes creamier, more like a bon-bon. You can keep them in the refrigerator, or leave them on the counter (but only for a couple days). I recommend keeping them in the refrigerator, if possible. I'll be making more for a holiday party soon.
From the first snow of the season

It's not absolutely necessary that you use oreos -- a chocolate-vanilla wafer cookie generally (and generically) works well, as long as you like the flavor of the initial cookie. Oreos, however, are vegan, and you can use vegan cream cheese if you want to make these vegan (though if you choose this measure, make sure you choose a vegan white chocolate -- they do exist, but some types contain milk products). These are definitely not gluten-free.


They are easy though, and pretty much no-bake (okay, they are no bake, but a microwave or stove top is useful for melting the white chocolate), which makes these an activity kids can help with easily!


Oreo Bon-Bons

1 pound reduced-fat oreos
1 8-ounce block neufschatel (reduced fat cream cheese)
Powdered sugar for coating OR
White Bark coating (about 1/2 pound) (recommended)

Smash the oreos so no huge chunks remain. This can be done with a gallon bag and a rolling pin--just be sure to get all the air out of the bag before you start hammering it. Or, you can toss them in your food processor and pulse it to break up the cookies. In a large bowl, using a fork, mix together the cream cheese and oreos until the color is even and it starts to come together to form a ball.

Roll small, equally sized balls of the cookie-cream cheese mixture. These can be any size you want, but it's easier to coat these if they're evenly sized--especially if you're using the white bark coating. Chill the small balls for an hour or two (stick 'em in the freezer), until firm.

Spread the powdered sugar in a shallow dish, if using, or melt the white bark coating (follow instructions on the package, but generally you can do this in a double-boiler or by microwaving it on HIGH for 1 minute and then stirring. Microwave on HIGH for additional 15-second intervals until it is completely melted).

Dip or roll the balls through the powdered sugar or melted white bark. Let set and then store in refrigerator.

Saturday, November 26, 2011

Book Review: Cinderella Ate My Daughter

A mother I work with from time to time recently asked me if I'd read Cinderella Ate My Daughter: Dispatches from the Front Lines of the New Girlie-Girl Culture by Peggy Orenstein. Then, a couple days later, I read about the book on NPR. How I missed this in February, when the article was originally published, I'm not sure. I was probably preoccupied with my graduate thesis defense, which was fast approaching.

I've taken a few (and yes, just a few) women's studies classes. My book explores paralleling stories of healing (eating disorder, serious injury) and growing up. I grew up feeling more comfortable with boys, and later men, than with girls and women. I'm torn between supporting the Hollaback movement and resenting that I need to/should support it--the equivalent of carrying a rape whistle or inserting the anti-rape condoms. In other words, street harassment, like rape, is something that happens. But I resent that I feel like I should have to defend myself against it at all--and that it's my responsibility to be prepared for that possibility and the emotional consequences.

The ideas presented in Cinderella Ate My Daughter are ideas I'm just beginning to explore--and simultaneously ideas that I've been exploring for a long time. I'm curious about the increasing number of eating disorders--and how they are beginning to appear in younger and younger children. I'm curious about the rise in make-up sales to children who haven't even reached double-digits. For that matter, I'm interested in knowing more about what I perceive as increasing consumerism/materialism not only as marketed to children, but as marketed to adults. I'd like to understand how the increasing pressure to read and know numbers up through 20 before a child starts kindergarten will affect both girls and and boys in the generation that's just starting school, and how this will define the haves from the have-nots. But more than that.

I'm curious about what it means to be female in America right now, and what it means to be female in general. I want to know if the division between girlie-girls and non-girlie-girls will cause a lasting division among women as this generation ages. I'm curious about why there's been the explosion of pink (and purple) in the girls' section of toy stores, shopping centers, and on the little girls I work with. And, I wonder about the messages we're sending girls--in an era when more women are taking science courses in college and entering the science field, but also in an era just before the generation of the girlie-girls Orenstein writes about.

Orenstein focuses, primarily, on cis-gendered (presumably) boys and girls, probably because that's her worldview. She nods, from time to time, to the idea that she'd still love her daughter, even if her daughter is a lesbian.Where this is inserted, it feels awkward, as though Orenstein is consciously trying to sound progressive. And, that being said, I think she is progressive. She wants her daughter to have sex before marriage. Long, long before marriage, in fact. But she's concerned about the early sexualization of girls, as well as the messages of "needing to be saved," or "being pretty," and that's what this book focuses on.

She cites one example of going to the Toy Fair and noticing that one particular banner (with pink script) says over, and over, and over, Beautiful, Pretty, Colorful. The other has the words Power, Energy, Heroes. Guess which one's for boys? She explores concern over pop-princesses and the exploitation of their girl-next-door wholesomeness especially as they get to the age where they try to step out of the pop starlet into young womanhood, possibly even starhood, over weight-issues and young women (and girls), over make-up and clothing and gender-associated playthings. Orenstein looks at the "harried, doing too much and none of it well" image of female superheroes as well as the hyper-sexualization of female superheroes when her daughter asks for a Wonder Woman costume for her sixth birthday.

And, I do give her kudos for exploring these issues as a mom of a young girl. I applaud her reading her daughter the Grimm fairy tales. I appreciate that she asked other moms for their opinions on the girlie-girl culture, and supports her writing with research (though some endnote markers would've been fantastic). I find her explorations more credible, and I'm more tolerant of the stumbles Orenstein takes as she works through these issues. In part, though I think the stumbles are intentional. She writes to impress a target demographic I'm not part of -- a part that wants to dismiss science (one Amazon reviewer blasts her for this early in the book after she talks about myelin sheaths and neural flushing, then in the same paragraph says, "Whatever that means."). But this also causes Orenstein to contradict some of her own thesis. We, as women (and men out there) should encourage the exploration of these terms if we don't understand them, rather than playing into a stereotype that talks down, at least to some extent to the audience.

This book seems particularly relevant to read right now, while fairy tale movies are coming out and/or are in post-production. The LA Times published a slideshow article in April on fairy tale movies for grownups. Included in the lineup: Red Riding Hood, Pan's Labyrinth, The Brothers Grimm, Snow White: A Tale of Terror. Movies coming out soon include Snow White and the Huntsman and Mirror, Mirror; Jack the Giant Killer; and Dorothy of Oz. Orenstein even nods to the Twilight series and movies, which she calls (and I'd agree) a modern fairy tale. I would love to know why we're collectively seeking this immersion in fairy tale lands. It's not as though this is recent, exactly. Thanks to E, I could name off fairy tale based movies, TV shows, and mini-series that are current for a while. But I could also name a fair number from the past 20-ish years, notable only because the Disney Princess line, which inspires Orenstein's book, was only created in 2000. We were already moving in that direction. Someone just decided to capitalize on it (more).

Would I recommend this book to others? Yes. With reservations. I am not thrilled by the way Orenstein jumps to some of her conclusions unfounded. I'm also not thrilled with the lack of exploration of the other side of the girlie-girl culture, those girls who (for whatever reason) don't fall into that position. She begins to do that toward the end, as she notices her own daughter turning against women. Specifically Orenstein wonders if her messages have caused her daughter to see being a girl as a bad thing while being a boy--or at least liking boy things--is superior.

One of the major positive attributes of this book? I found it super-readable. Orenstein's style kept the book from seeming overly preachy and because she was exploring the topic as a mom and using a journalistic-style voice (more inviting, than say, an academic paper) I had a hard time putting the book down. I can't say that for most nonfiction books. But I would've liked to feel more depth, or at least seen more exploration. I wanted to keep reading.

What I would love to know if this book was longer: What is it about the girlie culture that these other girls reject, for instance? And what becomes of them as far as body image goes? As far as fitting in later in life? Or those people who don't fit the cis-gendered roles? Why, really, are these the messages we're sending to girls culturally now? What about girls who grow up poor and not white? What affect does culture this have on them, and are they affected in the same way?

But Orenstein does explore a lot of topics I'm interested in, a lot of topics I wish people talked, and researched, and wrote about more. And that's the primary reason I would recommend the book. To push this type of conversation back off the Internet (where, to me, it seems more prevalent) and out of college classrooms, and back into places where moms and women and girls gather, talk, wonder why everything is just so pink.

Let me know your thoughts on these trends--even if you don't read the book. I love to hear from you.

Friday, November 25, 2011

A Very Veggie Breakfast

A quick reminder: the follower drive is still going on. Follow this blog and tell your friends to do so too!

I'm still in my "I want to eat veggies. Lots of veggies. Lots and lots of veggies. Especially green veggies..." stage and I've been making sautes and stir-fries for breakfast because the idea of sweet breakfast turns my stomach a little. In particular, I've been making some variation of this for breakfast almost daily, either using kale, chard, collards, or cabbage, depending on what I have in my refrigerator (aka, depending on what I got cheap at the growers market or the grocery store).

This is nice for breakfast because it's simple. I can start it after I walk the dog, even on days I'm feeling somewhat more rushed than I'd like in the mornings. I can steep my coffee (French press) while my food caramelizes, perhaps get my lunch ready to go on my weekdays, and even turn on my computer to check email and other things, all the while, giving my food an occasional quick stir so it doesn't burn.

As a post-Thanksgiving day breakfast, this is fun, light, and doesn't involve leftovers--which there will be plenty of, for many people, in the coming days (and weeks! So glad that's not me this year.). Plus, if you pair it with a piece of whole grain toast or other whole grain, then you will have plenty of stamina for shopping, cleaning, decorating, or whatever it is you do with your Black Friday. Usually, I would make tamales. This year, I work. But as I said, I've been eating this, or some variation of this, for several weeks and I find it a lovely way to start my day in a veggie-intense way that doesn't involve a smoothie (kinda cool for that this time of year, and the blender noise is obnoxious first thing in the morning).

In the variation of this depicted by the picture, I'm using Lacinato kale, which (apparently) has a long tradition in Italian cuisine. I'll have to remember that next time I buy some -- I definitely want something with tomatoes and Italian flavoring soon, probably also for breakfast. Lacinato kale is the same thing as dinosaur kale (my personal favorite name for it), Tuscan kale, and black kale among many other names. This is simply the kale that's looked best at both the growers market and the grocery store.

Sometimes I add mushrooms, because I really like them. I don't always want mushrooms though and so I'm not including it in the list of ingredients. When I do add mushrooms, I usually add 4-6 sliced (depending on the size) a couple of minutes after I add the onions, but before I add my greens. They add a lot of extra flavor though, so if you like mushrooms and have them on hand, I highly encourage you to use them.

This makes a great main dish breakfast for one or two, or could be used as a side dish for several. You could also use it for lunch or dinner, if you're so inclined (and I've been doing some of that too, just changing up what specifically I add).

I've also been craving, recently, baked beans on toast with stewed tomatoes. Maybe all these British shows E and I have been watching are rubbing off. Fortunately, or unfortunately, I don't usually have baked beans or stewed tomatoes on hand. Maybe though, I'll make that happen.

It's Good to Be Green (and orange!) Breakfast (or dinner)
1 teaspoon olive oil
1 tablespoon chopped ginger
1/4 cup chopped onion
1 clove garlic, sliced
1 carrot, sliced in coins, or 1/4 cup chopped sweet potato
1 bunch kale, chopped
Salt (I use about 1/4 teaspoon, at most)
Red pepper flakes (I use about 1/4-1/2 teaspoon)
Red wine vinegar (if you don't have this on hand, use lemon juice)

One or more of the following:
1/4 cup raisins, optional
1 teaspoon curry powder, optional
2 tablespoons chopped or slivered, toasted almonds
2-4 tablespoons goat cheese
1/2 thinly sliced, firm apple such as Arkansas black or pink pearl 

Heat the olive oil in a saute pan over medium heat. Add ginger, onion, garlic, and carrot. Stir to coat with oil and then only stir occasionally (every 2-3 minutes, perhaps) until the onions and carrots just begin to caramelize (about 7-10 minutes total, depending on your pan).

Add the kale (or cabbage), salt, and red pepper flakes. Saute until the kale begins to wilt and then add the red wine vinegar.

Remove from heat when the kale is mostly wilted and stir in the raisins, curry powder, almonds, goat cheese, or apple (I wouldn't recommend using all of these at once--but perhaps two or three, with a specific flavor-idea in mind as you're doing it), if using. Serve hot.