Pages

Showing posts with label baking. Show all posts

Thursday, December 26, 2013

Tea "Biscuits"

Ah, one of the joys of being an American is that a "biscuit" brings to mind something that you use as a side dish -- to pretty much any meal. You can have gravy on it (sorry, not my thing) or wedge a sausage patty in it. You can put it as a side to a dinner of meat (or not) and greens. You can spread jam or honey on it. You can do a lot of things to a biscuit. And, depending on where in the country you live, biscuits might be fluffy (Southern influence) or thinner and crispier (Northern influence).

SO MANY OPTIONS.

But, Americans don't usually hear biscuit and think "a sweet."

These tea biscuits are definitely more like cookies, if you're an American reader. They're sweet (yet have protein because of the g-bean flour!), and very versatile. The original recipe comes from the Flying Apron Bakery Cookbook, and calls for placing beautiful little berries in the center of each cookie. That's yummy (and frozen blueberries work great, btw). But you can also season these with sweet spices and create something that's (still) totally appropriate for eating with a mug of hot tea (or coffee), any time of day.

I make my tea biscuits much smaller than the original recipe recommends (it recommends baseball sized, mine are closer to golf-ball sized -- but then, I'm also not selling them in a bakery). A thought about this: If you're making them for a fundraiser or something along those lines, definitely make them big. I didn't have to make much of an adjustment to the baking time, so you should only need to leave them in for a few extra minutes. 

I like that these come together pretty quickly (though they do want to hang out in the refrigerator for a few hours -- you can make the dough in advance and just make a few at a time this way), but they will leave your hands sticky (something I'm less thrilled about). I recommend making the dough as listed below, and then modifying it however you'd like (suggestions also below, probably you don't want to try all the variations at the same time).


Tea Biscuits
2 1/2 cups brown rice flour
1 1/2 cups, plus 1 tablespoon garbanzo bean flour
1 teaspoon baking powder
1/2 teaspoon baking soda
3/4 teaspoon sea salt
1 cup canola oil
Scant 1 cup cane sugar
1 cup soy milk
Berries (optional)

Additions (probably only try 1-2 at a time, based on preference):
1/2-1 cup mini vegan gf chocolate chips (such as Enjoy Life)
4-5 drops pure orange oil (a little goes a long, long way -- and orange essence is not the same thing)
1 tablespoon of cinnamon
1/4 cup minced, candied ginger

Combine the brown rice flour, garbanzo bean flour, baking powder, baking soda, and salt in a large bowl. In a separate bowl (or if you have a stand mixer, in that), beat together the canola oil and cane sugar until well mixed. Stir in the flour mixture and the soy milk a little at a time, alternating, until well mixed. Chill* the dough at least three hours (it can go less, but believe me, you want that garbanzo bean flour to hydrate).

Preheat the oven to 350 degrees. Place golf ball sized balls of dough on a cookie sheet that has been greased or covered with parchment paper, about 1 inch apart (these don't spread much). Lightly flatten the balls with the palm of your hand. If you're using berries, press 2-3 into the top of each cookie.

Bake until golden and firm to the touch, about 20-24 minutes.

*Optional:
Stir in the mix-in to some (or all) of the dough before you let it rest in the refrigerator. If you're only making a few cookies and want to try out one of these options, I definitely recommend reducing the amount of ingredient you're choosing to mix in. You don't want to overpower the delicate flavors in these tea biscuits.

Wednesday, December 25, 2013

Oatmeal Cookie Crust

I knew I wanted to make a vegan French silk pie this holiday season (originally, I'd intended to make it for Thanksgiving), but for various reasons, it kept not happening. I even had a pretty tasty gluten-free crust, from the freezer section, on hand for a bit (and that got used for other things too). Alas, when I finally did find the time/energy/resources to make it, I didn't want to replicate a buttery, flakey crust. That 1) didn't seem fun because 2) it's a lot of work when it's also gluten-free.

I looked online for recipes for cookie-based crusts for similar pies and saw a lot for Oreo crusts (because Oreos are chemically vegan), but that doesn't work for a gluten-free diet (not even if you get the wheat-free Newman's, if you're new to gf baking). Then, I started looking for oatmeal cookie crusts (I love oatmeal cookies). Since this was going to be a very sweet pie, I didn't want any of the super-sweet crusts I was seeing and decided to make my own, less sweet, veganized crust.

This is what I came up with instead, loosely based on a straight-up oatmeal cookie recipe. It's lightly salty and holds together pretty well.

Oatmeal Cookie Crust
1/3 cup non-dairy butter
1/2 cup granulated sugar
1/4 cup brown sugar
1 tsp. pure vanilla extract
1 tbsp ground flax mixed with 5 tablespoons warm water*
1/4 cup applesauce
2/3 cup buckwheat flour
1/4 tsp. fine sea salt, scant
1/4 tsp. baking soda
1/4 tsp. baking powder
1/2 tsp. ground Ceylon cinnamon
1 cup rolled oats

In a saucepan, combine the butter and sugars, and stir until just melted and combined. Remove from heat, and add in remaining ingredients (I used a large enough saucepan, you may need to transfer these to a separate bowl), and mix thoroughly. Grease your hands or the back of a silicone spatula and press into a greased 9" x 11" baking dish, including up the sides. Bake at 350 degrees for about 9-11 minutes, or until edges just begin to brown. Remove from oven and cool completely before adding any fillings.

*This is more than you'd normally use for a flaxseed egg, but you want this dough pliable enough that you can push it throughout the pan

Wednesday, January 2, 2013

Pumpkin Granola with Buckwheat & Pepitas

It seems like over the past few months, pumpkin granola has leaped into the forefront of "it can be paleo and still granola" as well as many "skinny" (aka low-fat / no-fat / we'll prove we can use less or no oil and not use apple sauce") recipes. Certainly, if you got here by googling "pumpkin granola," you probably noticed how many recipes came from this year -- and how many are grain free or say you can use pumpkin instead of canola oil.

These things are not what I was thinking about when I decided I wanted to experiment with a pumpkin granola recipe. Instead, I thought about the granolas I've already made this fall, and how pumpkin granola seemed like a fun and tasty late autumn breakfast. I thought about how much I like pumpkin things (and how my parents didn't make them when I was growing up). I thought about how easy it is to find pumpkin at the store right now, both fresh and in cans.

And I thought, well, why not?

With this recipe, I use buckwheat, a gluten-free (un)grain (we treat it as a grain, but it's technically a psuedo-cereal and not a grain at all). I secretly really wanted to use millet, but I seem to be able to handle millet only in small amounts. Working with buckwheat can be a bit harder -- if you cook it first, it turns into a somewhat gelatinous blob and doesn't look very appealing. Fortunately, it doesn't really need to be cooked beforehand to be soft enough to chew. I used raw buckwheat, as opposed to kasha, because I was going to stick it in the oven anyway, and because kasha tends to be more expensive than regular buckwheat.

Pumpkin seeds add a little additional protein to this granola. I suggest 1/3-1/2 cup because they can be kind of spendy, but feel free to add more if you like -- or to wait and add them until you're ready to eat your granola.

As with most of my recipes now, this is gluten-free and vegan. If you store the granola in an air-tight container (I like storing it in jars), it should keep for about 2 weeks -- if you live in a humid climate, maybe not quite as long.

Pumpkin Granola with Buckwheat & Pepitas
4 cups GF rolled oats
2/3 cup brown sugar
2 teaspoons cinnamon
1/2 teaspoon ground cloves
1/2 teaspoon ground allspice
1/4 teaspoon ground nutmeg
1/4 teaspoon salt
1/3-1/2 cup raw pumpkin seeds

1 cup pumpkin puree mixed with 2/3 cup water

Preheat oven to 300 degrees Fahrenheit. Mix all dry ingredients together in a medium-sized bowl, and then add the pumpkin puree mixture. Spread evenly onto a cookie sheet. Bake 40-50 minutes, stirring the granola to break up the pieces about 30 minutes into the baking time. Remove from oven and allow to cool. If the granola still feels wet (and this is dependent on your climate, mostly) once it's cooled completely, return to the oven and bake at 300 for another 15 minutes.


Monday, December 31, 2012

Monster Cookes

How many times have I made Monster Cookies over the past 4 years (since I first learned about them)? More than I'd like to admit. There was a period where I was making them for every bring-something potluck or dinner I went to, and also a period of time where I was making them about once a week for a on-going bake sale fundraiser to support a literary journal (along with cake pops), where I was a member of the staff.

The thing I like about Monster Cookies are that they basically work with what you probably already have in your kitchen -- peanut butter, sugar, oats, butter (or in my case, vegan butter or coconut oil or even just canola oil), eggs (ehm, fake eggs), and chocolate, nuts/seeds, and dried fruit. Or, whatever else you want to throw in them.

I haven't made them since switching to a vegan diet, though I have made vegan monster cookies before. And I haven't tried to consciously make them just a little better for you, while still definitely tasting like an indulgence. To be sure, these are cookies, and they are an indulgence, just so we're all clear. But some indulgences are worse than others, right??

What makes these monster cookies better for you? Well... that's a somewhat subjective question, but these cookies are:
  • Gluten-free
  • Vegan
  • Low in refined sugar (they use agave nectar and the pictured cookies also use Enjoy Life (vegan, gf, soy free) semi-sweet chocolate chunks
  • High protein (especially if you add seeds/nuts!)
They're also moderately low fat (only a small amount of oil is needed to help these cookies become chewy and crispy and soft, the perfect combo in my mind) since most of the fat comes from peanut butter. They include whole grains, and they can use dried fruits or nuts of whatever sort makes you happiest.

Monster Cookies (vegan, gluten-free)
1 cup creamy peanut butter
1/2 cup agave nectar
1 tablespoon coconut oil, melted
2 flaxseed eggs (2 tablespoons ground flaxseed combined with 6 tablespoons water)
1/4 cup unsweetened apple sauce
2 1/2 cups gluten-free oats (quick oats works best, but I never have them on hand, so pictured you'll see old-fashioned oats)
1 teaspoon baking soda
1/4 teaspoon salt
1.5 cups of any combination of the following (or whatever your heart desires): VGF chocolate chunks/chips, sunflower seeds, pumpkin seeds, dried cranberries, raisins, chopped peanuts, VGF candy-coated chocolate (i.e. - sunspire drops), coconut flakes, slivered almonds, banana chips, etc.

Preheat oven to 350 degrees. In a medium-sized mixing bowl, combine the peanut butter, agave nectar, coconut oil, flax eggs, and apple sauce, and stir until well mixed. Add the oaths, baking soda, salt, and fruit/nut/chocolate combo. Stir well.

Allow the dough to rest for 20-30 minutes (especially important if you're using old-fashioned oats, because this allows them to become a little softer). Scoop the dough, by 1/4 cupfuls onto a baking sheet that has been lightly greased, or lined with parchment. Cook 12-15 minutes and allow to cool another 3-5 minutes on the cookie sheet, before trying to remove them.

Serve, or allow to cool completely and store in an airtight container for 3-5 days.


NOTE: You can also make smaller cookies (say 2 tablespoons, 1/8 cup). If you opt for this, keep an eye on them while they cook and reduce cooking time to 10-12 minutes. They should be golden brown around the edges when they are ready.

Thursday, December 27, 2012

Sweet and Fluffy Coconut Cornbread

Confession: I grew up not eating sweet cornbread. In the south, sweet cornbread is well, a bit blasphemous. It wasn't until I left my parents' house that I got sweet cornbread on a regular basis. Does that mean that I love sweet cornbread? Hardly. Pretty frequently, I opt instead for a spicy cornbread with whole kernel corn and jalapenos.


But, today seemed like a good day for a nice, warm sweet cornbread that I could pair with a vaguely chili-like stew. A friend of mine recently attempted to make a coconut cornbread that used coconut flakes and coconut oil -- and was disappointed that the coconut flavor didn't come through very strongly. I wanted to increase the coconut flavor (you should think coconut! when you taste this) when I worked with this recipe. The trickiest part was figuring out how much liquid to use (I guess coconut flour absorbs a lot of liquid -- this definitely used more water than I expected and you should see my note below about this, in case it was my cornmeal and not my flour greedily hogging water).

This is a vegan, gluten-free recipe that gets baked in an 8 x 8 baking dish, though I imagine it would also do well if you cooked it in a cast iron skillet (and it would probably have a better crust on the skillet side!). Serve it with a hearty stew for dinner, eat it as a snack, or pour some warm milk on it and serve it as a warm cereal for breakfast -- whatever makes you happy.

Coconut Cornbread
1/2 cup coconut flour
1/2 cup tapioca starch
1/2 cup unsweetened coconut flakes
1 cup finely ground cornmeal
2 tablespoons brown sugar
1 tablespoon baking powder
3/4 teaspoon salt

1/3 cup agave nectar
1 cup water
1/3 cup coconut, almond, or soy milk
2 tablespoons vegan buttery spread (or coconut oil)
1 tablespoon canola oil

2 flax eggs (2 tablespoons flax + 6 tablespoons warm water)

Preheat oven to 400 degrees. Mix together the dry ingredients (coconut flour through salt) together in a medium-sized bowl. In a small saucepan, over low heat, mix together the agave nectar, water, milk, buttery spread, and canola oil. Once the buttery spread has just melted, add the flax eggs to the liquid mixture, and then add the liquid mixture to the dry ingredients. Stir until smooth (note: you might need to add up to another 1/2 cup of water -- you want a batter that is a little thicker than cake batter).

Pour the cornbread mixture into a greased 8 x 8 pan, and bake for about 25 minutes, until it is golden brown on top, and a toothpick inserted into the center comes out clean.

Cool at least 15 minutes before cutting and serving.

Tuesday, December 25, 2012

Chocolate Orange Granola

I know, I know, you were thinking it'd been far too long since the last granola post, right?

I've started seeing Terry's Chocolate Oranges in the stores (and knock-off versions as well), and that reminded me of how, growing up, my dad and I would each receive a chocolate orange in our stockings at Christmas. I still enjoy the flavor of chocolate and orange together, at least from time to time, and because today is grey and gloomy (though also windy and warm, and beautiful in a slightly spooky way) it seemed like a good morning to try making chocolate orange granola.

As with my other granolas, this one isn't terribly sweet. If you like it sweeter, increase the sugar or agave nectar (in the directions, I'll have the amount I recommend increase in parentheses). The orange flavor is subtle, but then again, you probably don't want to overwhelm your tastebuds with super-duper-orange OMG goodness, or you'll cancel out the chocolate flavor.

The chocolate is also a moderately subtle flavor in this granola, which means you can actually still taste the oats and buckwheat groats -- which I appreciate, since they add their own complexity to the cereal. I bake this granola at a much lower temperature than most granolas I make since it does use cocoa powder and I definitely do not want that to scorch. If you decide to go with a little higher heat (like if you're crunched for time, I recommend not above 325, and stir more frequently).

Chocolate Orange Granola
4 cups gluten-free rolled oats
1/2 cup buckwheat groats (not toasted)
1/2 cup brown sugar (2/3 cup if you prefer sweeter granola)
1/4 cup cocoa powder
2 tablespoons agave nectar (3-4 tablespoons)
1/2 teaspoon salt
10-15 drops pure orange oil

1/2 cup hot water


Preheat oven to 275 degrees Fahrenheit. Combine all the ingredients except the water in a medium sized mixing bowl. Add the water and stir until all the oats are evenly coated and moist. Spread the granola out on a cookie sheet and bake for 45 minutes to 1 hour, stirring every fifteen minutes. Remove from oven and allow to cool completely. Granola should be crispy when cool. Store in an air-tight container.

Thursday, December 20, 2012

Cranberry Orange Scones

Cranberry Orange Scones (Vegan, GF)
It's been a long time since I made scones -- almost 18 months! That's far too long, and it makes me a bit sad (okay, so really only a year since I made any type of scone). This basic recipe is one of my favorites, and now I've modified it to be vegan in addition to making it gluten-free.

When I first posted the basis for this recipe,I hadn't been eating GF for very long. I used Bob's Red Mill flour, and was incredibly excited when the recipe turned out edible. Now, I'm more confident in baking GF and I experimented with the flours some. Generally, if you're creating your own GF blend a 70:30 (flours to starches) ratio works pretty well. This recipe hits that pretty close, though it's a bit higher on starches, which causes the scones to be reminiscent of sweet English tea biscuits.

If you're already baking GF, there's a good chance you have these flours in your pantry. If not, you can find them online (like anything else) or in most grocery stores, on the baking aisle. Xantham gum might be the tricky thing to find (and I actually don't love using it -- you're welcome to try the recipe without it. It works, but is a bit more crumbly.) and this too is pretty readily available now.

Scones remind me of breakfast with friends in the Midwest. The last time I made these, I created a glaze for the top using citrus juice and powdered sugar. I don't have powdered sugar on hand and it didn't seem worth buying for just this recipe, but if you want a slightly sweeter scone, I recommend it.

Cranberry Orange Scones
1/2 cup sweet white rice flour
1/2 cup sweet white sorghum flour
1/2 cup tapioca starch
3 tablespoons light brown sugar
2 1/2 teaspoons baking powder
2 teaspoons orange zest
1/4 teaspoon baking soda
1/4 teaspoon xantham gum
1/4 teaspoon salt

6 tablespoons butter, softened
1/3 cup soy milk combined with 1/2 teaspoon lemon juice to produce "soy buttermilk"
1 tablespoon flax seed mixed with 2 tablespoons warm water

Optional Quick Cranberry Sauce (you can use sauce leftover from another project or meal too!)
6 ounces fresh cranberries
1 tablespoon orange juice concentrate
1 tablespoon agave nectar

Place rack in the upper third of the oven and preheat to 425 degrees F. 
 If you don't have leftover cranberry sauce, combine all ingredients from the Optional Quick Cranberry Sauce in a small saucepan over medium heat. Allow to cook, stirring frequently, for 10-15 minutes while you prepare the scones.
Unbaked
In a mixing bowl, sift together flousr, xantham gum, sugar, orange zest, baking powder, baking soda and salt. Cut in butter until mixture resembles coarse meal. In another bowl, combine  soy buttermilk and flax seed mixture, then  beat lightly with a fork. Add to flour mixture all at once, stirring enough to make a soft dough. 
Turn out onto a lightly floured board (I used a little bit of sweet rice flour) and knead a few times to make sure the dough isn't too sticky -- it should hold together without sticking to your hands, but it shouldn't crack around the edges either. Roll or pat out into a 1/2-inch thickness. Cut into 8 large or 12 small squares. On half the squares, spread a thin amount of cranberry sauce(amount will depend on the size square you’re using and how much jam you want. I make small squares and use about 1 tablespoon sauce per finished scone). Place the remaining, squares on top to make a “sandwich.” Place scones on prepared baking sheet. and bake at 425 degrees F for 12-15 minutes, until they just begin to turn golden. 
Up Close, Golden Brown and Ready to Eat!

Saturday, November 17, 2012

Masa Harina Cornbread (GF)

First, let me apologize for the lack of pictures in this post. You'll have to just trust me.

When I started to make black beans the other day (now in March, when I was still eating animal products, since I didn't remember to take pictures the next time I made this either), I realized I didn't have enough rice. Oops. Oh well, I had some masa harina (tamale style, though I'm not convinced it really makes a difference). I poked around on the internet until I found a masa harina cornbread recipe. That recipe, apparently, didn't come out very fluffy but had a strong corn tortilla taste. 

To counteract the flat nature of the cornbread, I didn't use a preheated skillet and I increased the baking powder from 1 teaspoon to 1 tablespoon. I also used melted butter because, growing up in the south, I never once saw a cornbread recipe that didn't use melted butter. I reduced the amount of butter and added some olive oil (because why not), but you could certainly use all butter if you were so inclined. It definitely leaves a lightly buttery flavor in the cornbread at this ratio. I increased the amount of honey because 1 tablespoon seemed too low and added a dash of cinnamon for a little extra complexity--and to complement the flavors in the black beans.

The cornbread that came out was light, rather than dense, and had a nice corn flavor without being overwhelming. I wasn't really reminded of "corn tortillas," probably because I added a little extra sweetener, and because of the cinnamon.

I let it cool for about an hour before I cut into it, so I can't attest to how well it will hold together still hot, but at "lightly warm" it held together beautifully, without adding any binders other than the ones you see. I saw one variation similar to this one, meant to be gluten-free, that added xanthan gum and an extra egg--lots of extra binder in other words. Not necessary and that just increases your overall cost, so I recommend against it. Plus, let's face it, it increases the "tastes gluten-free" factor. 

Masa Harina Cornbread
1 1/2 cups masa harina
1/2 cup brown rice flour

1 tablespoon baking powder
1 teaspoon salt
1/4 teaspoon cinnamon (optional)


2 tablespoons melted butter
2 tablespoons honey
1 tablespoon olive oil

2 eggs, beaten

1 1/2 cups milk


Preheat oven to 400 degrees. 

In a large bowl, combine the dry ingredients. Add the butter, honey, and olive oil and stir to combine well. Add the eggs, mix, and then add the milk. The batter should appear moderately wet at first, but will quickly start to thicken. Pour into a greased pie pan and bake at 400 degrees for 10 minutes and then turn up to 425 degrees for another 15-20 minutes until golden brown on top.

Friday, November 16, 2012

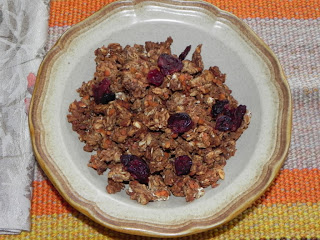
Orange-Lentil Granola

Orange-Lentil Granola
Regular readers, you might have noticed I was absent for a while. A fairly long while, compared to this spring. I was in the middle of another move, and now that I'm settled I hope (plan) to start posting more regularly again. I appreciate your patience and the handful of kind notes I got asking where I'd been.

Shortly after moving to my new place, I discovered a lack of (affordable) stick-with-you / nutrient-dense gluten-free cereals. I'd been spoiled by having a CSA share (sauteed veggies for breakfast most days) and access to cheap(er) cereals over the past year. To compensate, since I'm trying to survive on a really small budget, I started making granola again, and now make it a couple times a week. That much granola can be, well, a little boring.
That's what inspired this vegan, gluten-free granola, which has just a slight hint of orange. I don't like my granola particularly sweet, but if you do, add a little more brown sugar or a hit of agave to it. You might also experiment with the amount of orange you add. I use pure orange oil, so a 1/4 teaspoon works well. One of my testers though, used an orange extract and suggested that 1/2 teaspoon would be more appropriate. It's absolutely fine to taste it before you stick it in the oven, and add more orange flavoring, if you like.

The lentils in this granola add a lovely splash of color and a hint of protein. Soaking the lentils, as I suggest in the recipe (or boiling them for about 5 minutes, and then draining them) is essential. You'll (probably) get really gassy otherwise and they'll definitely crunch a lot when you bite into them. Be sure you use split red lentils.

This would be perfect to make a few days in advance of Thanksgiving, so you don't have to think about it on Black Friday morning, when everyone is feeling possibly-still-a-little-gross from the day before -- or something that you can make a lot of and put in mason jars as gifts for the winter holidays!

If you do decide to make this recipe in larger quantities, I find about 3 cups of oats per baking sheet works pretty well.

Orange-Lentil Granola
1/3 cup red lentils3 cups old-fashioned oats
1/2 cup packed brown sugar
1 tablespoon cinnamon
1/4 teaspoon salt

1 cup hot water (near boiling)

2 tablespoons canola oil
1/4 teaspoon pure orange oil

Mix all the dry ingredients ingredients together. Add the hot water and the oils, and mix thoroughly. Allow to rest 30 minutes to an hour (this will start to soften the lentils). Spread the granola mixture on a baking sheet and bake in a 300 degree oven for 45-60 minutes, stirring every 15 minutes, until the oats have turned golden and most are crispy.* Store in an airtight container.

*If some aren't crispy, they'll continue to harden as they dry. As long as the majority of your oats have begun to crisp, and you don't have any huge lumps of granola-cluster, you should be fine.
Orange-Lentil Granola, with dried cranberries

The pictures in this post are courtesy of Nick Clift.

Tuesday, November 13, 2012

Autumn Muffins (GF and Vegan)

Dog, seen on bike ride
Until recently, I worked at an Inn, where I made breakfast for people a lot. I love this work, because as you're probably aware (if you're a regular reader), I enjoy feeding people and forming a connection with others and with the environment via the things we put in our bodies. For me, cooking for others -- and eating with others -- creates a sense of community that I think is often overlooked in the way we usually run our lives. Unfortunately, a lot of the time at the inn, I made one of a dozen or so dishes and it quickly becomes pretty routine. I didn't always get to talk to our guests after they've finished their meal (there are so many things to do at an inn!), and I only had the opportunity to try one new recipe on guests (and this isn't it).

Happily, however, one of my co-workers (we'll call her J) and I started eating brunch together after work about once a week -- it was a wonderful opportunity for us to just relax, to talk about life, and generally hang out. We worked together in the kitchen, lovely change from the Sunday evening cooking I do for a handful of friends, and reminiscent of the Friday breakfasts I shared with friends when I lived in the Midwest.

Tree, no pretty leaves yet...
These breakfasts also presented an opportunity for me to actually feel inspired to try new things, or to make modifications to recipes I didn't like as much the first time around but see potential in. That's what happened with these muffins, which were inspired by a non-vegan recipe from my food co-op. These muffins are moist and taste like autumn -- perfect as the weather starts too cool off. Lately, I've even seen a few trees with red and yellow leaves!

We had these vegan, gluten-free muffins with a lovely veggie saute, made entirely with veggies from J's garden. They rise well, are moist, and hold together nicely (especially for a gluten-free product). If you decided to make these in loaf pans, you could definitely do that and because it holds together well, you could probably turn it into french toast (easier if you're not vegan). Afterward, we went for a bike ride together, and these muffins combined with the veggies, gave us plenty of energy for a 20 mile trip.

Don't let the ingredient list intimidate you. If you're already gluten-free, you probably have many of these ingredients around -- and if you're not, but are cooking for someone who is, these ingredients are available at most grocery stores. If you like nuts (I don't in baked goods), consider sprinkling a few chopped walnuts on the top of the muffins before throwing them in the oven.

Autumn Muffins (Gluten-Free)
2 tablespoons ground flaxseed
1 medium, overripe banana, well mashed
1/4 cup agave nectar
1/2 cup water
15 ounces roasted butternut squashed (mashed)
1 cup brown rice flour
1/2 cup quinoa or millet flour
2 teaspoons guar gum
1/2 teaspoon baking soda
3 teaspoons baking powder
1/2 teaspoon salt
1 teaspoon cinnamon
1/4 teaspoon ground clove
1/4 teaspoon grated nutmeg
1/2 cup shredded, unsweetened coconut
1/2 cup chopped dates, raisins, or dried cranberries

Preheat oven to 350 degrees F. Oil muffin tins*, or line with paper liners. Beat flax seed, banana, oil, agave, and water until creamy. Fold in butternut squash.

In a separate bowl, sift together all dry ingredients (brown rice flour through nutmeg). Fold the wet and dry ingredients together. Fold in coconut and dried fruit. The batter should be pretty thick, but add more water if it's the consistency of extra-firm cookie dough. Divide batter into muffin cups (3/4 full). Bake 25-30 minutes, until tops begin to brown and spring back lightly when touched. Allow to cool for five minutes before removing from the pan.

Serve warm. Store in an airtight container, and refrigerate after the first day. Keeps 2-3 weeks in the freezer.

*I come out with 12 regular sized muffins, plus 1 mini-loaf (which cooks another 10-15 minutes.
The Muffins!

Friday, January 20, 2012

Oven Roasted Chickpeas

It seems like a lot of bloggers recently (the past year or two, anyway, if that really counts as recent) have written about oven-roasted chickpeas. They're a good, high protein snack, moderately cheap to make (especially if you're not buying a can of them--or if you get said can on sale), and you can flavor them a lot of different ways for different tastes. They store well for hikes or trips to the zoo, they're easy to eat with fingers (making them good for kids, or for road-trips), and they're (depending on what you put on them) mostly or very "whole" as in non-processed.

The first time I read about these was about two years ago. The first time I tried them: about 18 months ago. The first time I tried freshly made ones, with Annie, last spring. I thought she'd blogged about it -- but then I couldn't find it on her site.

The recipe below is for a savory (and very garlicky -- now there's a surprise) roasted chickpea. I started with dried chickpeas that I soaked for about 24 hours before cooking in lightly salted water. They cooked up very quickly though, about an hour and then roasted for about 40 minutes at 375 degrees--the same temperature I needed for baking brown rice. Convenient!

The chickpeas came out crispy on the outside, some a little soft on the inside, and because I live in a fairly dry environment, they didn't go soft again too quickly -- a complaint I saw others making on other blog posts.

Garlicky Oven-Roasted Chickpeas
12 ounces cooked chickpeas
1 tablespoon (or a little less) olive oil
1/4-1/2 teaspoon garlic powder (to taste)
1/4-1/2 teaspoon onion powder (to taste)
Pinch salt

Preheat oven to 375 degrees. Mix all ingredients together in a bowl and then spread on a foil- or parchment-lined cookie sheet. Bake  about 40 minutes, stirring 2-3 times during the cooking process to avoid scorching.


Wednesday, January 18, 2012

Baked Brown Rice with Red Pepper Flakes

I love Alton Brown's baked brown rice, in part because I've never screwed it up, and in part because it saves pretty well if I don't finish it. But I never want a full recipe, so I usually cut the recipe in half. And I add pepper flakes (and sometimes dried herbs) most of the time, because 1) they're super pretty and 2) they add nice flavor.

This recipe is also pretty easy in that it requires almost no attention once you pop it in the oven--as long as you don't forget about it. Another major plus, especially at the end of the work day. Here's how I do it:

Baked Brown Rice with Pepper Flakes
3/4 cup brown rice
1 1/4 cups water
1/2 tablespoon unsalted butter (I often use olive oil instead, and this would make it vegan)
1/2 teaspoon kosher salt
1 teaspoon red pepper flakes
1/2 teaspoon dried thyme/oregano/fines herbes (optional)

Preheat the oven to 375 degrees. Dump the rice into an 8-inch square baking dish, or into a small casserole dish (I use a tiny dutch oven). Add the butter, salt, pepper flakes, and herbs if using. Bring the water to a boil and then pour it over the rice. Stir to combine. Cover the dish tightly with foil or an oven-safe lid, and then bake in the oven for 1 hour. Fluff the cooked rice with a fork and serve.

Thursday, December 29, 2011

Winter Veggie Cobbler (gluten-free)

Gluten-free friends, rejoice! A gluten-free recipe that actually browns beautifully. Okay, so it's not really that exciting for most people, but if you're used to eating GF, then you're also used to things that are slow to brown, or which don't brown at all -- which for bread recipes, can be rather frustrating.

I've had a version of this recipe on my fridge for a while, courtesy of a food co-op, but hadn't gotten around to trying it. I didn't have what I needed. Or I didn't have the time. Or I didn't have the creative energies for making it. Or...well, there were lots of excuses. And that's the thing. There are always excuses about why we should make something simple, or even why we should just go grab food to go, or have it delivered. 

I finally did make it when I had a lazy weekend, and E and I were going to go swimming in the evening after she got off work. I wanted something that would be pretty much ready for us when we got home -- and this can certainly be easily prepared up to a point and then left in the oven for an hour or so and quickly rewarmed, which is exactly what we did. That's nice, really nice, because let's face it, most of us are pretty busy. That being said, this recipe does take a fair amount of prep time before it actually goes in the oven, but it's pretty low-key prep. Chopping, sauteeing, stirring the topping mix. 

Chopped Turnip and Celery Root
I used the winter veggies I had on hand. The original recipe, for instance, called for parsnip (not turnip), among other things, and I suspect the recipe would be fairly forgiving in general of changes. My word of caution with that would be to use caution when thinking about how much you want to include of strongly flavored veggies, such as turnip.

It was a lovely dish to come home to on a day off that had been filled with wandering around town in the pale sunshine of late December. If you're vegan, I imagine this would be pretty easy to convert to a vegan recipe using a vegan margarine or shortening in place of the butter and coconut milk (or another non-dairy milk of your choice) in place of the whole milk in the dumplings. In this case, I'd probably add some lemon juice to create a vegan buttermilk and 1/2 teaspoon baking soda . 

Because this used red wine, and because we were feeling cozy, E and I mulled wine to go with this dish. Just a suggestion, but it was pretty fantastic.

Winter Veggie Cobbler
Topping
1 cup brown rice flour
1/2 cup white rice flour
1/2 cup tapioca flour
1 teaspoon guar gum
1 teaspoon sea salt
1 tablespoon and 1 teaspoon baking powder
3 tablespoons unsalted butter cut into small cubes
1 ½ cups whole milk or half butter milk and milk
2 tablespoons mixed fresh herbs like thyme, marjoram or parsley, finely chopped (I used about a teaspoon dried instead and it worked fine. Who has this many fresh herbs in winter?)

Veggies
1 tablespoon olive oil
1/2 large yellow onion , chopped
4 large carrots cut into ½ inch rounds then quarters
1 medium size celery root peeled and cut into 1 inch pieces
1 medium turnip peeled and cut into ½ inch rounds
1/2 medium size sweet potato cut into 1 inch dice
3 cloves garlic, minced
1/2 cup dry red wine
3 tablespoons tomato paste
2 ½ cups veggie stock or water
2 tablespoons fresh herbs like thyme, marjoram or parsley chopped fine (again, I used dried herbs)
1 teaspoon sea salt
Black Pepper

 Preheat the oven to 400 degrees.

Make topping first and let rest in the fridge while you make the veggie filling.

Topping: Sift the dry ingredients together in a bowl. Cut in the cold butter until the mixture resembles a coarse meal. Add herbs and the milk. Mix very lightly with a spoon until the batter just holds together (it comes out pretty liquidy, so make sure all the lumps are gone). Let rest in the fridge until you make the veggie filling.

Filling: Heat half of the butter and half of the oil in a large sauté skillet. Add the onion, stir for a minute, then all the carrot, celery root, and sweet potato. Brown well on several sides. In the last 3 minutes of cooking, add the minced garlic. Transfer veggies to a 9x13 baking pan.

Return skillet to high heat and add the tomato paste, toasting until fragrant. Add the wine and veggie stock. Bring to a boil, scraping up all the browned bits in the skillet. Simmer at a lowered heat for a few minutes.

Pour the liquid into the baking pan. Sprinkle with the herbs, sea salt and pepper.

Use a spoon to dot the surface of the vegetables with golf-ball sized dollops of the topping.

Just after removing the foil to bake longer
Cover baking pan with foil and bake 25 minutes at 400 degrees. Remove foil, return dish to the oven and bake uncovered until the topping is browned, about 25 minutes. Serve warm.

Beautifully browned veggie casserole


Tuesday, December 27, 2011

Ambercup Squash with Forbidden Rice and Cranberries

When my local growers market was still running, I bought several varieties of squash I hadn't tried before, or had only tried once or twice. I've been slowly working through the pile and recently tried my ambercup squash. I hadn't tried this type before because in my grocery stores past, it was always just in a pile of winter squash with no flavor profile descriptors to be seen. Fortunately my growers market did a much better job with describing it -- though for the life of me, I can't remember what the sign near the bin of these squash said.

Forbidden Rice
I wanted to bake my squash and stuff it and so I looked at my ingredients and saw I had some forbidden rice (a black rice) I'd purchased from my co-op around the same time I bought the squashes. I decided to boil it up, adding split red lentils and some flavorings, and then stuff the rice mixture into the baked squash.

This recipe was nice, because of the small size of the ambercup squashes I used. I could cut them in half and stick two halves in my toaster oven (I could have also used my regular oven, but I didn't actually need to make all the filled squash right away), start the rice, and take the dog on a run -- and do all this after work. After 30 minutes, the squash was quite tender, the rice was ready for lentils and cranberries, and I only had a little bit longer to wait for dinner.

I made the conscious decision to make this recipe vegan, because I know at the beginning of the year, a lot of people make promises to themselves about the eating habits they will adopt in the coming year. My regular readers know I play with vegan recipes regularly, but if you're new to the blog this is a great recipe to start with -- it's savory, filling, and doesn't use (too many) bizarre ingredients. If you don't have access to forbidden rice, you could certainly use a short grain brown rice in a very similar way. Nutritional yeast, which provides a lovely cheese-y flavor without cheese, is available at most major grocery stores now -- but certainly in the bulk section of stores that focus on whole food approaches to eating and online. And this filling could go in a number of different winter squashes, be eaten on top of salad, or (in the summer, though you might have to sub out the cranberries unless you're like me and stock up on cranberries while you can or happen to live in a place that keeps them in the freezer section of the grocery store year-round) stuffed in a large tomato.

Without Sunflower Seeds
You can use fewer cranberries, but I really like cranberries and try to eat as many as I can while the season permits, hence the wide range. They'll definitely add a tart flavor to your dish if you use way too many, but I liked the lightly tart taste they provided for this meal.

After all the hyper-indulgent food from the past month, this dish is a welcome respite, and full of flavors that still match the season without being the flavors of the season.

Roasted Ambercup Squash with Forbidden Rice and Fresh Cranberries
2 small/medium ambercup squash, cut in half with seeds removed
2/3 cup forbidden rice
2 cups water
1/4 cup split red lentils
1/2-1 cup fresh (frozen) cranberries (to taste)
1/2 teaspoon red pepper flakes
1/4 teaspoon fines herbes
1/4 teaspoon salt
2-4 tablespoons nutritional yeast (to taste)
Shelled sunflower seeds, optional

Bake the squash, cut side down in a baking dish covered with a thin layer of water, for 30 minutes at 350 degrees then remove and allow to cool.

Meanwhile, combine rice and water in a small saucepan over high heat. When it boils, turn the heat to low and cover the pot. Cook 30 minutes.

After the rice has cooked for 30 minutes, increase the heat, remove the lid, and stir in the lentils, cranberries, and red pepper flakes. Cook 10 minutes and then stir in the fines herbes, salt, and nutritional yeast. Cook another 5-7 minutes to allow flavors to combine (add a small amount more water if the mixture begins to stick to the bottom of your pan -- you want it dry, but not so dry that it sticks).
Rice, lentils, cranberries, pepper flakes
Spoon the rice mixture into hollow part of the squashes and sprinkle the top with sunflower seeds, if desired.
(I like that they add a bit of extra crunch) Use salted and roasted, or raw, depending on your personal preference. Serve warm as a side dish, or a main meal.

Sunday, December 25, 2011

Chocolate Roasted Potato Cake

E and I recently hosted a double-birthday/holiday potluck. My friend whose birthday was approaching said she wanted something "chocolate," when I asked her what I could bake her -- not terribly helpful, but she's also super laid back, so I wasn't too concerned either.

I, however, don't like chocolate cake and even though I wasn't planning to eat any of it (even if I'd made it gluten-free, using my standby chocolate gluten-free cake recipe), I wanted to at least try to make something that wouldn't, well, be dry and tasteless. And, I told myself, I'm not on a budget that really lets me try multiple variations of things. So, whatever I did with a chocolate cake, I needed to make sure that it was something that I wouldn't mess up--or that I'd have alternate ingredients for if I did mess it up.

E suggested the brownies I posted in November. Doable, definitely. Even if I messed up the cake. But, this was an opportunity to try making something new and how could I pass that up? In recent weeks, I've felt barely able to write--or even think about writing--much less do anything more than put rather routine (for me) food in my mouth. I haven't wanted to be creative. My friend's birthday though, seemed like a good opportunity to spark some of that kitchen-creativity again. So, I thought: chocolate. And I thought: birthday. To me, this surely equals some sort of cake.

I remembered my friend Kim, a talented writer and generally wonderful person, had a potato party while I lived in the Midwest. She'd bid on a bushel of potatoes during an auction and won--and wanted help eating them all. One of the things she made: chocolate potato cake. And, I remembered seeing recipes for potato cakes (and sauerkraut cakes) in my parents' German cookbook.

I remember trying Kim's chocolate potato cake--before I went GF--and thinking that it was surprisingly good--and delightfully moist. And this, I decided, was what I wanted to make. But, most of the recipes I looked at called for unseasoned mashed potatoes. I understood that, to some extent. The process of creating mashed potatoes necessarily creates a little additional moistness. But I know how to make things more moist. I wanted to subtly up the flavor a little. I'm in favor of roasting things--especially in the winter, when I can also use it to warm up the house (though I pan roasted the potato for this, so not applicable). And because I didn't have enough potato for any of the recipes I looked at, I added a couple of carrots to the roasting process. I always have carrots on hand.

I also thought about making this cake into a Mexican chocolate cake, with cayenne and cinnamon. But I couldn't bring myself to do that either--at least not to the whole cake. It can surprise come as a surprise if you're not expecting all those extra flavors in your cake.

Chocolate Roasted Potato Cake

1 cup unseasoned mashed potato/carrot mixture (for me, this was one medium potato and two large carrots all finely diced which I pan-roasted for about 45 minutes before processing in my food processor until nearly smooth)
1 cup buttermilk
1 ¾ cups sifted all purpose flour
1 cup unsweeted dutch cocoa powder
2 1/4 teaspoons of baking powder
1/2 teaspoon baking soda
½ cup salted butter (softened)
1 ¾ cups granulated sugar
1 teaspoon vanilla extract
2 large eggs
1/3 cup mayonnaise
Confectioners’ sugar for garnish

Preheat oven to 350 degrees. Grease and flour two 9-inch round baking pans and set aside.

Place mashed potatoes/carrots into medium bowl. With a small whisk, gradually beat in buttermilk to form smooth mixture.

Sift together flour, cocoa powder, baking powder, baking soda, and salt.

In a large bowl, use an electric mixer to combine the butter, sugar, and vanilla extract until well blended. .
Add eggs and blend well. Add mayonnaise and beat at medium speed for 2 minutes.

At lowest speed, alternate adding both the dry ingredients (from step 3) and smashed veggies (a little dry ingredients, a little smashed veggies, a little dry, a little smashed veggies etc.) until all are incorporated.

Turn equal amounts of batter into prepared baking pans. Bake in preheated oven 27 to 32 minutes (for a 10” cake pan; 15-18 minutes for cupcakes), rotating once about halfway during the baking process.

Cake is cooked when a toothpick inserted into the center of the cake comes out clean. When done remove to a cooling rack. Cool completely before removing from pans and cutting. If desired, frost or sift confectioners’ sugar over top of cake after the cake has cooled completely.


Note: The pictures you see of the iced cupcakes use just a basic buttercream.

Saturday, December 24, 2011

Snickerdoodles - thin

E wanted snickerdoodles at Christmastime. Not my favorite cookie (though the fact of cinnamon does help the fact that they're sugar cookies), but ones that are super-simple to make--or at least uses only ingredients I tend to have around (and ingredients that tend to be cheap).

Sadly, I didn't have cream of tartar. I could have subbed in baking powder--but didn't remember that little trick until after it was too late. And that means that my snickerdoodles didn't puff much. Still, they smelled like snicerdoodles--and presumably tasted that way. I didn't bother trying to make them gluten-free.

However, I did take a fair number of them in to work so I could make more, this time with a much more conscious effort to make them soft and chewy. Part of what I suspect I need: more flour. The dough seemed a bit soft. And part of what I need, of course, is the thing that makes baked goods puffed. So that I can stay in my happy, tiny budget, I'll probably just use baking powder because E and I already have that. And I'll add a little more flour than this recipe calls for. And I'll chill the dough. But aside from that...

The recipe below makes snickerdoodles that would be perfect for:

  • Crumbling over ice cream
  • Pressing (the dough) into a pie pan to make a snicker-doodle pie crust (I'd precook it first as it expands a lot initially and then collapses down about the time it's ready to come out of the oven)
  • People who like thinner, crispier cookies
Thin Snickerdoodles (not gluten-free)
1/2 cup butter, softened
1/2 cup shortening
1 1/2 cups white sugar
2 eggs
2 teaspoons vanilla extract
2 3/4 cups all-purpose flour
2 teaspoons cream of tartar
1 teaspoon baking soda
1/4 teaspoon salt
2 tablespoons white sugar
2 teaspoons ground cinnamon

Preheat oven to 400 degrees F (200 degrees C).

Cream together butter, shortening, 1 1/2 cups sugar, the eggs and the vanilla. Blend in the flour, cream of tartar, soda and salt. Shape dough by rounded teaspoons into balls.

Mix the 2 tablespoons sugar and the cinnamon. Roll balls of dough in mixture. Place 2 inches apart on ungreased baking sheets. They expand a lot—so this space is really important.
Bake 8 to 10 minutes, or until set but not too hard. Cool 2 minutes on sheet and then remove from baking sheets and place on wire racks. .

Friday, December 23, 2011

Tomorrow's Just an Excuse -- plus Oatmeal Raisin Cookies

One recent morning, as I sat down to write, Smashing Pumpkins' "Thirty-Three" played on one of my Spotify playlists. I didn't come to Smashing Pumpkins until I was an adult, or at least not really, even after listening to my friend Sanna talk about them pretty often when we were in 7th grade, and even after trying to listen to them around that same time.

I guess you could say I wasn't ready for that type of music then.

In fact, it took until a curly-haired friend with a big smile and always-a-twinkle-his-eye expressed amazement at  a bar in Iowa that I hadn't heard (or, as it turned out, didn't realize I had actually heard) "Tonight, tonight." He went up to the DJ and requested it, then as it came on, started rocking out at our table. This friend caused me to relax a lot around myself, and around him, because he seemed so comfortable in the man he was--and because of that, could act with kindness toward pretty much everyone he met. I admired this about him, and wanted to emulate it until it became part of the way I saw myself, and the world, as well.

Travels -- literally and figuratively -- made me ready for The Smashing Pumpkins, and for sitting down at the table, at the bar ($2.50 your call!) with that friend. That same night, he handed me a copy of the book Shantaram, a gift, the first time someone who didn't know me all that well had given a book that, when I read it (pretty much starting immediately), I liked. Or loved. I'm still not sure. It's a book I will need to revisit -- a book about travels, finding a place, learning about oneself, about, to some extent, the things I've been doing for the past four years (only on a more extreme level).

Listening to "Thirty-Three" also seems particularly appropriate for the season, because of the line "Deep in thought I forgive everyone," --what we should be doing this season, and every day.

Although I like to listen to music when I write, I also like to have music playing while I'm baking. Making these cookies, I listened to my Spotify mix that I titled simply The Stranger, after the Lord Huron song -- but it includes music from The Beatles and The National to Jonathan Coulton (re: Your Brains), Iron & Wine, and Chain of Lakes, among many others. The songs on the playlist are about distance, about the people we thought we knew (but discover we don't), about strangers, lost love, and missed connections, about becoming (or being) a stranger in the place you live. The songs explore the distances between us. Maybe I listen to this mix while I bake because I like to imagine that baking brings us together--even with people who have left us, even with people we never met--if nothing else, through the sharing of recipes.

This recipe is adapted from one by Deb from Smitten Kitchen so that it's gluten-free. Pretty much though, if I wasn't avoiding gluten, I would make these cookies as she describes. Oatmeal-raisin are among my favorite cookies (something like tied--depends on my mood--with spice cookies and/or gingersnaps). If you haven't checked out Deb's recipes, please do yourself the favor of exploring Smitten Kitchen. The photography is beautiful, the recipes tasty (and often quite innovative), and the writing wry, tight, and honest.

Remember, some people who are gluten-intolerant also react negatively to GF rolled oats (oats contain a different type of gluten than wheat--so many people are okay), so if you're making these for someone else please ask first.

Oatmeal Raisin Cookies (Gluten-Free)
1/2 cup (1 stick or 4 ounces) butter, softened
2/3 cup light brown sugar, packed
1 egg
1/2 teaspoon vanilla extract
1/2 cup GF oat flour
1/4 cup corn starch or tapioca flour
3/4 teaspoon guar gum
1/2 teaspoon baking soda
1 teaspoon ground cinnamon
1/4 teaspoon ground cloves
1/4 teaspoon salt 
1 1/2 cups GF rolled oats soaked in 1/3 cup warm water
3/4 cup raisins
1/2 cup walnuts, chopped (optional)

Preheat oven to 350°F (175°C).

In a large bowl, cream together the butter, brown sugar, egg and vanilla until smooth. In a separate bowl, whisk the flours, guar gum, baking soda, cinnamon, cloves and salt together. Stir this into the butter/sugar mixture. Stir in the oats, raisins and walnuts, if using them.

At this point you can either chill the dough for a bit in the fridge and then scoop it, or scoop the cookies onto a sheet and then chill the whole tray before baking them. You could also bake them right away, if you’re impatient, but I do find that they end up slighly less thick.

The cookies should be two inches apart on a parchment-lined baking sheet. Bake them for 10 to 12 minutes (your baking time will vary, depending on your oven and how cold the cookies were going in), taking them out when golden at the edges but still a little undercooked-looking on top. Let them sit on the hot baking sheet for five minutes before transferring them to a rack to cool.


Monday, December 19, 2011

Peanut Butter Blondies (gluten-free)

 
You'll have to trust me on this one. I've been eyeballing black bean brownie recipes for a while (I was reminded of them after reading about garbanzo bean brownies by my friend Victoria over at Easy Gluten Free). And for longer than that, I've been meaning to make a pot of beans (either black or pinto) and haven't gotten around to it--I want to start a crockpot of beans one morning and come home to it in the evening. Why haven't I? Good question. You'll know when I make them, I'm sure.

This recipe came about because I intentionally bought black beans so I could make black bean brownies. But when I got home, I discovered I hadn't bought black beans after all, but pinto beans. Sigh.

Look at the chocolate and peanuts!
Okay, I'm sure pintos would've worked just fine in brownies. They're pretty mild, after all. But black beans definitely wouldn't work in blondies and since I had a set of beans that would work, I decided to go with it. The pinto beans replace the flour in this recipe and add protein, without leaving a bean-y taste (at least if you've rinsed them well.). You'll notice in the picture, I have a carton of coconut milk--but I decided once everything was mixed together that it didn't need the couple of tablespoons of milk called for in the recipe I based this on. 

These blondies are also pretty low fat (for peanut butter blondies). I used up the last tablespoon of butter E and I made recently, mostly to get it out of my fridge, and because I wanted to up the peanut butter flavor by increasing the peanut butter from the 1/3 cup called for in the original recipe to 1/2 cup.

These blondies, when warm, practically melt in your mouth. They're super-moist, and nicely peanut buttery. The peanuts and chocolate on top add a nice bit of spunk (both presentation and flavor-wise), but if that's not your thing, then by all means leave the topping off.

Peanut Butter Blondies
1 can pinto beans, well rinsed
¾ cup granulated sugar
1/2 teaspoon baking powder
1/4 teaspoon salt
1/2 cup creamy peanut butter
1 tablespoon butter, melted and cooled slightly
1 teaspoon vanilla extract
2 large eggs, lightly beaten
2 tablespoons ground flax
1/4 cup semisweet chocolate chips or chocolate chunks, chopped

2 tablespoons unsalted peanuts, chopped
Cooking spray

Preheat oven to 350°.

Place the pinto beans and sugar in a food processor and process until smooth.
Blended Pinto Beans & Sugar
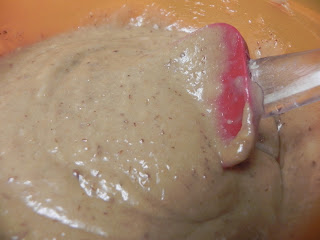
Transfer into a medium-sized bowl and add the baking powder, salt, peanut butter, butter, vanilla, eggs, and flax and combine well.
Combining well
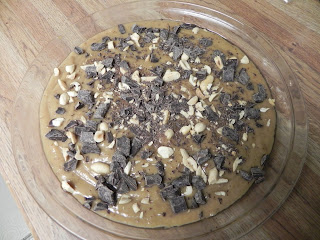
Pour into a lightly greased 9” pie pan (or 8 x 8 baking dish).

Sprinkle the chopped peanuts and chocolate chips on top of the batter.
Adding Chocolate and Peanuts
Bake at 350° for 25 minutes or until a wooden pick inserted in center comes out with moist crumbs clinging. Cool in pan on a wire rack.
Yum!